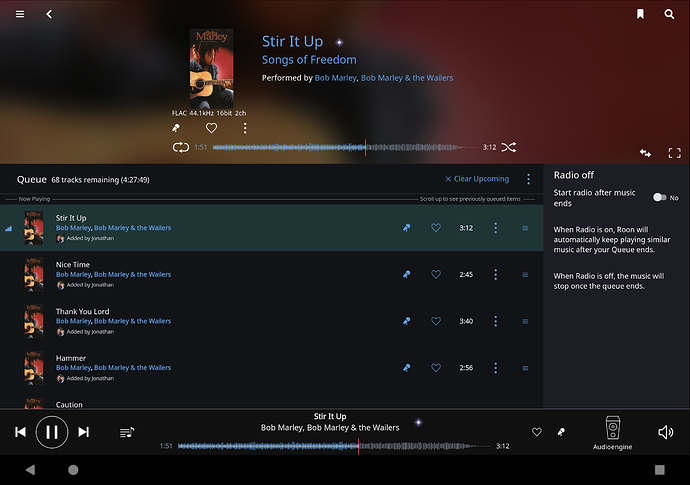
Guide to enabling immersive mode in Android

I just went through this myself, having to pull info from different sources to get it to work, so I thought I would write a quick(ish) guide while it’s still fresh in my memory. I couldn’t find anything about it on the Roon forums, so I thought it would be a good tid-bit to contribute. This is the best way I found to enable immersive mode on Android (immersive mode meaning 'get rid of the navigation and status bars on the top and bottom of the screen).

Note that this does NOT require a rooted device. Also, I wrote this as an attempt to make it easily accessible for people who aren’t super computer savvy, and who may not know what the hell ‘immersive mode’ means, so bear with me if it’s a little redundant for the more techie oriented users. If it doesn’t work for you, sorry I can’t be tech support, but I’m sure you just need to tweak the process somewhere slightly. On my Nexus 9 with Android 7.1.1, it worked very well.

Prep - Before you start, it’s probably best to close Roon Remote. Also, this process will cost you a dollar and some of your precious time. Oh, and ya, it’s probably a good time to make a good cup of coffee.

1. Buy and install an app from the Play Store called “Granular Immersive Mode” for a dollar… it’s a great app, and doesn’t need to run in the background to function, so it’s worth a buck.

2. Enable USB debugging mode on your Android -

      **A.** Enable "Developer Mode" on your device by going to Settings -> About Device (bottom) -> Tap "Build Number 
                (bottom again) 7 times (yes, for real).
       
      **B.** Back in settings, go to the bottom of the page and tap the newly available "Developer Mode" option.  

      **C.** Scroll down to find 'USB Debugging', and toggle it on.

3. Plug your android into a computer via USB (I’ll use Windows here).

4. Go to https://developer.android.com/studio/releases/platform-tools.html. Download the appropriate ‘SDK Platform Tools’ package for your OS under “Download” at the top of the page.

5. Extract the downloaded zipped file to your root folder (anywhere is OK, but for the sake of ease in this example, let’s go with the C: Drive)

6. Open Command Prompt or Terminal. In Windows, make sure you run this as an administrator. (In Windows 10, go to Start -> Windows System, right click Command Prompt, click “Run as administrator”).

7. In Command, type “cd C:\platform-tools”, assuming you extracted the downloaded folder into your C: root, and kept the folder name as ‘platform-tools’.

8. Type “adb devices” (without the quotes!) and press enter / return. If all went well, there should be a return list with your device visible, listed as a string of numbers and letters (not sure what this is – serial code perhaps?).

(Note) - If nothing is listed, your device may need to be put into PTP USB mode instead of MTP… however, MTP should work. Another possibility for failure here is that you may need to download the google USB driver, or a universal ADB driver, depending on your OS… I’m not going to get into this here though… if you run into issues, you are going to have to do some digging.

9. If you saw a device listed in the last step, go ahead and type “adb shell pm grant com.rascarlo.granular.immersive.mode android.permission.WRITE_SECURE_SETTINGS”, and press enter / return. If it goes well, you should see it quickly jump to a new command line, without any confirmation text (for some reason). You can now type ‘exit’ to close Command / Terminal.

10. Disconnect your droid from the computer, and fire up ‘Granular Immersion Mode’.

11. On the menu at the top of the app, scroll all the way to the right, and select “Permission”. Here you will see a less complete, partial version of the guide I just typed. At the bottom, there is a “check” button. Press this. If all went well, you should see ‘permission granted’.

Note - If you see ‘permission denied’, something went wrong (obviously). In this case, retrace your steps, and go slower. If you did everything correct and it still doesn’t work, again you are going to have to go do your own digging at this point, because I don’t know! Every device and computer and OS are different, and thus interact with each other slightly differently, creating too many variables to cover in one guide.

12. Assuming you have ‘Permission granted’ status, we’re home free… At the top of the app, scroll left and select ‘User Apps’. Scroll down and mark the check box next to “Roon”.

13. Scroll back up to reveal the three dot menu icon on the top right. Tap this, then check “Apply”.

14. Open Roon, and verify that you now have a beautiful full screen without the status and navigation bars. If you need them, just drag up / down from the bottom / top of the screen.

I hope this works for most / all who try it, and that it adds another grain to enrich the wealth of resources in the community. Oh, and rainbows and puppy dogs too.

2 Likes

Thanks @Ybwly, I didn’t even know this was possible!

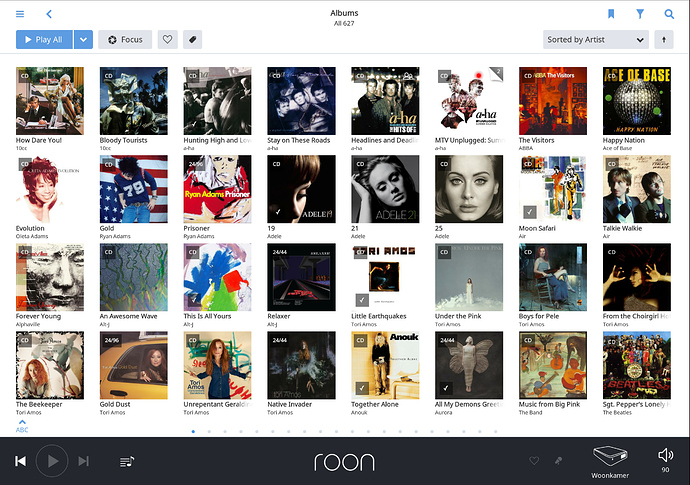
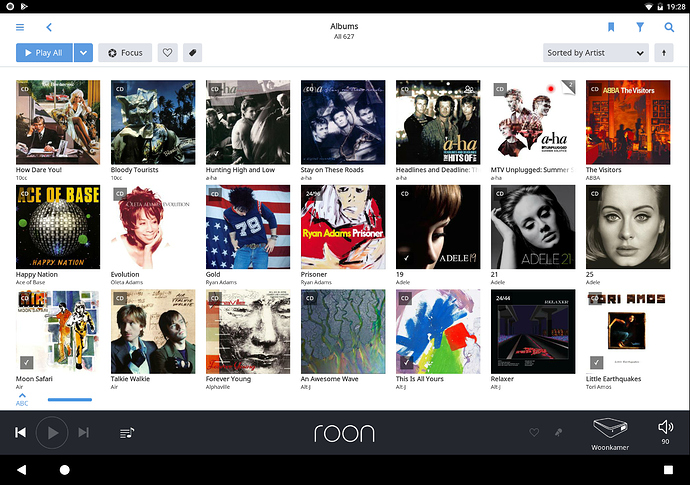
I installed it on my Pixel C and really like the extra screen real estate. The change has the biggest impact (for what I have seen yet) in the album browser, more albums per screen :clap:

Before

After

Apparently it can also be done for free (I haven’t tried it):

@Jan_Koudijs I’m so glad my guide was helpful to you! Wow, it made a huge difference on your screen… Your resolution must be just over a pivoting point where Roon decides to display more albums, and if the real estate is restricted a little bit by the status bar end navigation bar, It’s enough of a resolution decrease where Roon bumps you down to a graphics setting with larger album sizes and less displayed per page.

Also, that’s a great guide you found! It’s better than any I found, and doesn’t require any software… Very nice. I guess the only advantage to having the software is that you can easily enable and disable immersive mode for multiple apps if you want without having to reenter command prompt or terminal and type the ADB command… But in my case, I only care about immersive mode for Roon in particular, so I probably would be a candidate for using the non-software method detailed in the guide you linked to.

I’m having an issue that I didn’t realize was present at the time that I wrote the guide. With the busyness of the holidays, I didn’t try Roon again until last night when I returned home. That’s when I noticed that I could not search, or do anything that requires inputting text because immersive mode is blocking my soft keys from appearing on the screen.

I’m currently working on finding a solution, and will update my guide when I do. I’ve emailed the author of the app, because I couldn’t find any clear solutions when I was Googling the issue. In the meantime, I found another app that does the same thing, but the reviews are specifically mentioning that it does not kill your soft keys… So it sounds like this is a common problem, and this other app is worth a try. Also, it would be worth a try to follow the guide that you linked to as well, because it’s a slightly different method without the need for an app, and thus might preserve the keyboard functionality better. :thinking:

I’ll post back soon.

I had not tried searching, but yes I have the same issue.

Two things I noticed:

  • When I enable immersive mode for Chrome, the onscreen keyboard remains working within this app
  • If I only hide the status bar (keep navigation), the search function within the Roon app works again.

Yup, that is exactly what is happening on my end too.

Hmmmm… Well it seems that I’m stumped. The only thing I have to offer after digging around more is that, based on one discussion, it seems the soft keys are functionally bound to the nav bar by the native functionality of Android.

At this point, any further pursuing of this isn’t worth it to me… I’ll just hope that the Roon developers take note and integrate the ability to add full immersive mode in the future through the default options. Given the nature of this issue, it seems that they may need to make their own in-app keyboard in order to maintain the ability to type while also having full immersive mode.

I guess this is a ‘plus one’ for Apple, as they look to be already in their own full ‘immersive mode’ when running Roon Remote. :unamused:

Does anybody out there have any solutions?

The guide is still valid I guess, because, like you said (@Jan_Koudijs), we can still get rid of the status bar without issue… And anyone who is using a hardware keyboard will benefit without compromise as well.

I do have a Bluetooth keyboard and gave it a try but it is not working either. At the moment that the input line appears it immediately disappears, as happens with the soft keyboard.

It indeed looks like something specific for the Roon app has to be changed to make full immersive mode work. @mike, can you shed some light on this issue?

Oh, right! Brain fart on my part :roll_eyes:. Of course that wouldn’t work either, because the key presses have no target.

Ya, I’ll defer to the developers at this point too… Hopefully someone catches wind of this thread. I wonder if we are the only two who care about this at the moment, ha.

Just wanted to update the thread with where I ended up in this.

After speaking with the developer of the ‘granular immersive app’, he looked into it for us as well (very cool). He concluded that since the keyboard and nav bar are linked by Android code, they cannot be separated (at least not as of now)… So, ya, the same conclusion we came to. He even offered a refund for the one dollar I paid for the program! Good support.

You know, I made lemonade from lemons here… I ended up going forward with installing a new custom ROM called ‘slimrom’ on my Nexus 9. I highly recommend it - it’s basically the same as stock Android, but much lighter and faster with much better battery life. Their mission is to create a minimalist install of Android, and they did it very well.

With granular immersive mode installed, I can remove the top status panel. Part of the functionality of the custom ROM is that I can customize my navigation bar extensively… I minimized the height and set custom buttons for Roon navigation in place of the standard back, home, and recents buttons. Additionally, I was able to set them in a custom red color with a gentle fade effect. Now, at the bottom of my screen, there are four buttons - one for search, one for menu, one to shut the screen off on the tablet, and a back button.

It’s actually easier to navigate this way than with the placement of the built in buttons of Roon… Now all my main critical buttons are right at the bottom of the screen where my thumbs can reach them easier when holding the tablet with two hands.

Oh, another advantage of Slimrom is that the Nexus scrolls much more smoothly than it did on stock Android… This is true of every app now, especially browsing in Chrome.

So, there you have it - my conclusion to this chapter, and concluding recommendation. I won’t go into any technical details here about how to flash custom ROMs as that info is widely available with a little Googling.

Good luck all and any who find this thread, and happy listening!

1 Like

I just followed these instructions and it’s working great on my Pixel C in full immersive mode. You can swipe up from the bottom or top of the screen to see the menu or controls.

Good to know that the free method works as well.

(I’m afraid it doesn’t, but) Does the Roon search function work when the navigation bar is hidden?

(I’m afraid it doesn’t, but) Does the Roon search function work when the navigation bar is hidden?

Correct. Just tested and confirmed. The keyboard pops and immediately hides making it impossible to use. Just confirmed this with the BT hardware keyboard as well. Back to USB debig mode to adjust we go!

immersive.status is the one you want. minimal device nav at the bottom … the other two options prevent search from working. Here’s a quick look …