We are not there yet, the command has to be entered from outside the container. I expect that you use a laptop or PC to connect to the web interface of the NAS. Use that device and try to follow the steps in the instructions I linked to. You have to find the IP address of you NAS, (you might already use this to access the web interface) and use that to connect.
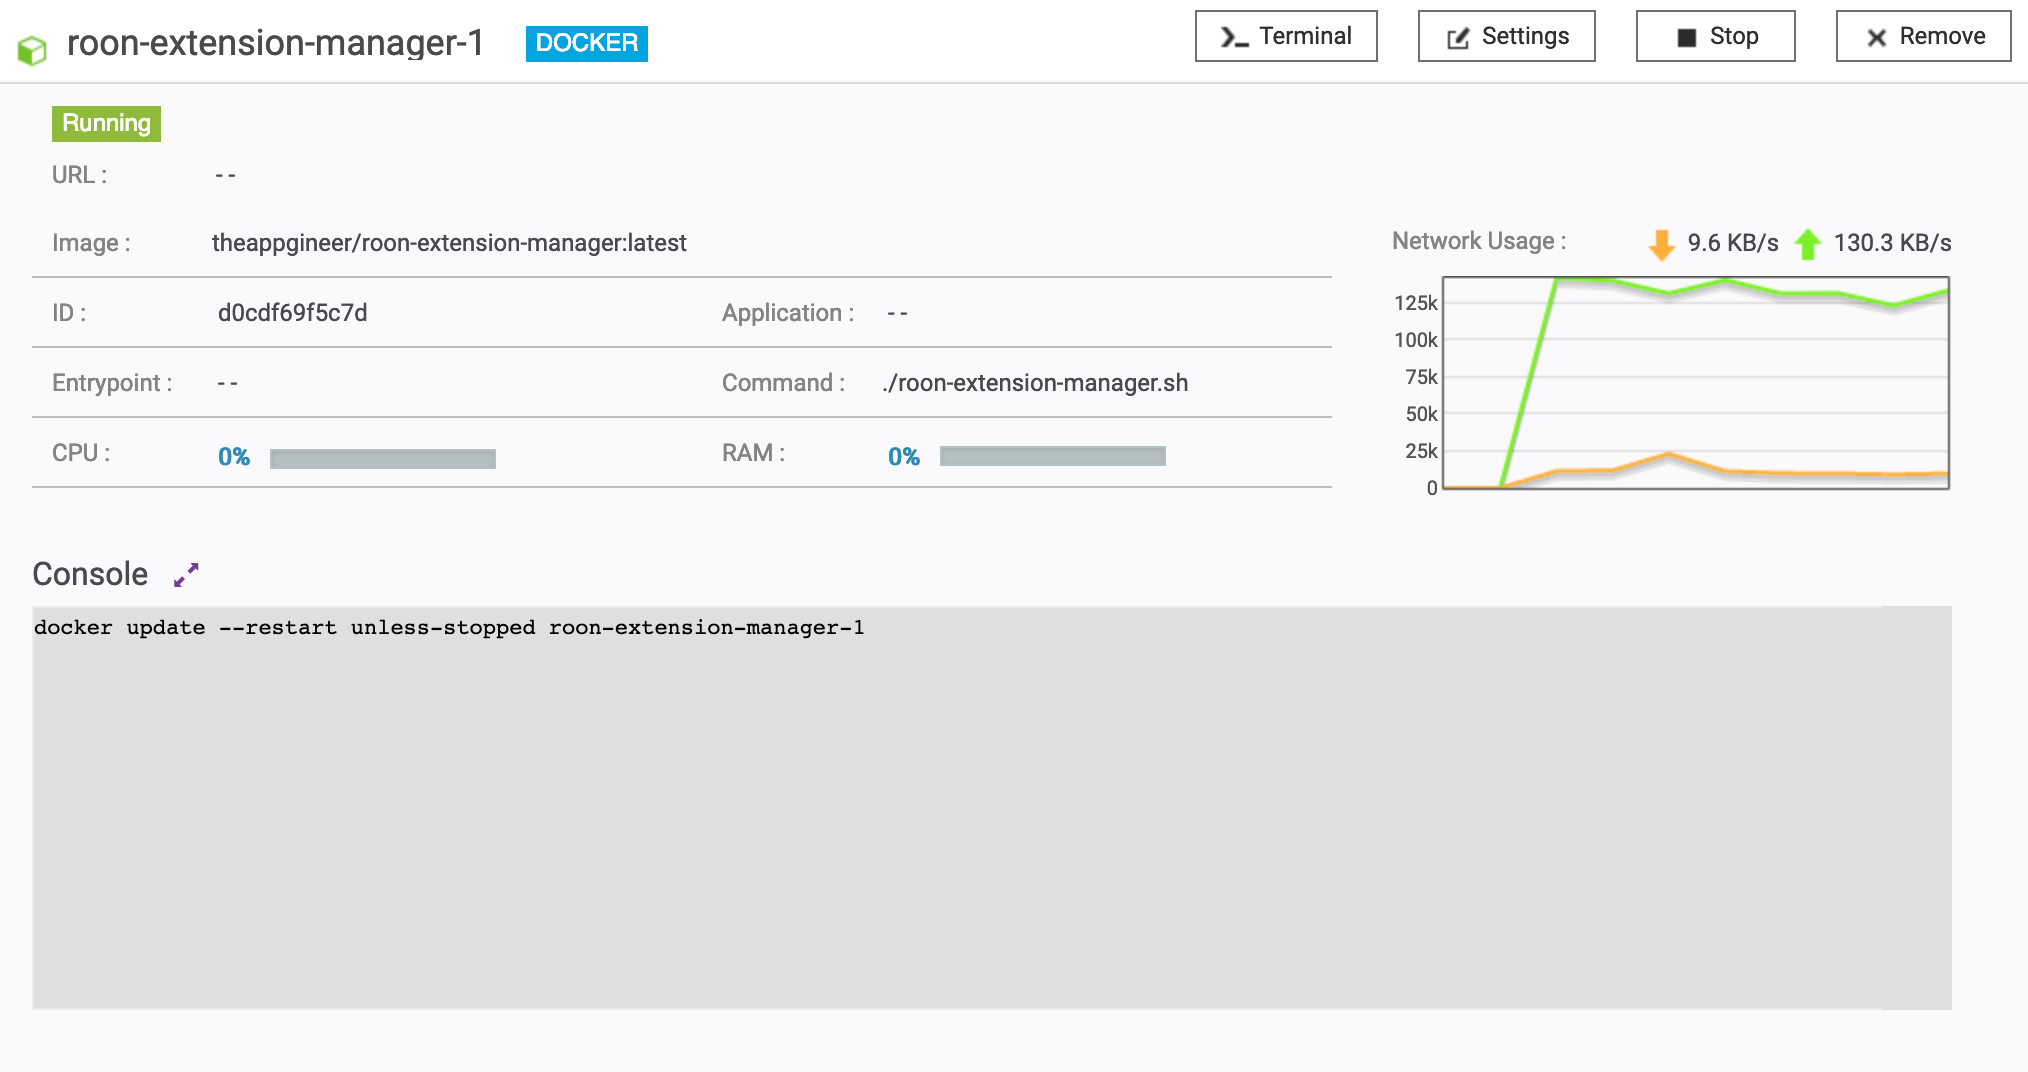
The 2nd line “roon-extension-manager-1” was the response I received after I entered the first line: “docker update --restart unless-stopped roon-extension-manager-1”. (“roon-extension-manager-1” is the name of the container). I’ll now resart the container.
Thank you for confirming! The only way for me to delete the command in the console is to remove the container, reinstall, etc. That should be easily done now that I have the steps! Once I’m done I’ll post the steps for others.
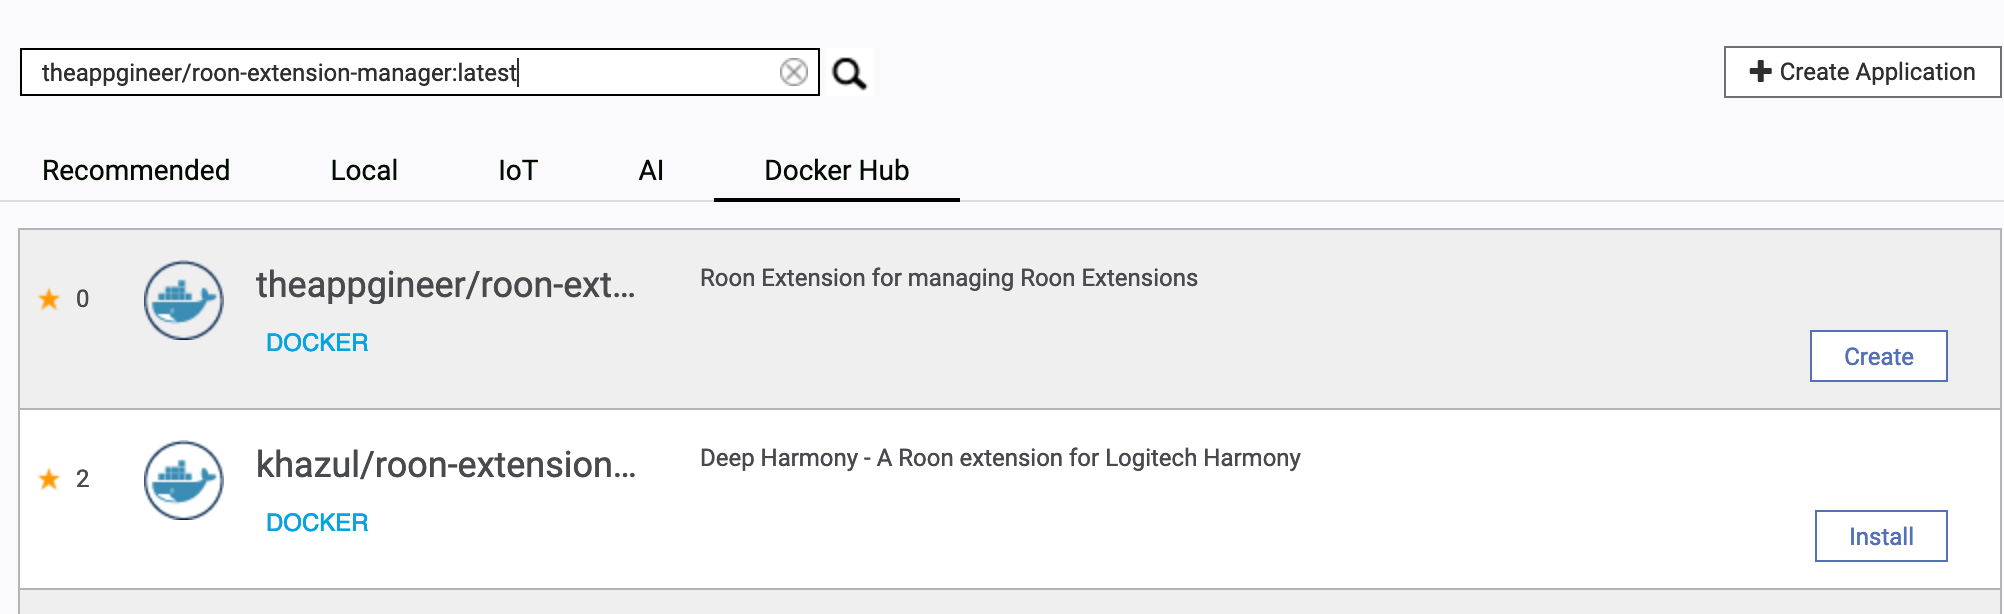
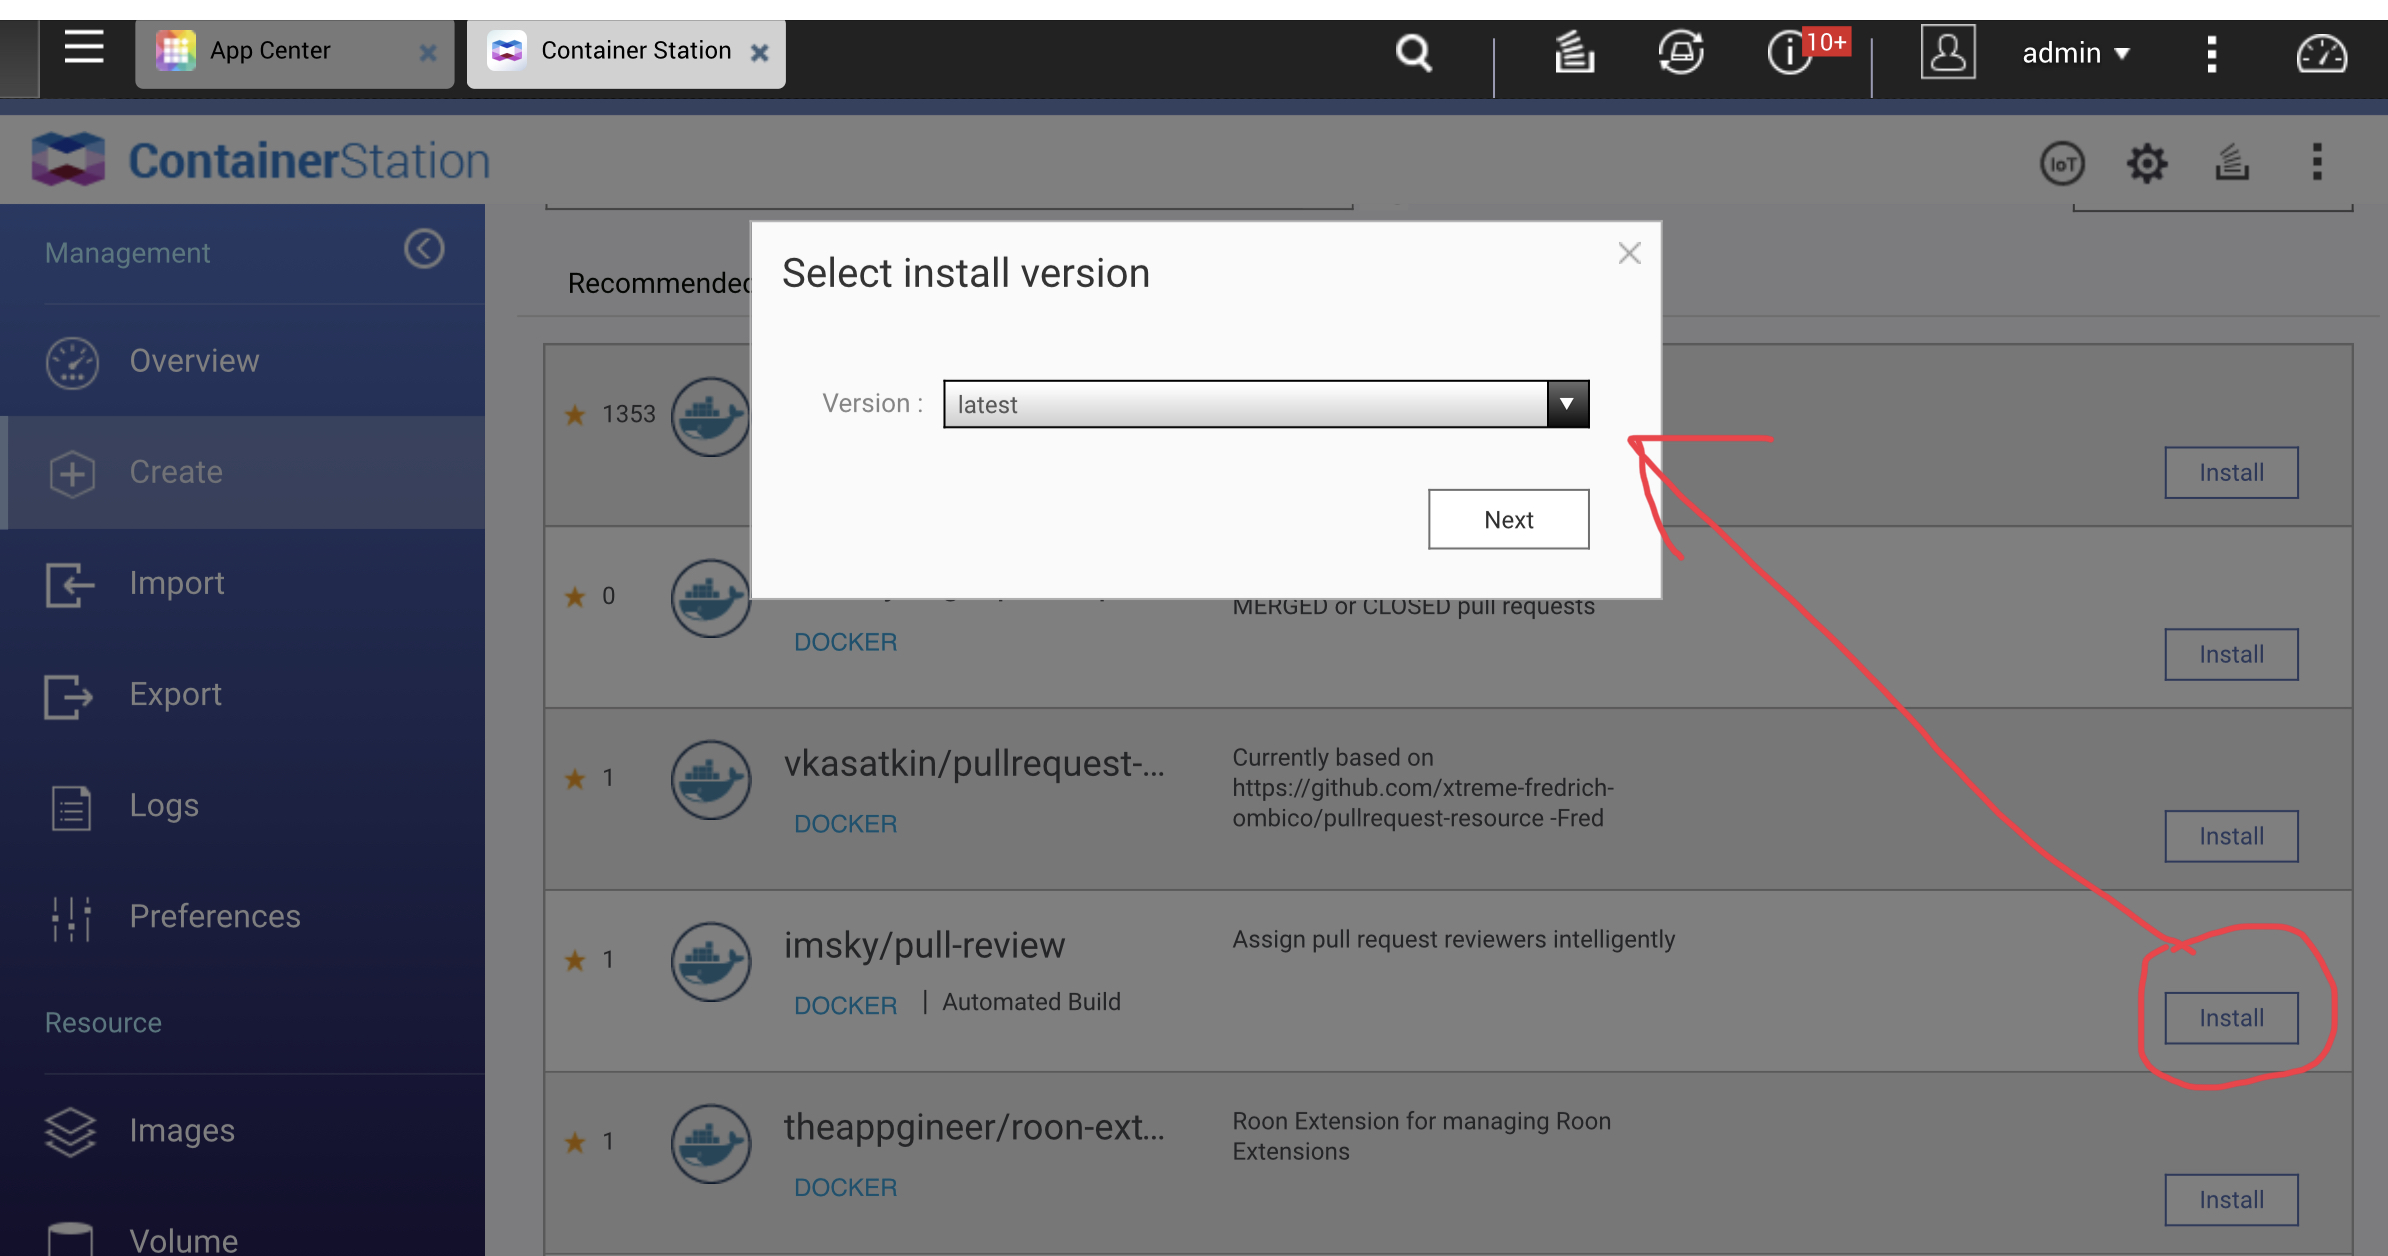
You’ll also see a list of others. Select the first one “Roon Extension for managing Roon Extensions”.
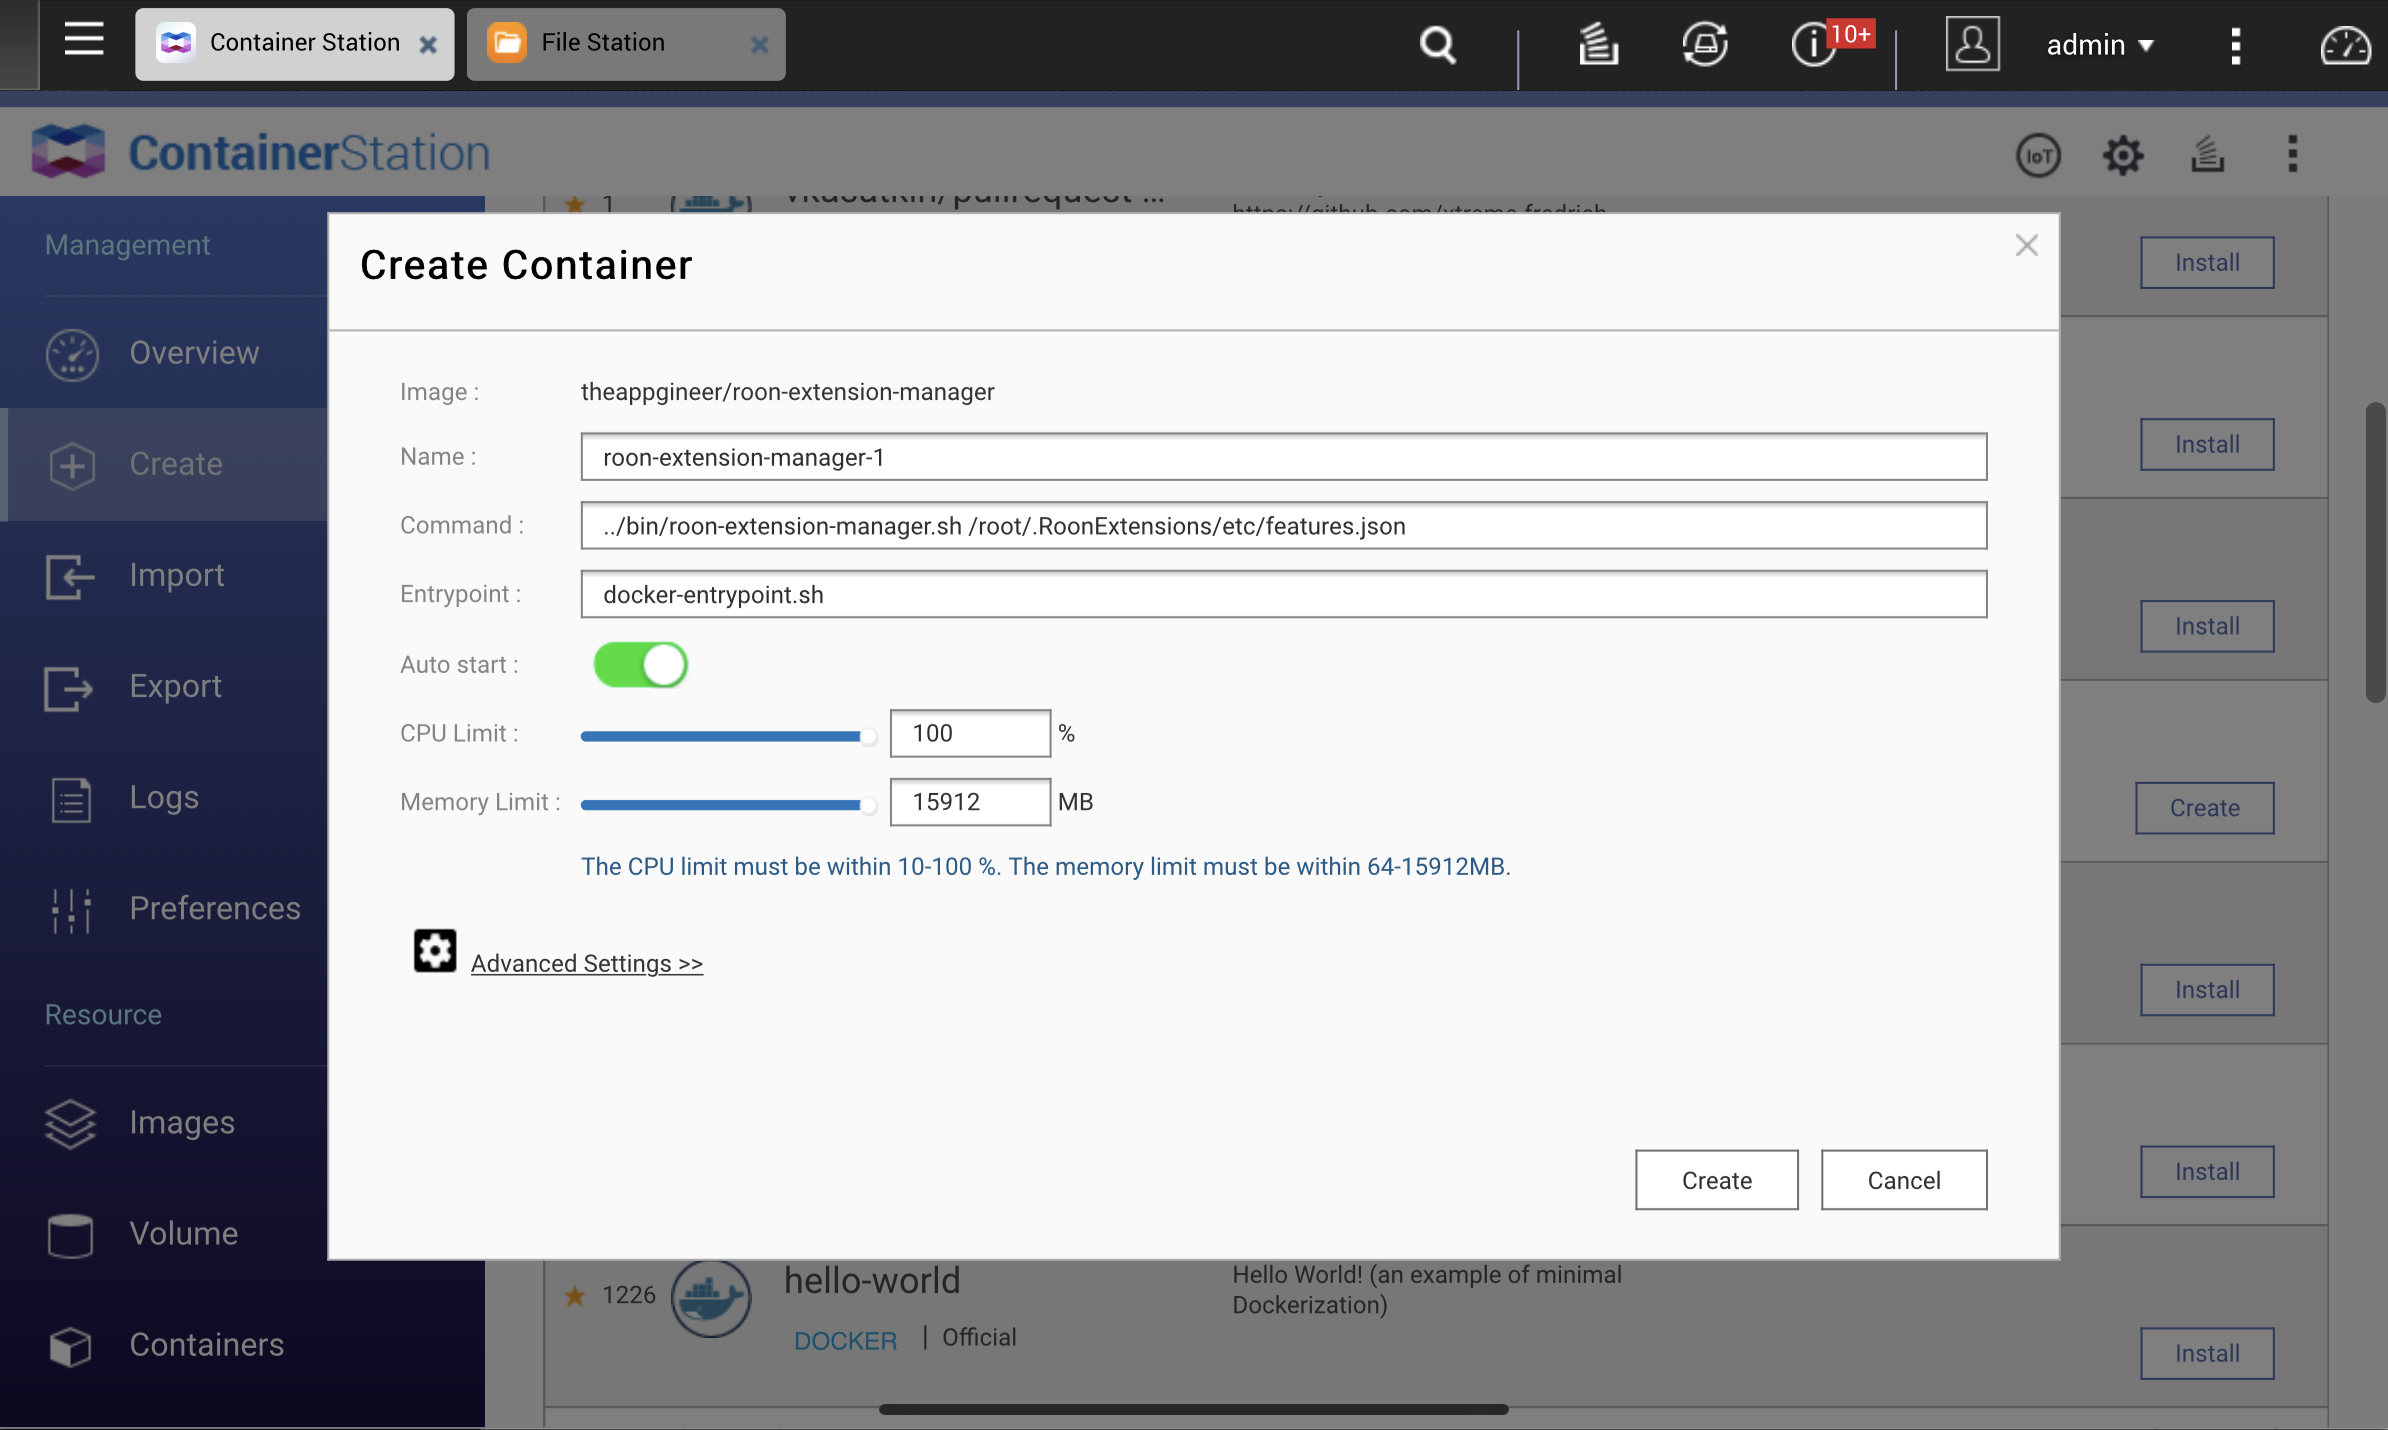
4. Click Create.
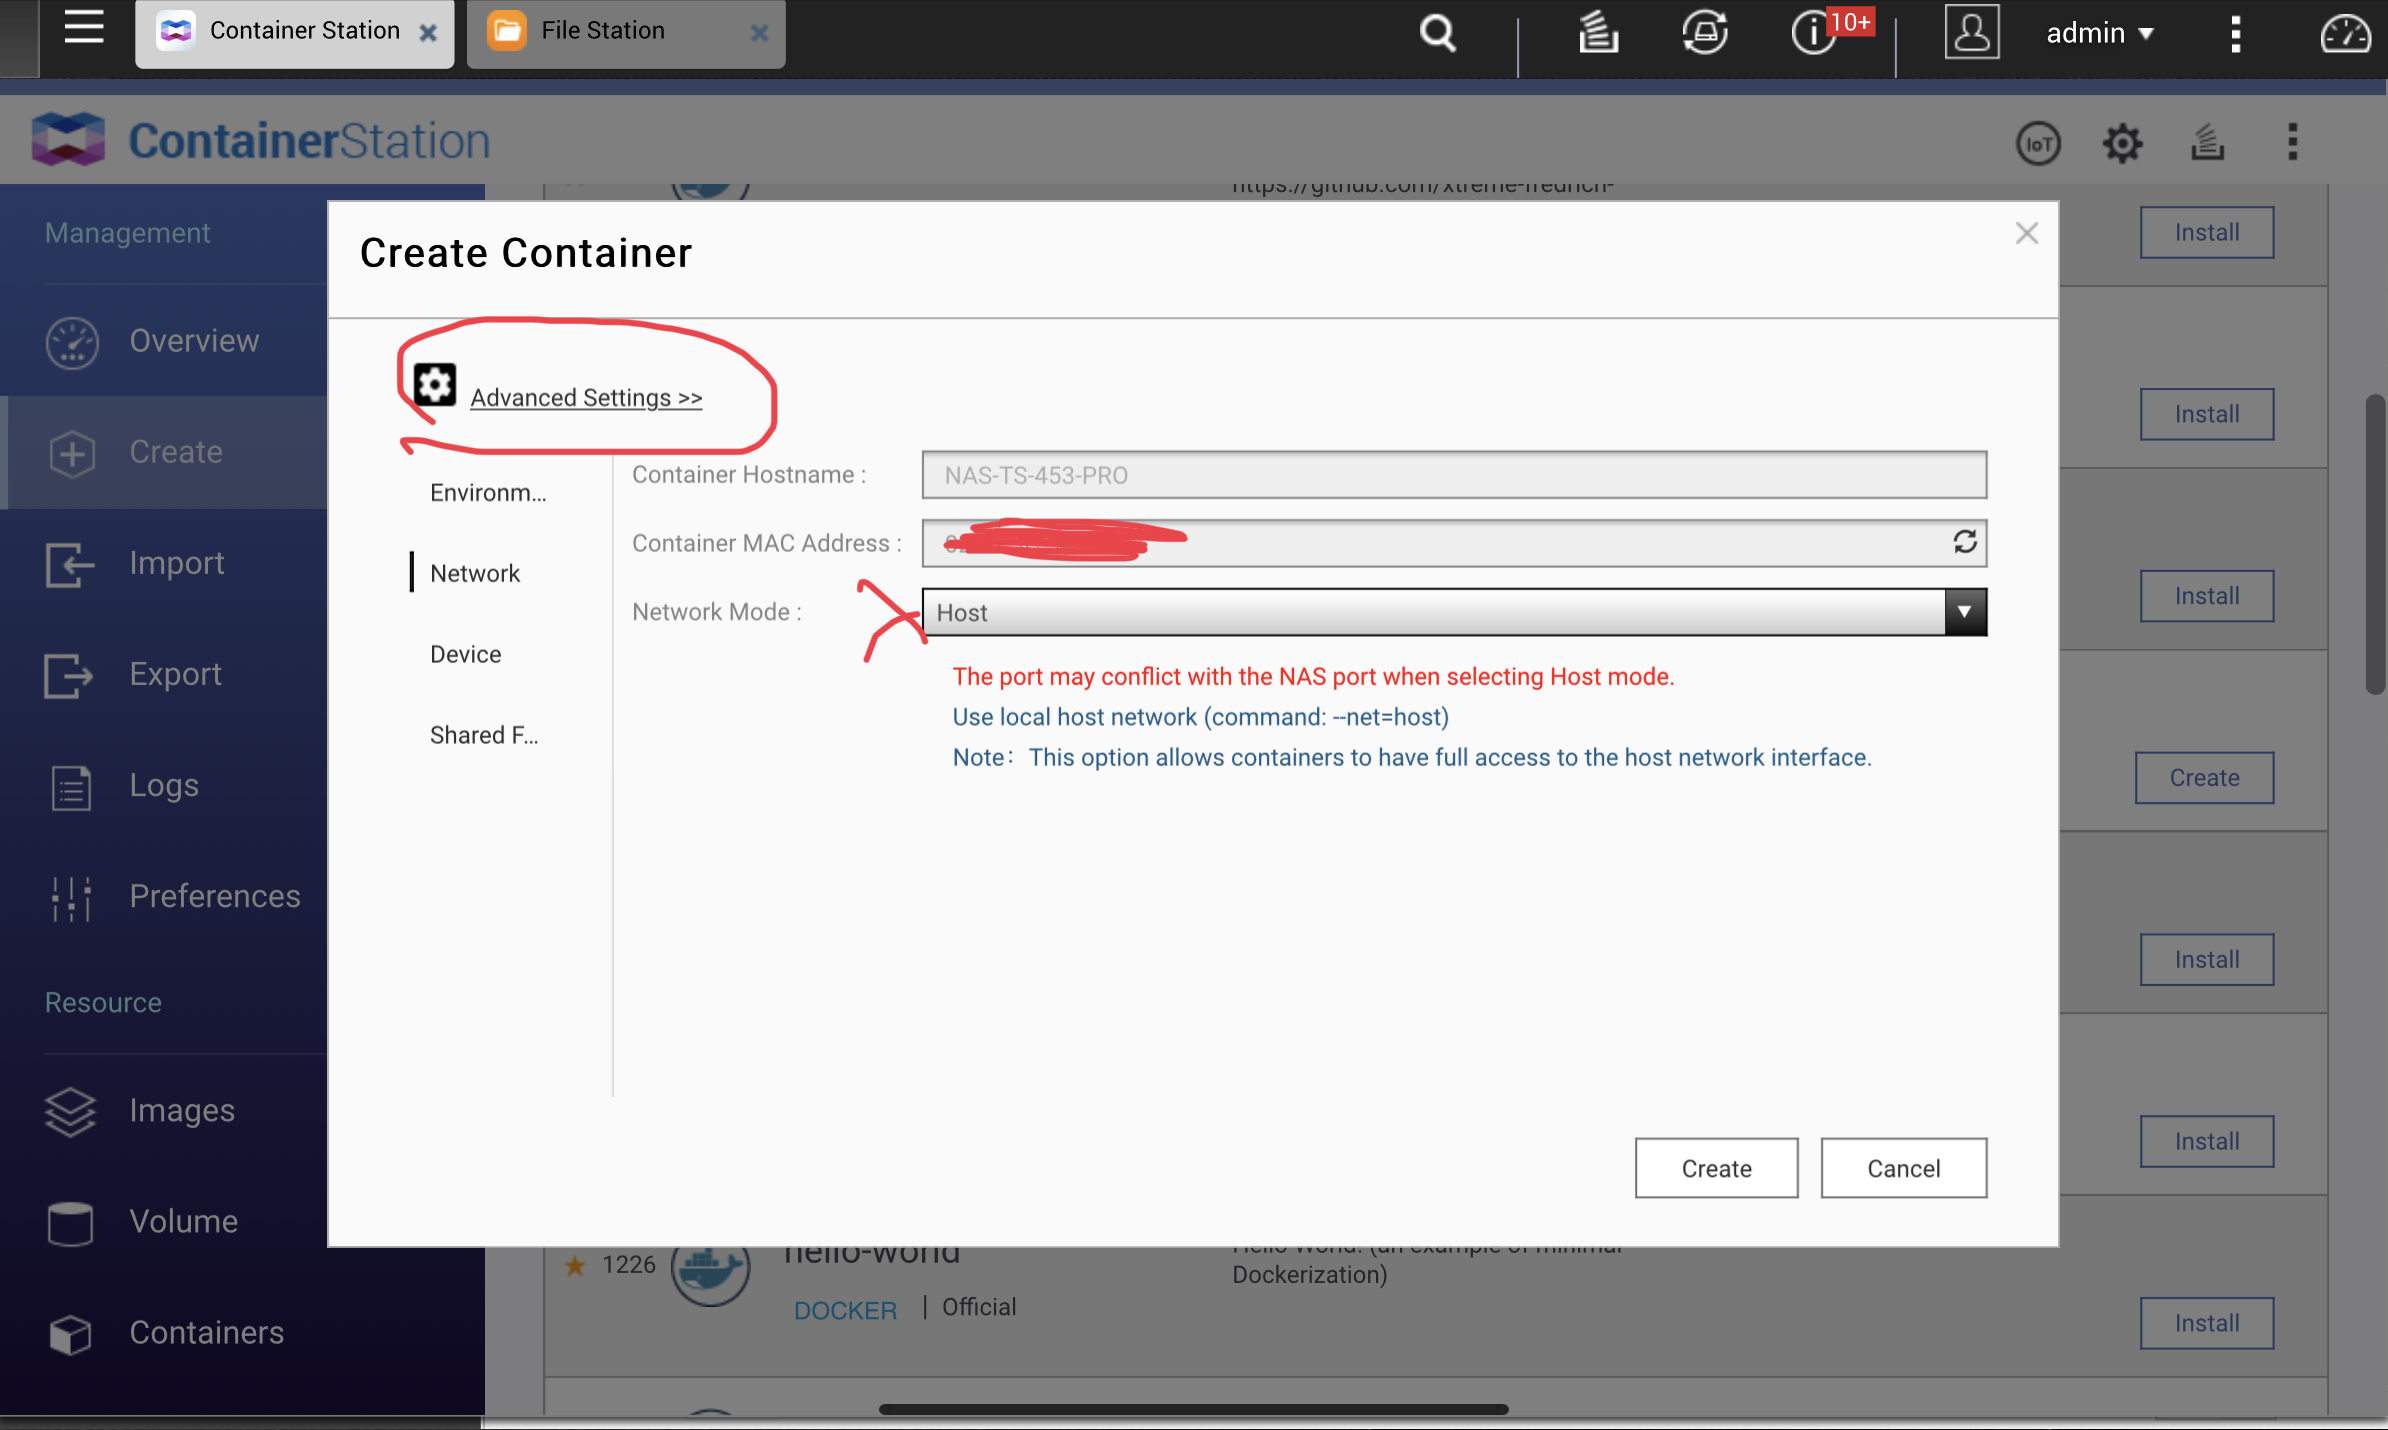
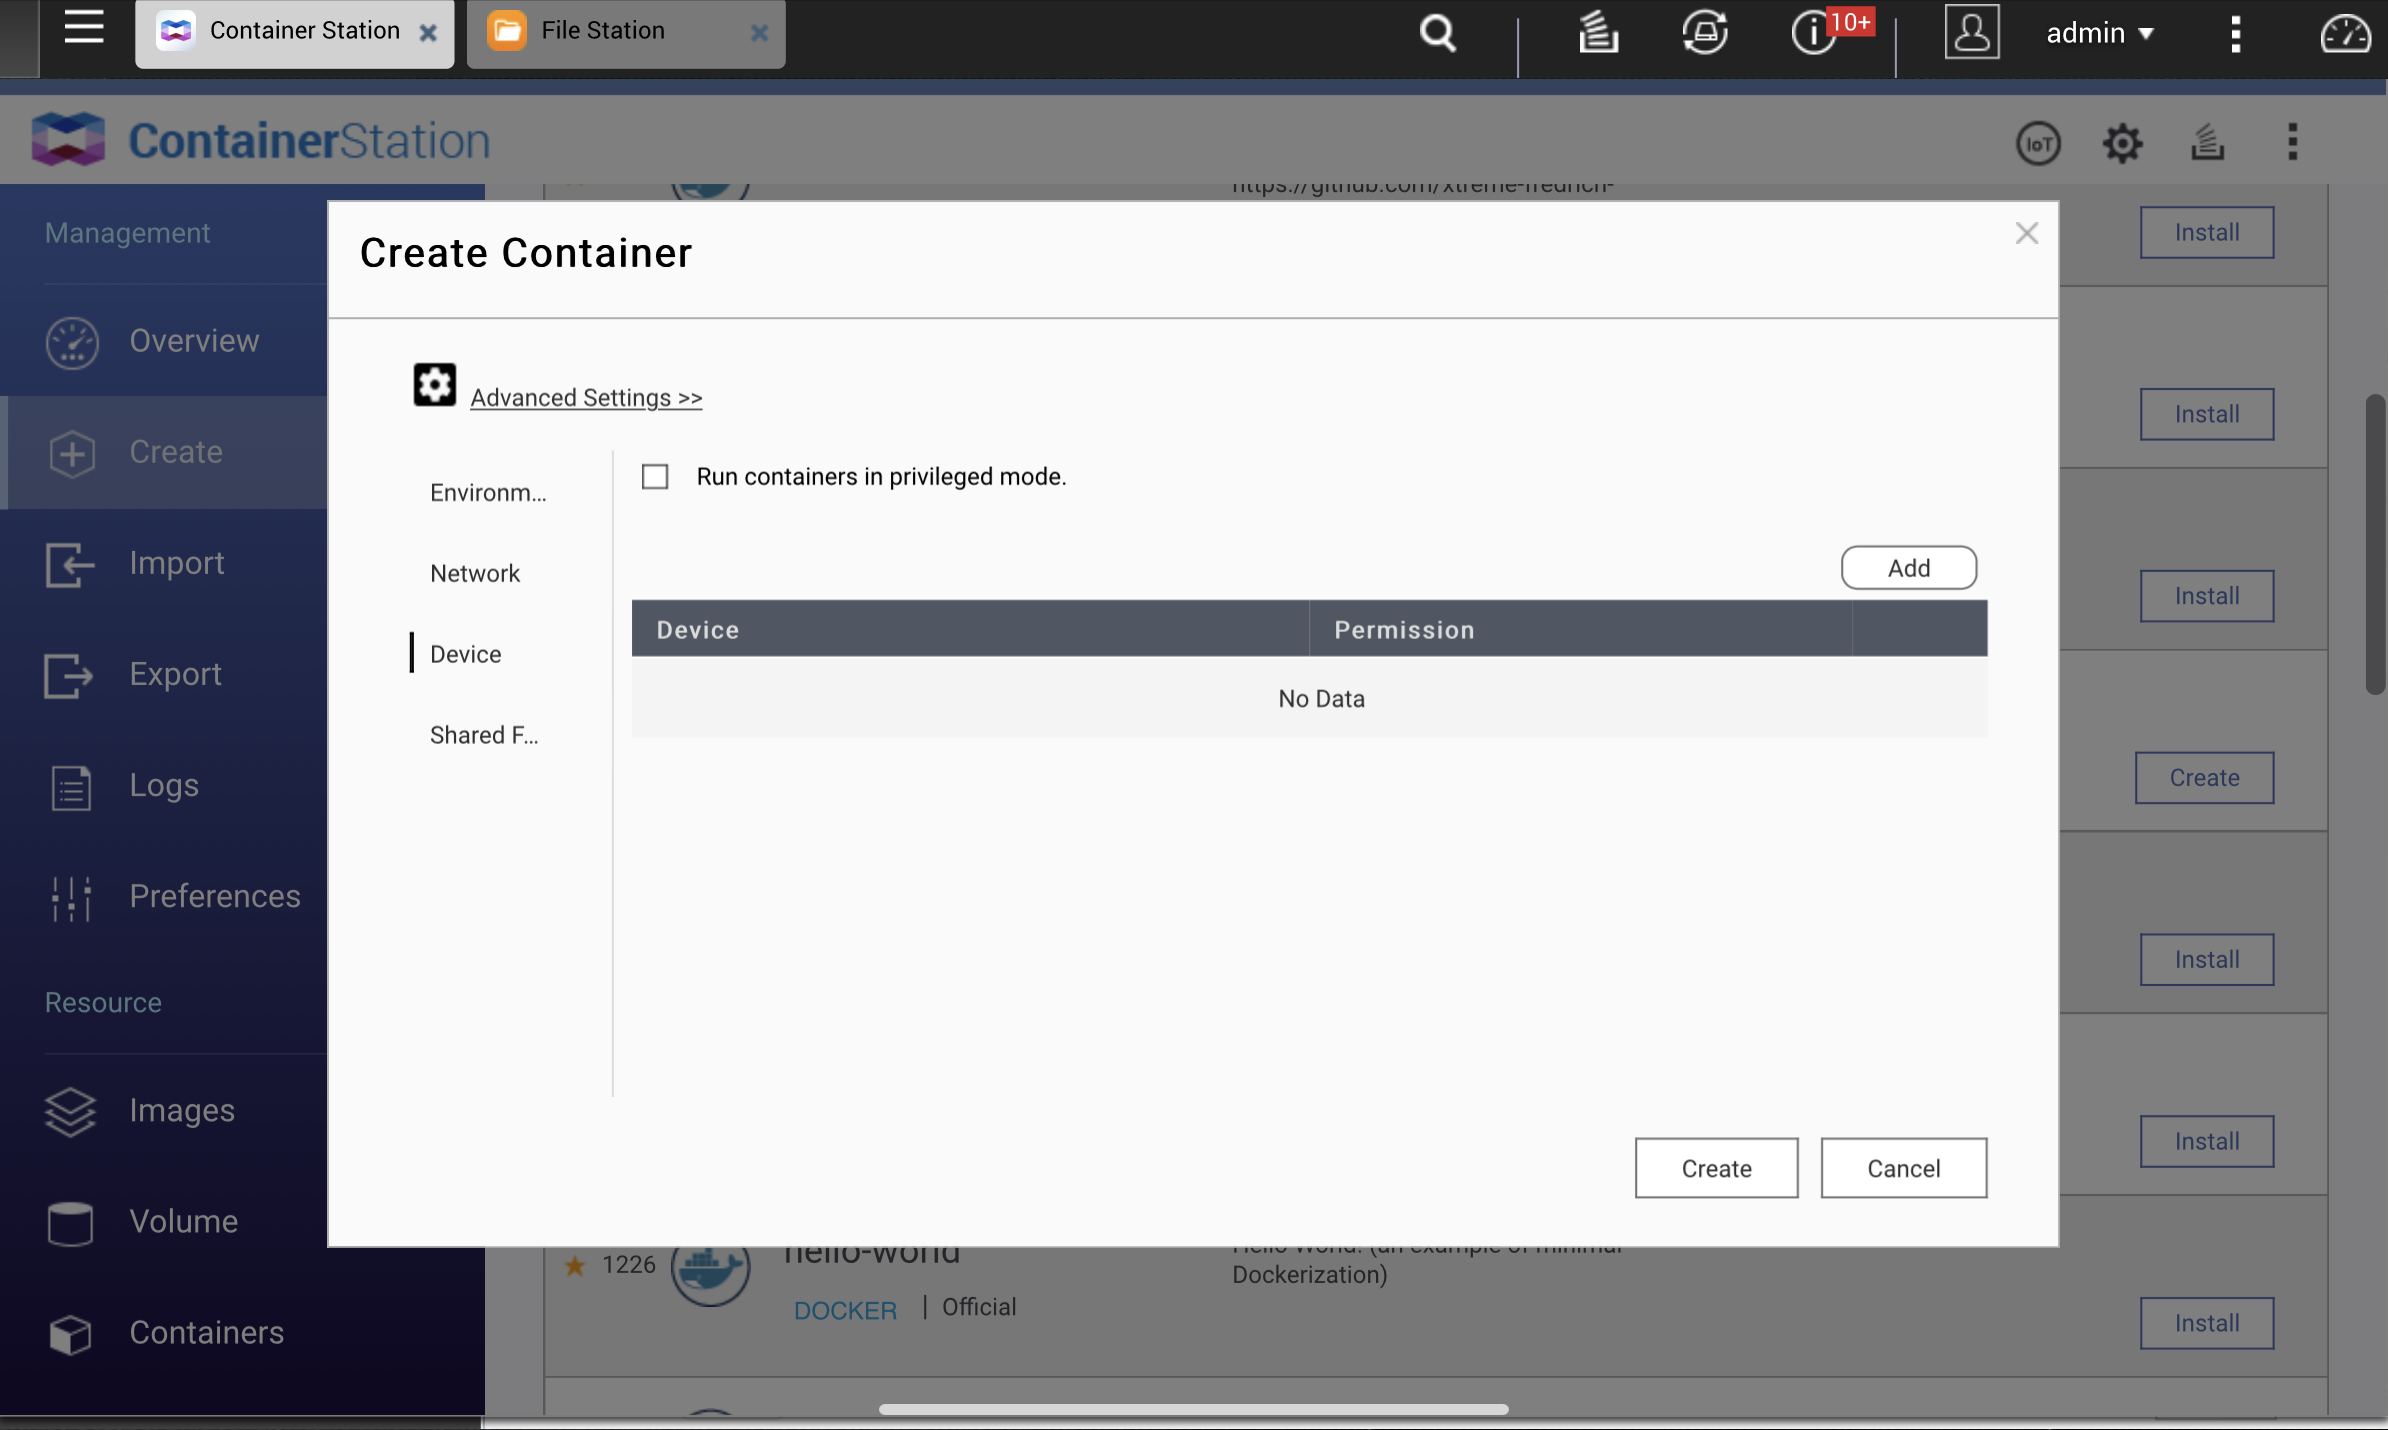
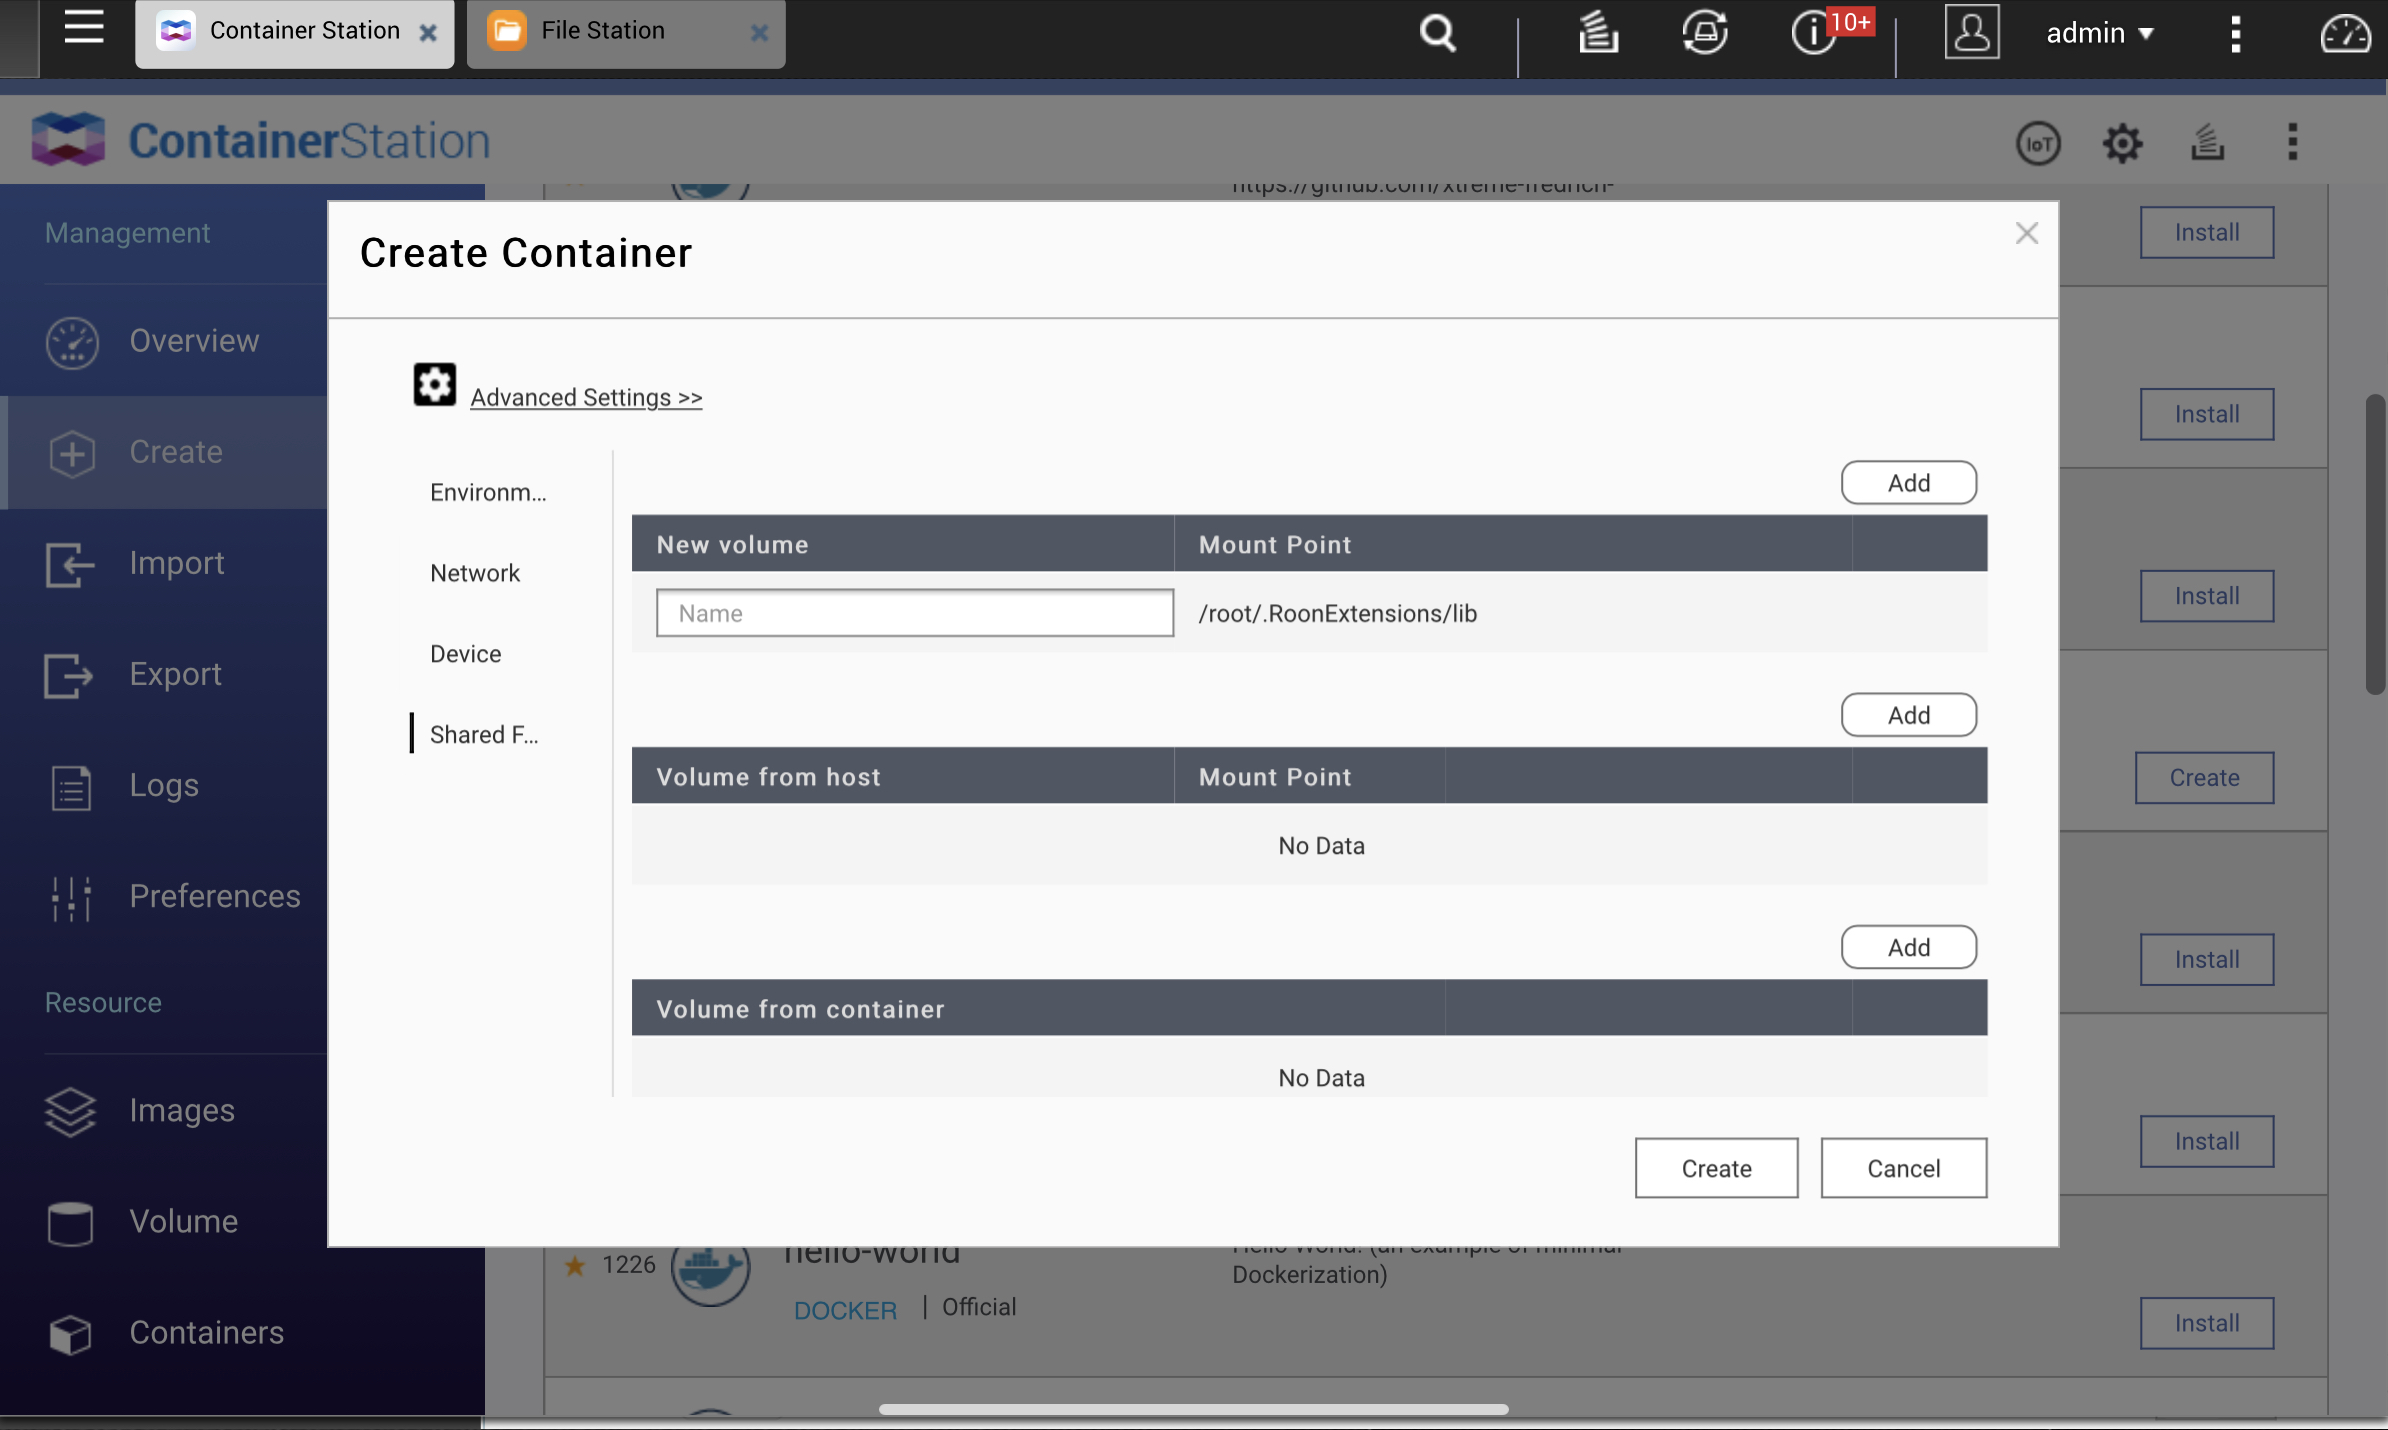
5. Now we’ll get a pop-up where we need to do our first bit of config. Click on Advanced Settings and navigate to the Network tab.
6. Change the Network Mode dropdown to Host. That’s all the config we need to do here so go ahead and click Create again. After you have done that we’ll have a Docker container running a vanilla and very stripped down Linux ready to go!
After a few seconds a background task will complete and your container is now running. Head back to the Container Station Overview tab and you’ll see the Container running - denoted by the green cube under Status.
Step 2: Enable Automatic Restart of the Container.
This step requires one to update the container from outside the container, so don’t use the “console” button in the QNAP ContainerStation Overview tab.
If you’re not sure how to access the QNAP directly from a Mac or PC, follow these instructions:
Once you’re at the NAS command prompt, type this command: “docker update --restart unless-stopped ” without the quotes.
Where it says put in the actual name of the container created under step 1 above. For me that was: “roon-extension-manager-1”. If you’re not sure, go to the Overview tab in the ContainerStation and note the name. Don’t use the “<” and “>” characters when entering the command.
Press Enter.
You’ll get a response back. For me it was the name of my container.
Exit Terminal or PuTTY if using Windows.
Step 3: Installing Extension Manager in Roon and Random Radio
In Roon, go to Settings and then Extensions.
Click on Settings for Roon Extension Manager.
Under Category, select Playback
Under Playback Extension, select Random Radio
Under Action, select Install.
Press Save
Once installed, you can configure the settings for Random Radio. See below for specific instructions, etc.:
Hello, waiting for beta testing of version 2.0 Web Controller I installed on my Qnap Serwer Roon Extension manager. Unfortunately, the Qnap NAS uses the “: 8080” port for configuration, which is the same one that the | Web Controller uses. How can this be changed so that the Web controller uses e.g. port: 8088?
As previously mentioned, Roon Web Controller is installed on my Qnap server.
Regards Robert Tota
The above method is documented as working as well as the use of a configuration file (the method I use) for the current stable release of the extension (see here). Not sure about the alpha release though.
Path to config file on QNAP: /Container/container-station-data/lib/docker/volumes/[Optional App Name]_roon-extensions/_data/node_modules/roon-web-controller/config
Shouldn’t the question better be posted in the respective Roon Web Controller thread (stable|alpha)?
Thank you for the hint. I will install WinSCP and find the right folder thanks to your hint to change the port on which the Web Controller is listening. For now I’m using the stable version of Web Controller 1.2.13. I look forward to the release of a more stable version than alpha because I’m worried about stability.
Thanks again Robert Tota
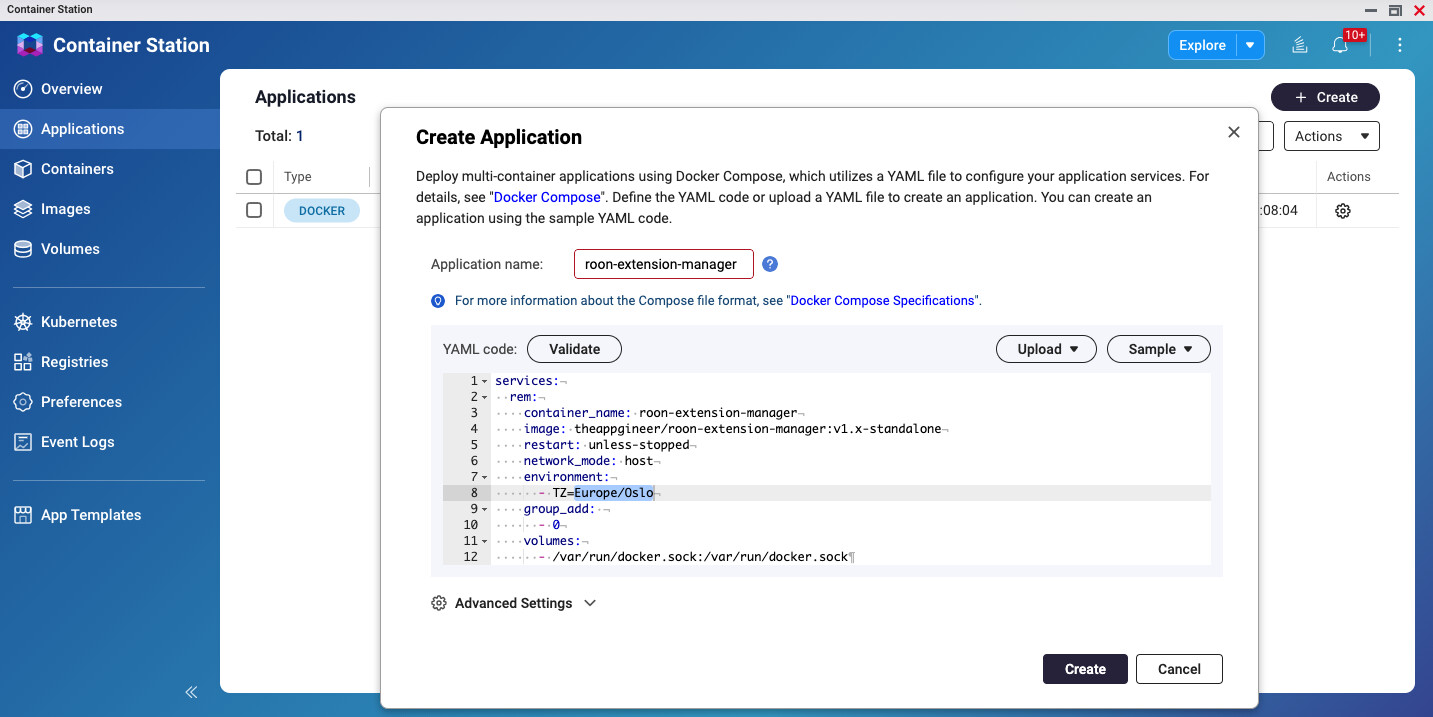
With this compose file, I just pressed the Create button, and the Container started without issue and appeared in Roon’s list of extensions soon after. Works like a charm