having spent the last 6 months researching, designing, building and implementing the upstream portion of my digital source [that is, everything in the digital signal path upstream from the DAC], i thought a recount of the experience might be useful to others here as they go about designing / tweaking their own systems. what follows is the topology i eventually implemented and the rational behind some of the choices.
first off is to list the overall goal of the project and the principles (read: assumptions) used to guide the design and implementation:
goal: to deliver the DAC a perfect digital stream — i.e. nothing but the intended digital signal contained in the audio file. if able to accomplish this goal, then the sound coming from the speakers will then only depend upon the DAC and the downstream analog system. in other words, the goal is to ensure the upstream digital infrastructure adds or subtracts nothing from the intended digital signal entering the DAC, thereby, making it perfectly transparent.
principle #1: electrical noise is a source of digital signal degradation and there are two types of electrical noise. type 1 noise is the extraneous but detrimental electrical “information” carried alongside the intended digital signal which modulates digital to analog conversion. type 2 noise is identical to type 1 noise except that it is of a magnitude sufficient to also alter the digital signal — that is, to actually add or remove 0s and 1s. [for an electrical implementation, the digital signal is carried by a waveform that switches where voltages above a threshold level are interpreted and 1s and voltages below another threshold level are interpreted as 0s. voltages between these two levels are invalid and only occur in a fault condition, i.e. when extraneous electrical noise is introduced — wikipedia].
principle #2: optical isolation is an effective method of removing type 1 noise. here, the electrical digital signal is converted to an optical (light) signal representing only the 0s and 1s. as no electrical current is passed from the light source to the light detector, only the desired lightwaves/photons representing the data are carried forward. obviously, this does not remove or correct type 2 noise where the digital signal has been altered.
principle #3: data transmitted over ethernet is effectively immune from type 2 noise. the ethernet standard contains protocols for error detection and correction. consequently, the end result of ethernet data transmission is that the receiving device knows the exact same digital information as the sending device.
principle #4: minimalism and simplicity wins. each box, cable, connection, power supply, dongle, etc. is a vector for the introduction of extraneous electrical noise into the digital signal. therefore, constraining the infrastructure to only the absolute minimum number of pieces is beneficial to digital signal quality. this is particularly relevant for in-device data handling.
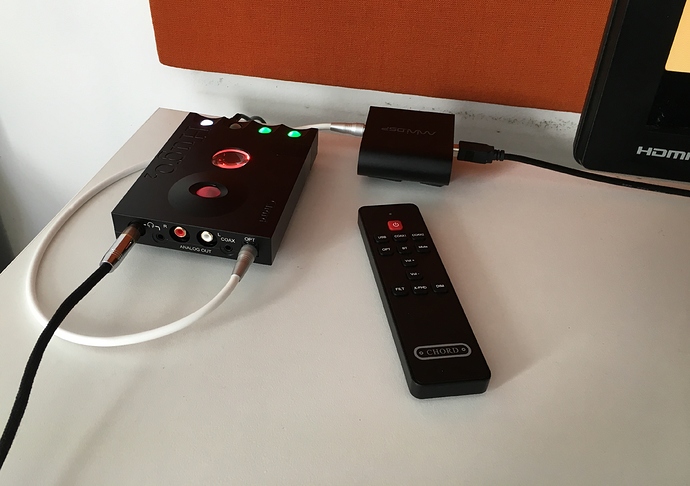
principle #5: the only clock that matters is the one on my DAC. using its own internal clock, it is capable of operating without reference to or use of the timing information from the source clock: asynchronously in the case of USB connection and re-clocking in the case of s/pdif connection. this precludes any jitter from upstream clocks. [note: this assumption is DAC specific and will depend upon specifications]
next, i found it useful / essential to distinguish audio files stored locally (i.e. stored on the device) from those stored remotely (e.g. streamed over the internet or stored on a NAS). using a divide and conquer strategy, i then chose to first design the infrastructure for locally stored files. subsequently, the networking to access remotely stored streamed files was designed and implemented. in doing so, the overall project was effectively divided into two separate and distinct projects: an audio transport project and a networking project.
audio transport project - locally stored files: after much research and product comparison, i eventually arrived at a set of requirements and specifications needed to accomplish the goal as best possible with respect to the digital audio transport task.
one box solution — follows from principle #4. to minimize the number of boxes, connections, power supplies, cables, etc. i wanted storage, streaming, transport, rendering, etc. all to reside in a single box with the absolute minimum number of components / connections.
passively cooled enclosure / no moving parts — to eliminate both audible and electrical noise generated by an internal fan, spinning hdd, etc.
expandable and upgradable — to accommodate future changes in computer audio technology as well as any changes in my system.
direct connection to the DAC — follows from principles #4.
m.2 ssd storage — this type ssd is connected directly to the motherboard, thereby, eliminating two cables and three connections per drive.
ultra low noise power supply — external DC power supply connecting to a fanless, high-efficiency + low-noise internal DC power unit.
processor capable of significant DSP — to accommodate DSD512 and to have headroom for other functionality such as library searches.
given these specifications which were developed and refined alongside my research and the evaluation of almost every available product, i was unable to find a single product that met an acceptable subset of these specs. without detailing the pros and cons of the available options considered, every one failed on the expandable/upgradable and the m.2 ssd specs. most failed on the one box spec requiring additional equipment to fulfill the necessary upstream digital functionality. also, every product failed on at least one of the remaining specs.
therefore, i eventually (and reluctantly) came to the conclusion that the best course was a DIY build. given that i have the rather minimal computer skills necessary for a DIY design and build, it just made sense to go in that direction.
i should mention here that the one thing that made DIY a viable option is the availability of roon optimized core kit (ROCK). simply stated, this is the software that made the DIY hardware feasible. ROCK is a linux-based operating system whose only purpose is to run roon. it is highly efficient with no unnecessary processes and, therefore, near or completely silent, depending upon hardware.
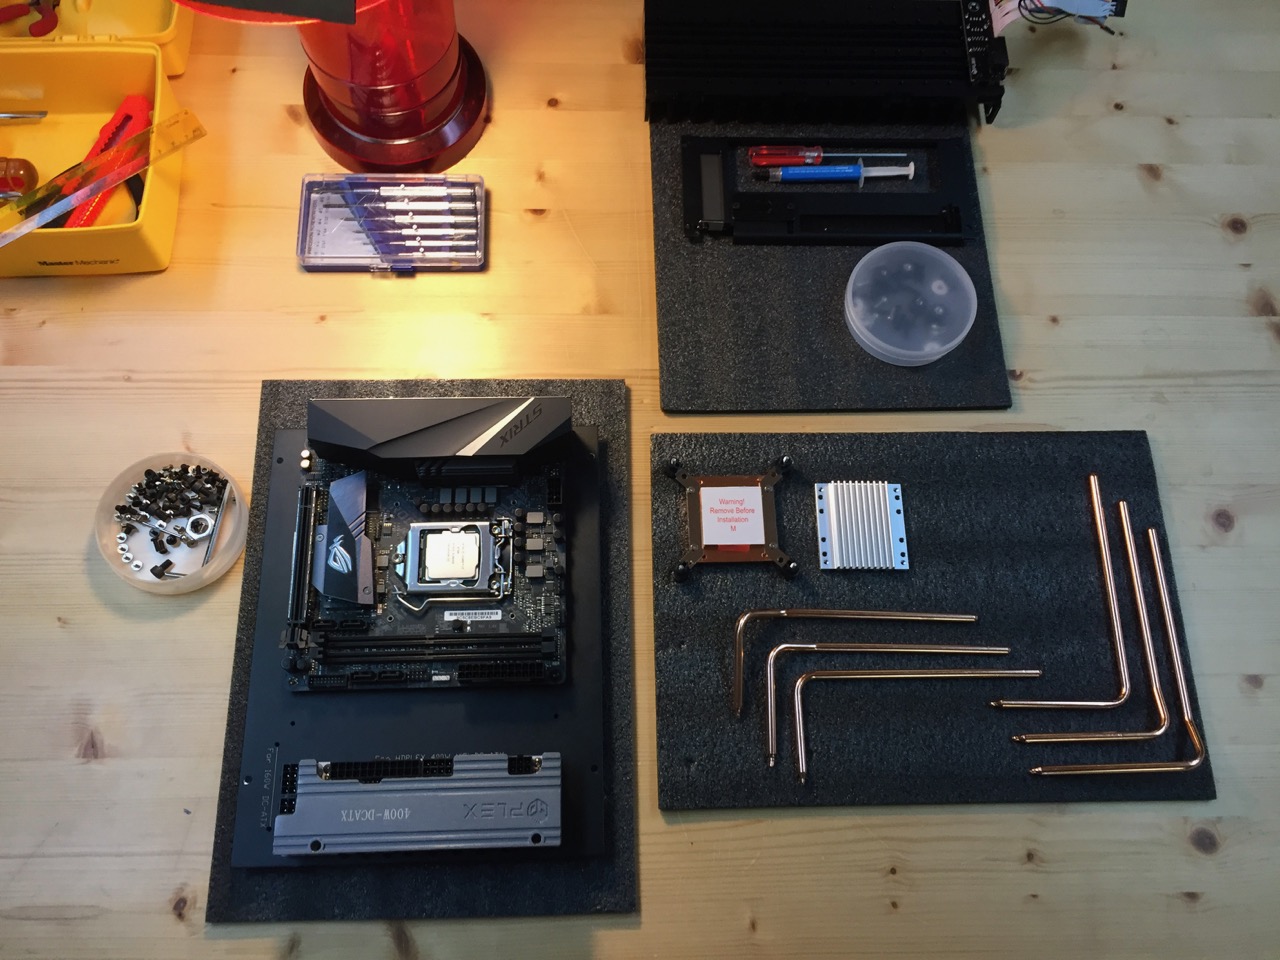
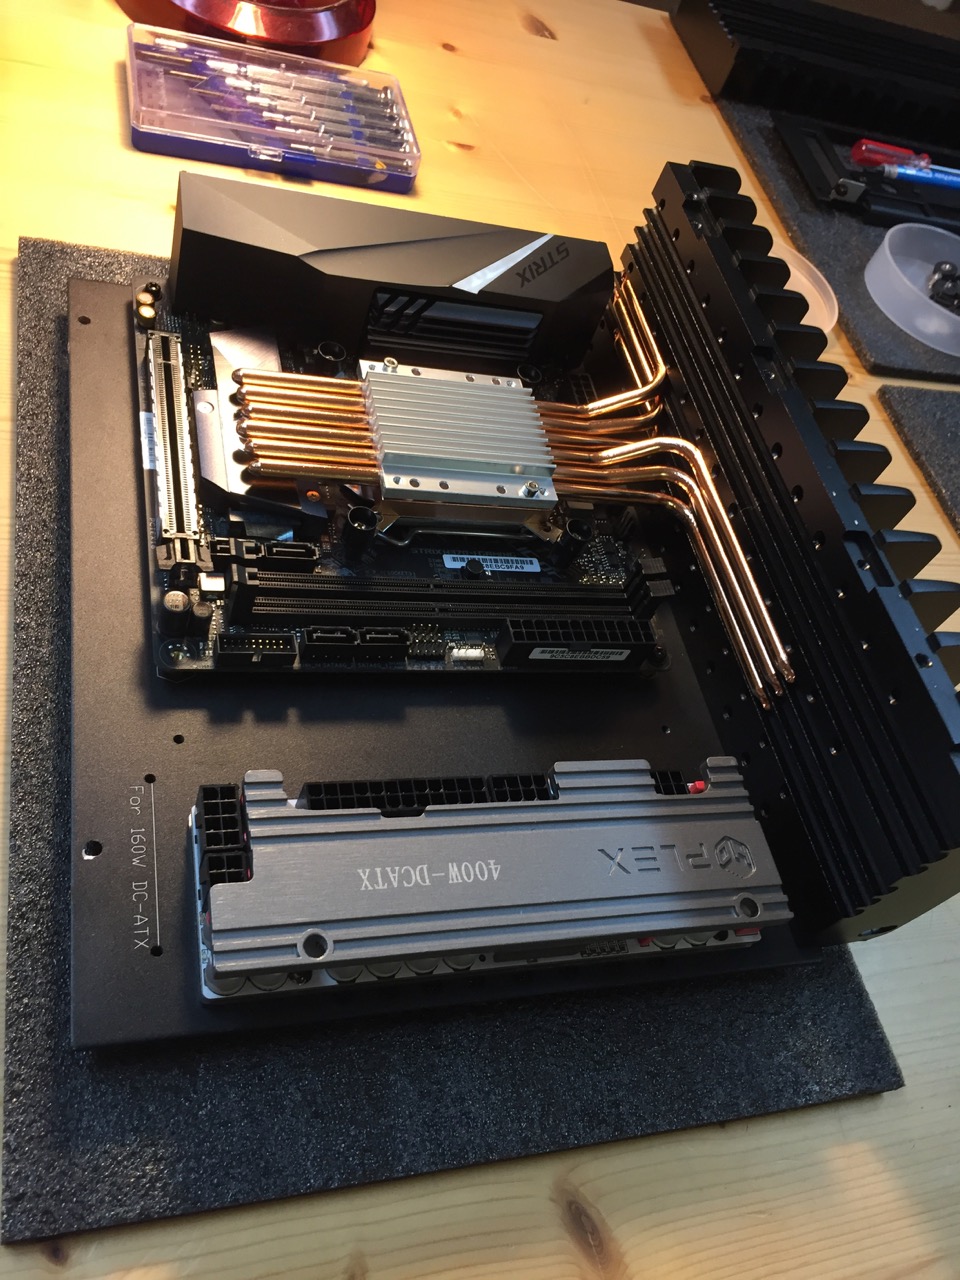
given the desired specs and performance characteristics, i then collected the following parts list for the build with each one chosen for quality and where applicable speed to ensure snappy performance.
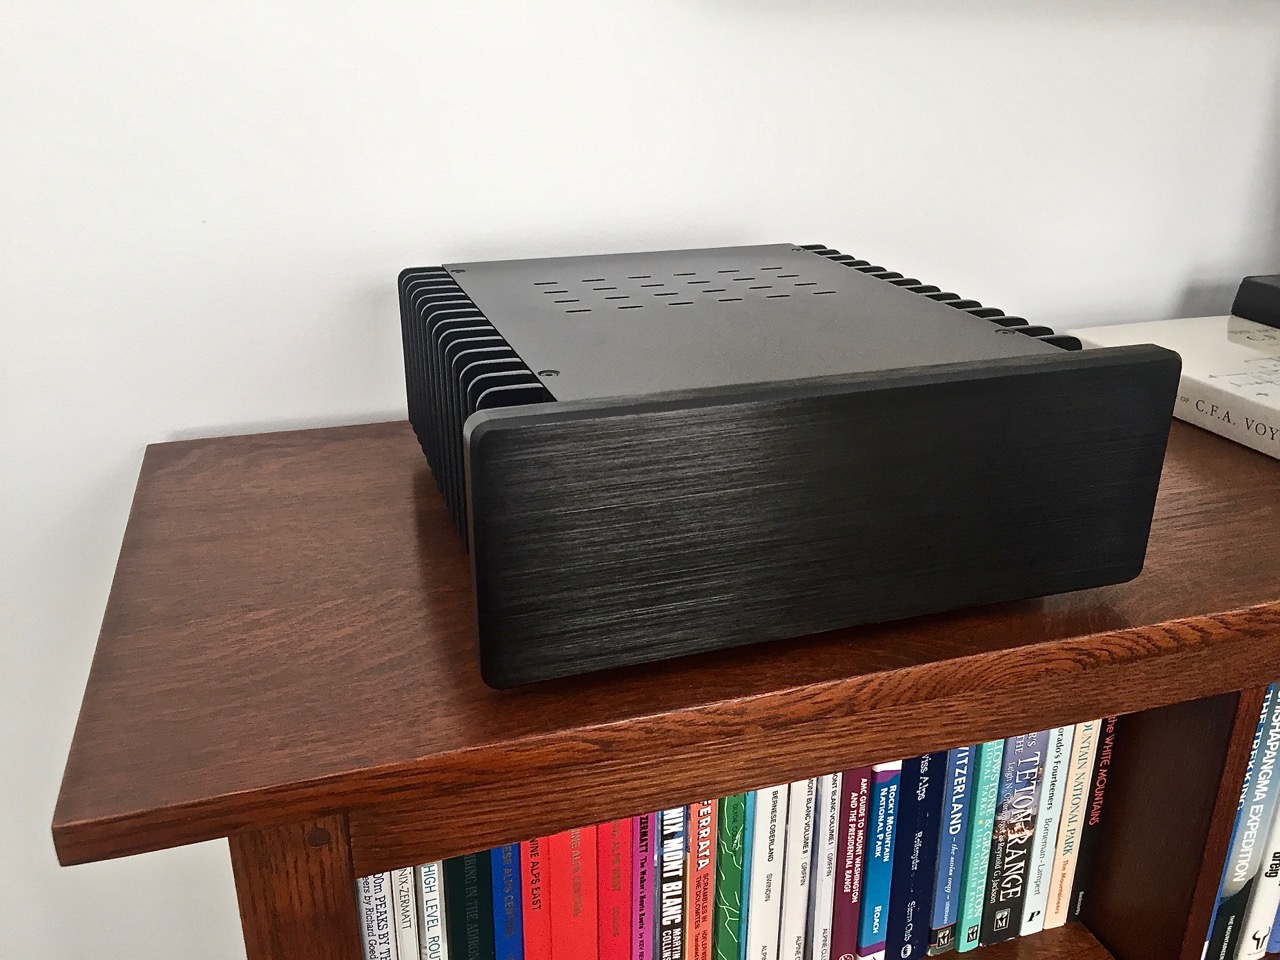
fanless chassis - hdPlex h3 v2 (supports 80W TDP CPU)
internal PSU - hdPlex 400W hi-fi DC-ATX
motherboard - asus h370-i mini-ITX
CPU - intel i7-8700 (65W TDP)
drive 1 (OS) - western digital black sn750 NVME m.2 SSD, 250GB
drive 2 (storage) - micron/crucial p1 NVME m.2 SSD, 1TB
ram - kingston 2 x 2666mHz DDR4 dimm, 4GB each
external PSU - LPS: tbd (300W DC power adapter in interim)
assembly took about 8 hours or so and can be accomplished by anyone who is comfortable carefully working with a variety of screwdrivers and can diligently work through the set of instructions that come with the hdPlex chassis and the asis motherboard.
the final step was to install ROCK, configure the device as the roon core, and copy over some music files to the internal storage drive. the installation of ROCK took me about an hour. this can also be accomplished by anyone comfortable working carefully through the very detailed installation instructions provided by roon. configuring the device as the roon core took about 10 minutes and can be done from any roon control device on the network. this should be familiar territory to those with prior roon experience. adding music files is simply a matter of drag-and-drop as ROCK exposes the internal storage drive to the network.
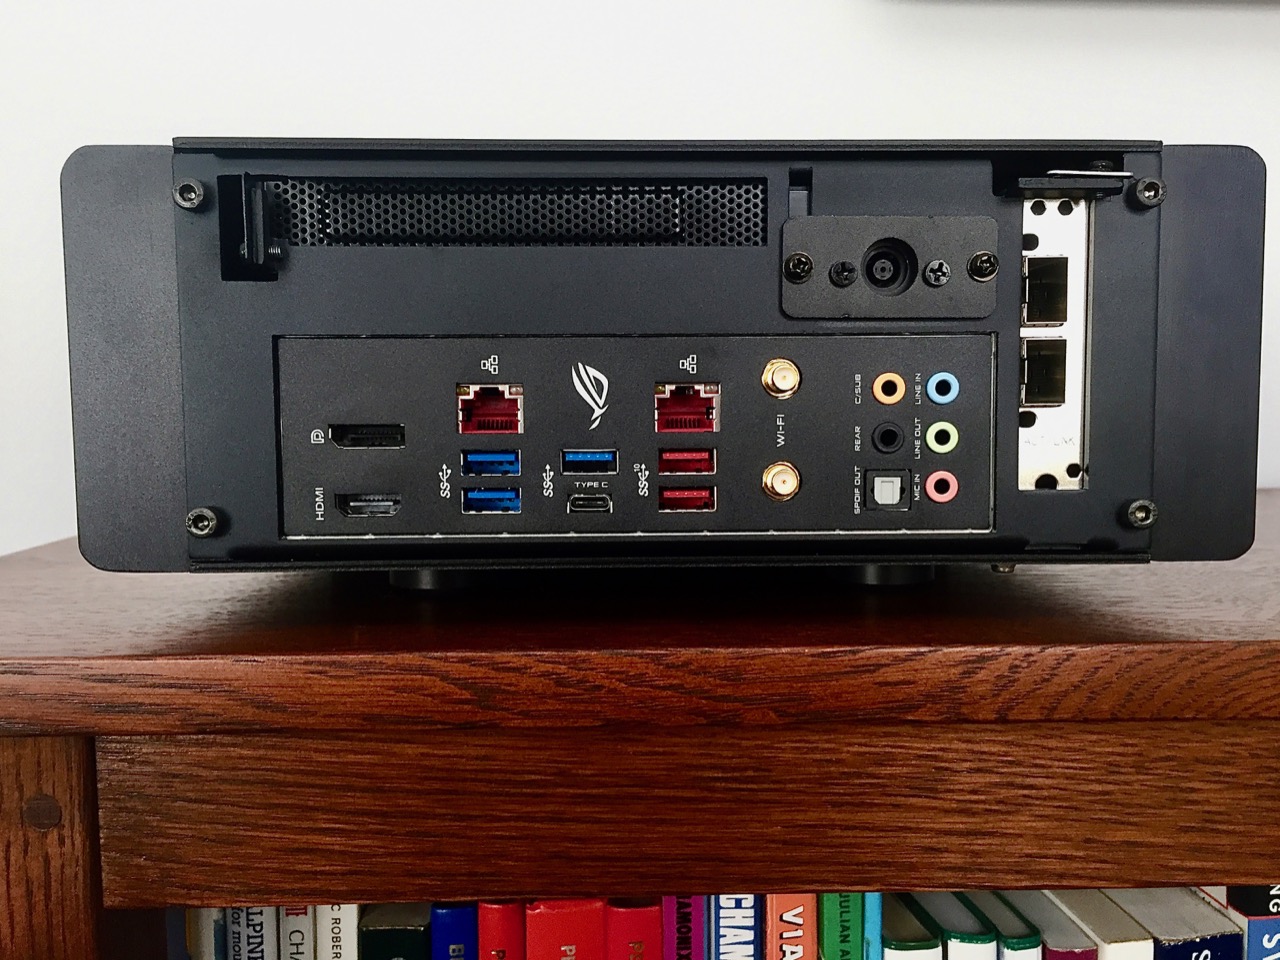
meet the kanjiroba 6883-yak audio transport …it needed a name, right?
networking project — streamed / remotely stored files: the simple goal here was to deliver remotely stored (streamed) music files to the transport such that they are in effect indistinguishable from locally stored files. that is, once delivered to the transport, remotely stored files would be bit-perfect and free from all upstream electrical noise — i.e. free from both type 1 and 2 noise.
accomplishing the this goal turned out to be quite straightforward and much, much simpler that i had thought at the outset. given principle #3, the error checking and recovery protocols in the ethernet standard, type 2 noise is simply not an issue for files sent over the network… no matter how mangled a packet of bits might become while in transit, the receiving device will detect and cause to be corrected any errors in the arriving data.
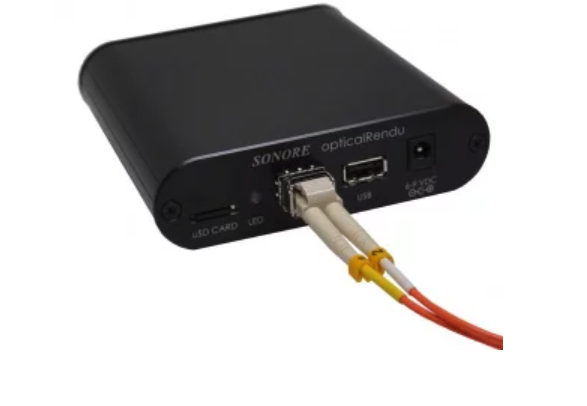
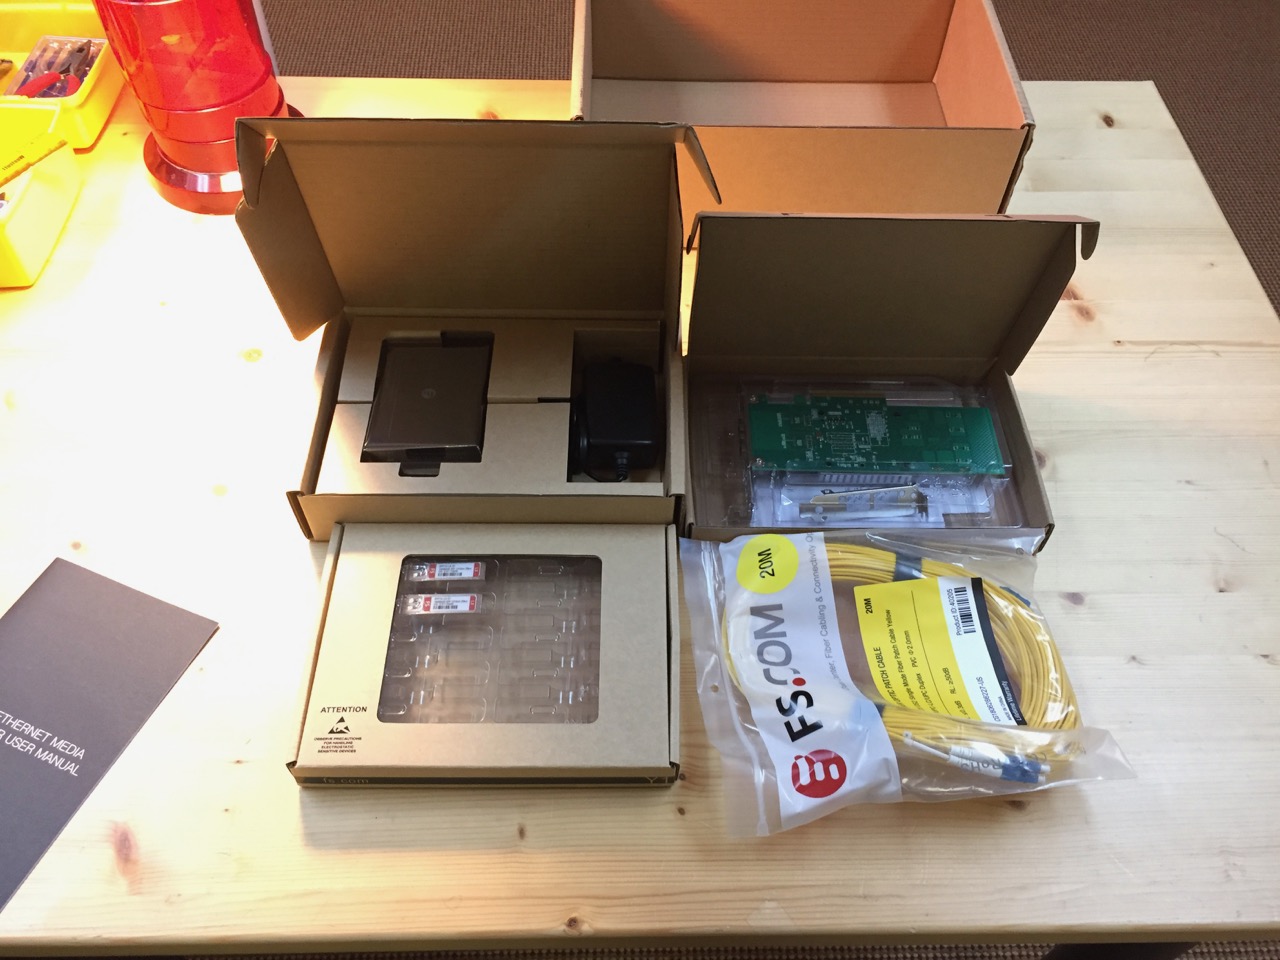
consequently, type 1 noise is the only concern here and, using principle #2, it can be eliminated via optical isolation. to accomplish this in my network / system all that is needed is to run a fiber ethernet cable directly to the transport. the equipment needed for this task is actually quite minimal:
fiber NIC - FS PCIe 2.0 x8 dual port 10 GbE SFP+ NIC
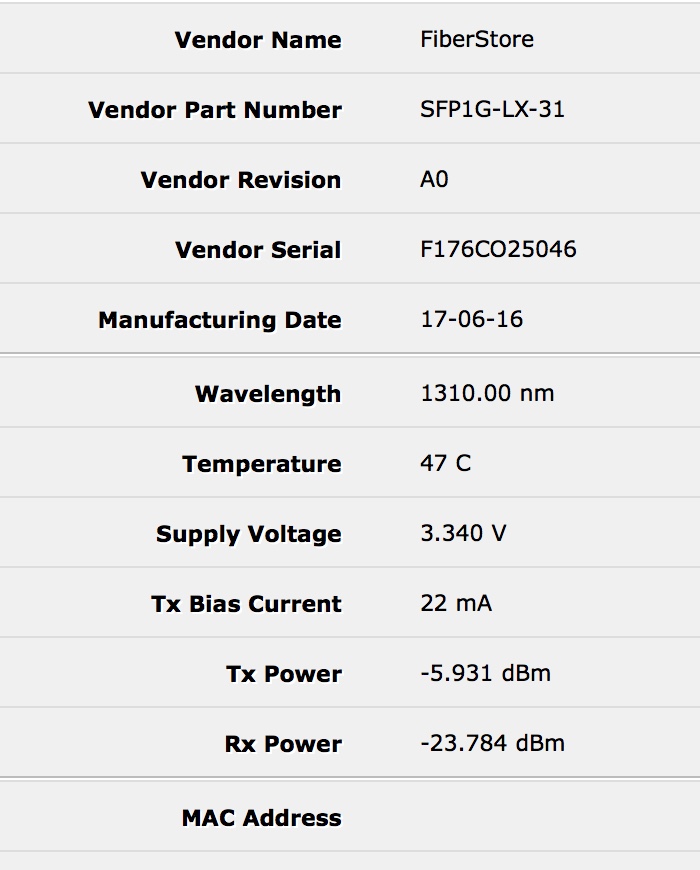
SFP transceiver - FS 2 x 1000BASE-LX/LH 1310nm 20km DOM SFP module
fiber cable - FS LC/UPC duplex OS2 Single Mode PVC 2.0mm
media converter - FS Unmanaged 10/100/1000Base-T RJ45 to SFP GbE
it is probably important to note here that, unlike copper ethernet which is mostly plug-and-play, optical ethernet components need careful matching to ensure compatibility. specifications such as wavelength, simplex/duplex, single/multi-mode, fiber cable connector type, fiber end polish, etc. all need to be considered.
installation was straightforward with the time between the fedEx package arriving and listening being about an hour. first, the PCIe fiber network interface card was installed in the transport. here, the single connection is directly to the motherboard via a PCIe expansion slot — similar to the m.2 SSDs used for storage. next, the SFP transceivers were installed in the SFP slots of the NIC and the FMC. finally, the NIC and FMC were connected to each end of the fiber cable and the FMC was connected to the network. once the configuration and gear was tested, it took another hour to relocate the FMC to the basement and run the 65’ of fiber to that location.
results: this turned out to be one of the most impactful upgrades i have done to my system. i was not expecting this dramatic an impact. the best description of the SQ improvement is a very much blacker background (inky black, black-hole black) and all the detail and clarity goodness that flows from that… transients are simply phenomenal: impactful yet gliding through time with never a ragged edge to get caught up on; significant bass extension with a much greater presence and crispness; the overall sound is now integrated and holistic.
i should probably note that there is a sequencing effect here. after having done significant system upgrades over the past several years, the upstream digital was then the (very) weak link in the chain. so i think, really, the benefit of this upgrade was to simply get out of the way and allow the rest of my system to perform at its potential.
finally, the audio transport and networking projects were done sequentially with six weeks between the two. so, i had the opportunity to similarly evaluate the results of each project. i would have been more than happy with the results of each project by itself; however, i think there is significant synergy when putting the two together. adding the fiber networking to the transport is what made the whole project just pop and come alive. i was simply floored by the sound when the two were put together.
final thoughts:
i guess the real question here is: was the initial goal accomplished? yes and no… yes, in that i am thrilled with the results which far exceeded my expectations. no, in that it was an impossible goal. electrical noise is a fact of life associated with computers. however, i think i have been able to design and build a transport that is about as quiet as possible without resorting to a custom / bespoke motherboard and a CNC milled aluminum chassis. i am saving that for the mk-ii version!!
while cost was not really a consideration or motivating factor, the price / performance of this upgrade was staggeringly off-the-charts. soup-to-nuts, total cost was $1,377.28 — metaphorically, i am enjoying domaine de la romanée-conti for the price of jug wine.
despite some initial misgivings about turning an audio hobby into a computer science and systems administration quagmire, DIY was the absolutely right way for me to go. i got exactly what my system called for and, thus far, in conjunction with ROCK it has operated flawlessly. also, it was an enjoyable and satisfying process.
here is the final digital source topology:
[router] <— cat5e —> [fmc] <— fiber —> [audio transport] <— usb —> [DAC]
i want to thank many here and elsewhere who have helped me think trough all the issues and come to a solution which works for my system — especially @wklie who has been exceedingly generous and helpful.
lastly, wondering about the kanjiroba 6883-yak audio transport name? inspired by yaks transporting timbers in the kanjiroba himal: