Here’s a new mini streamer/DAC project I recently completed. It’s currently being used in my shop and I’m listening to as I write this. I wanted this project to include subsystems I already owned, but weren’t using. For the past year or so, I’ve been using Rasp Pis and DAC HATs configured as roon end-points, so I’ve gotten a fair bit of experience getting these DAC/streamers up and running. But, I wanted something more contained with all cables coming off the back panel rather than 3 sides of most RPi setups. From a software standpoint, I’ve been a big fan for over a year now of the roon digital audio, whole-house streaming ecosystem. This software is a pleasure to use. Once you have your digital library online (NAS), and capable roon server hardware, you’re ready to go. Plus, it’s pretty painless to configure and get it up and running too. Roon allows you to purchase their customized back-end server, that runs on a variety of hardware platforms. It also has what they call end-points. These are streamers and DACs that play the music from your network. If you build you own end-point (like this project), also available is ‘roon Bridge’ which will configure the end-point(SBC) running Linux to work with roon Server. Another Linux solution for an end-point is to use DietPi. It offers an option to automatically configure ‘roon Bridge’ with from a single software selection.
This project is a hybrid of hardware/software subsystems matched to provide a very small footprint that can be used wherever you have an amp, speakers and network access. It can easily be setup using a USB WiFi dongle for access as well, if you’d rather go that route. You’ll see how I’ve mixed and matched the various hardware systems below. Now that I have a fully assembled unit, I thought I would share the project with the roon community. The following are the individual hardware/software pieces I used and necessary links.
Hardware:
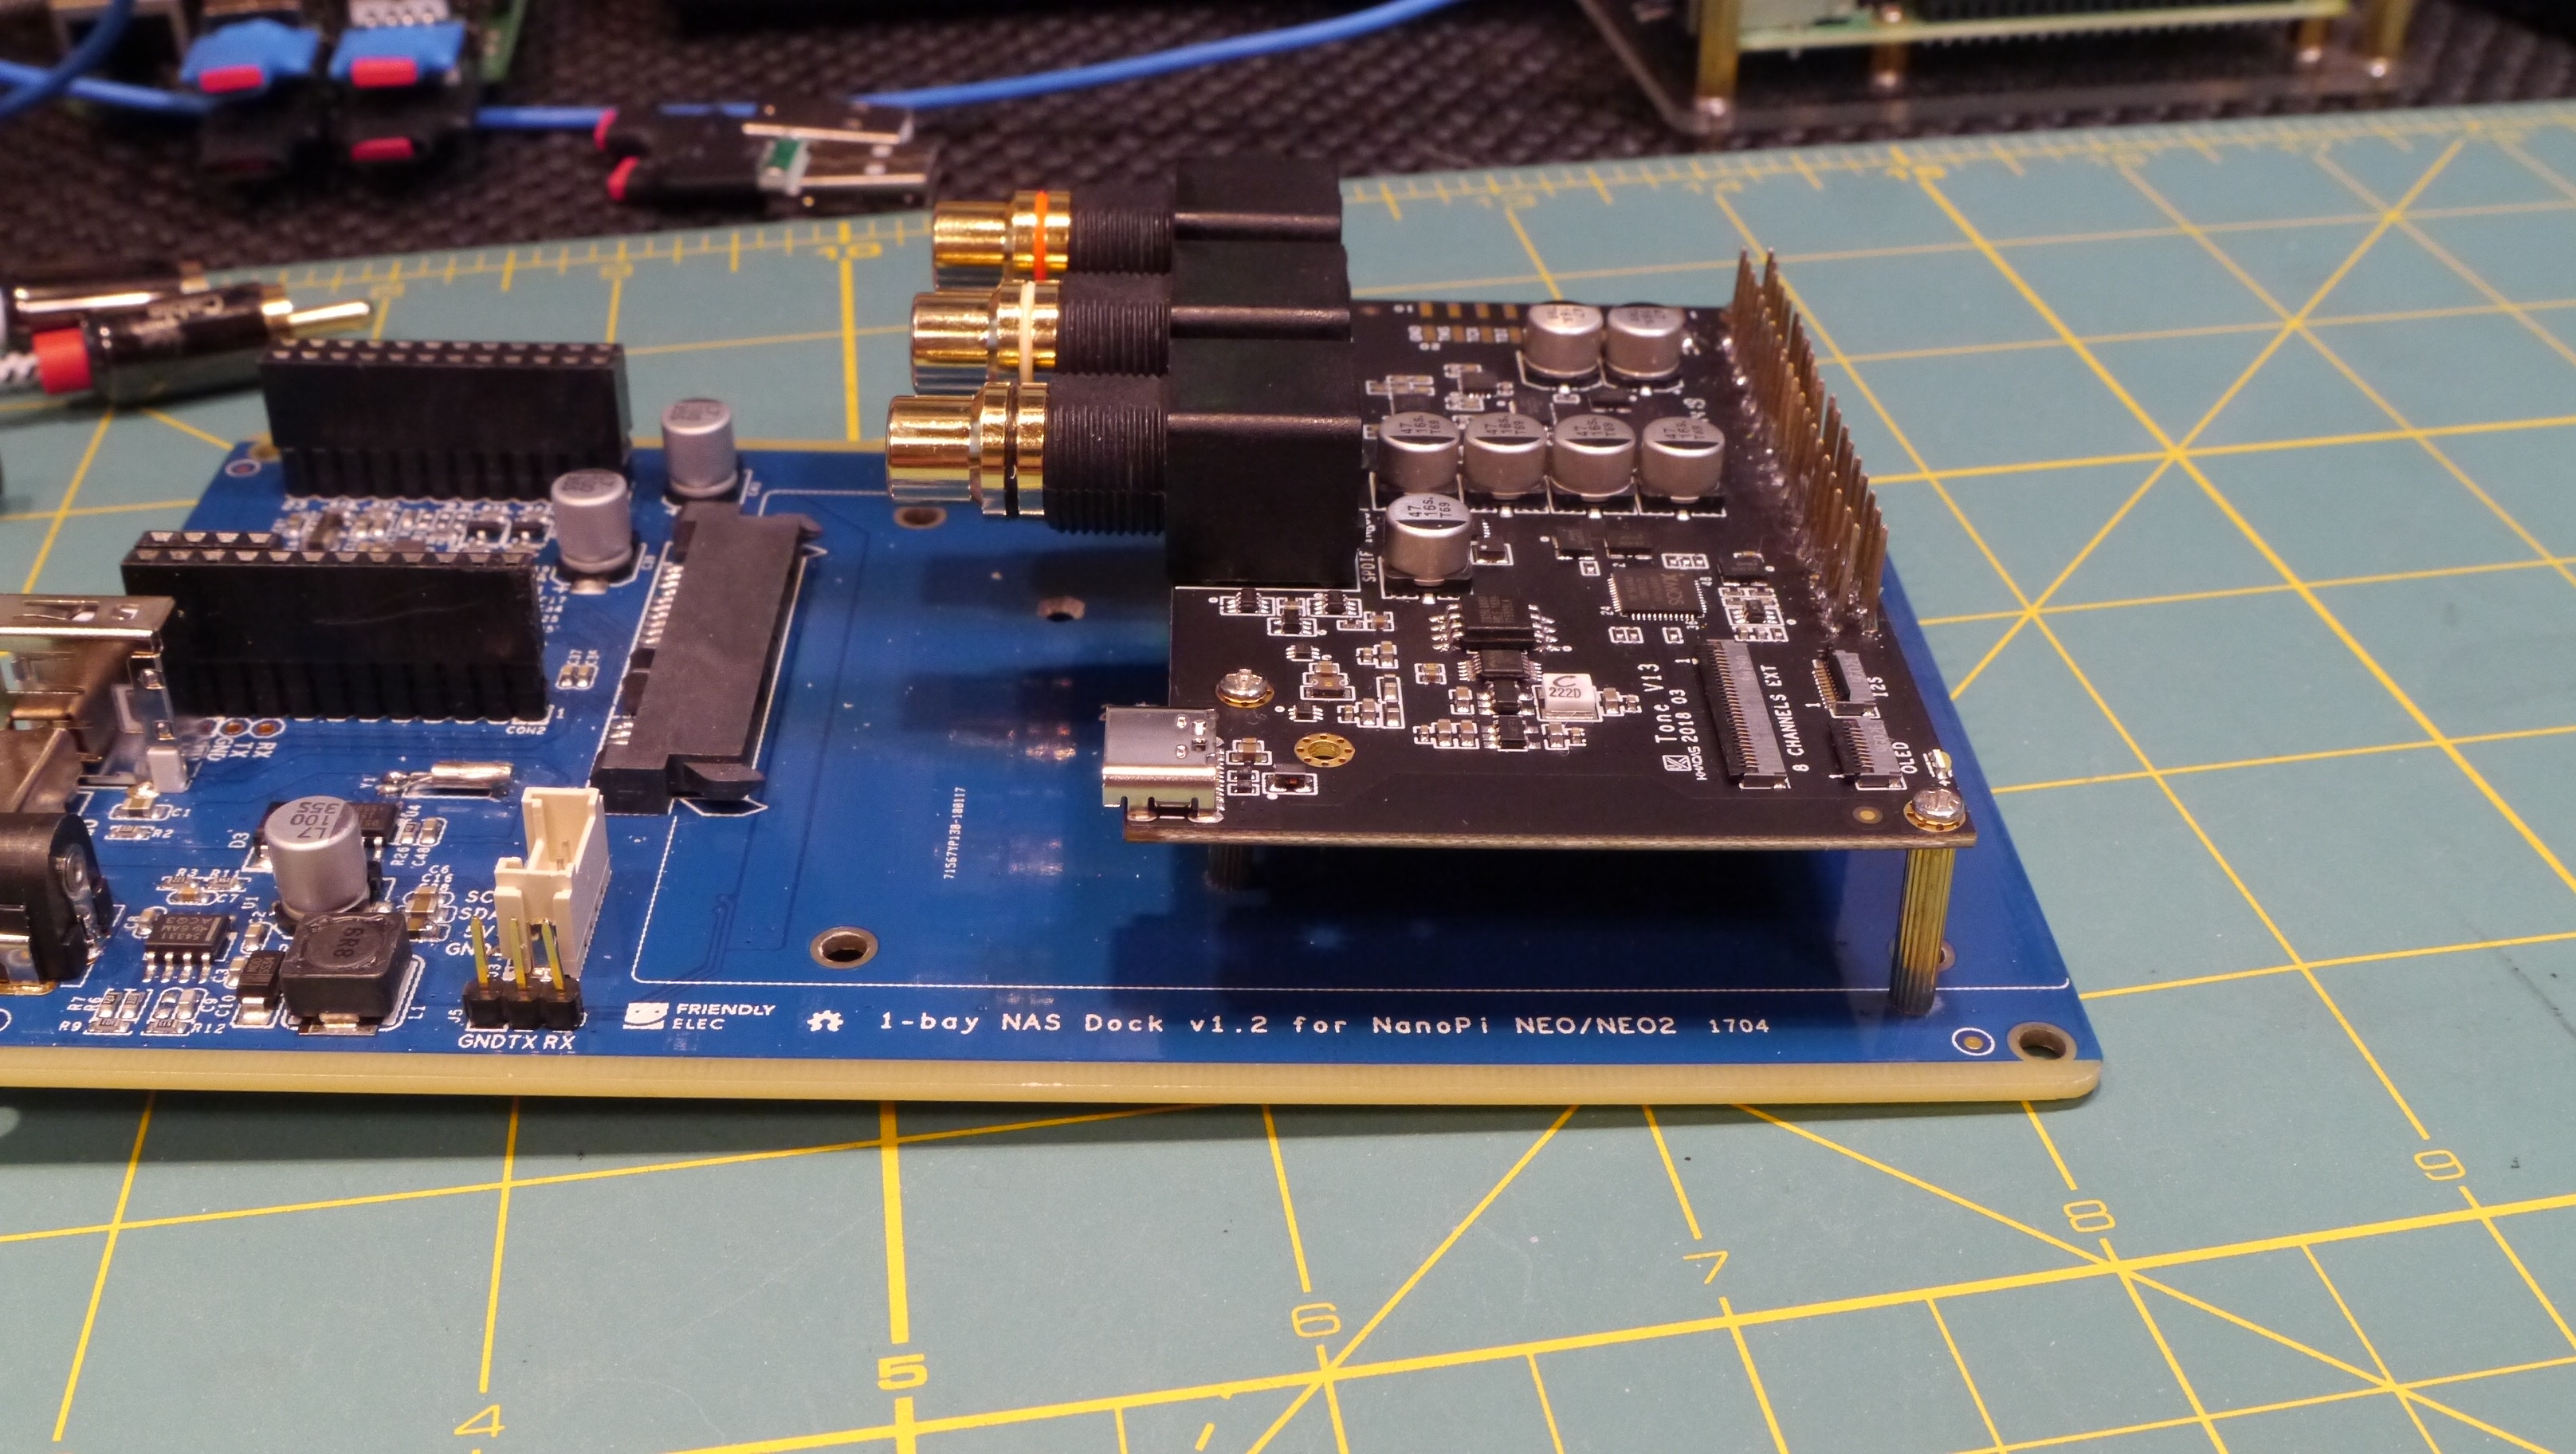
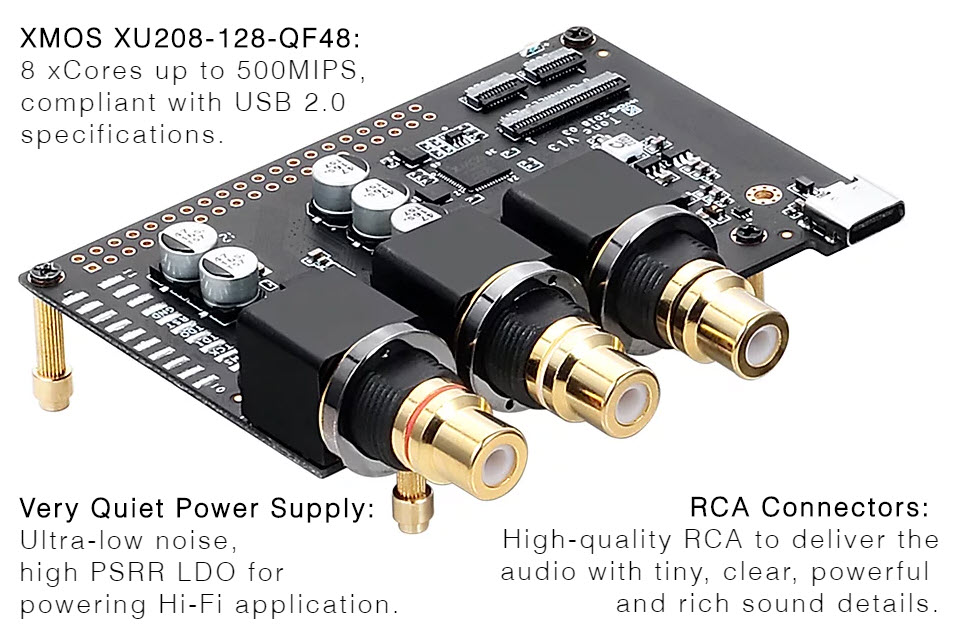
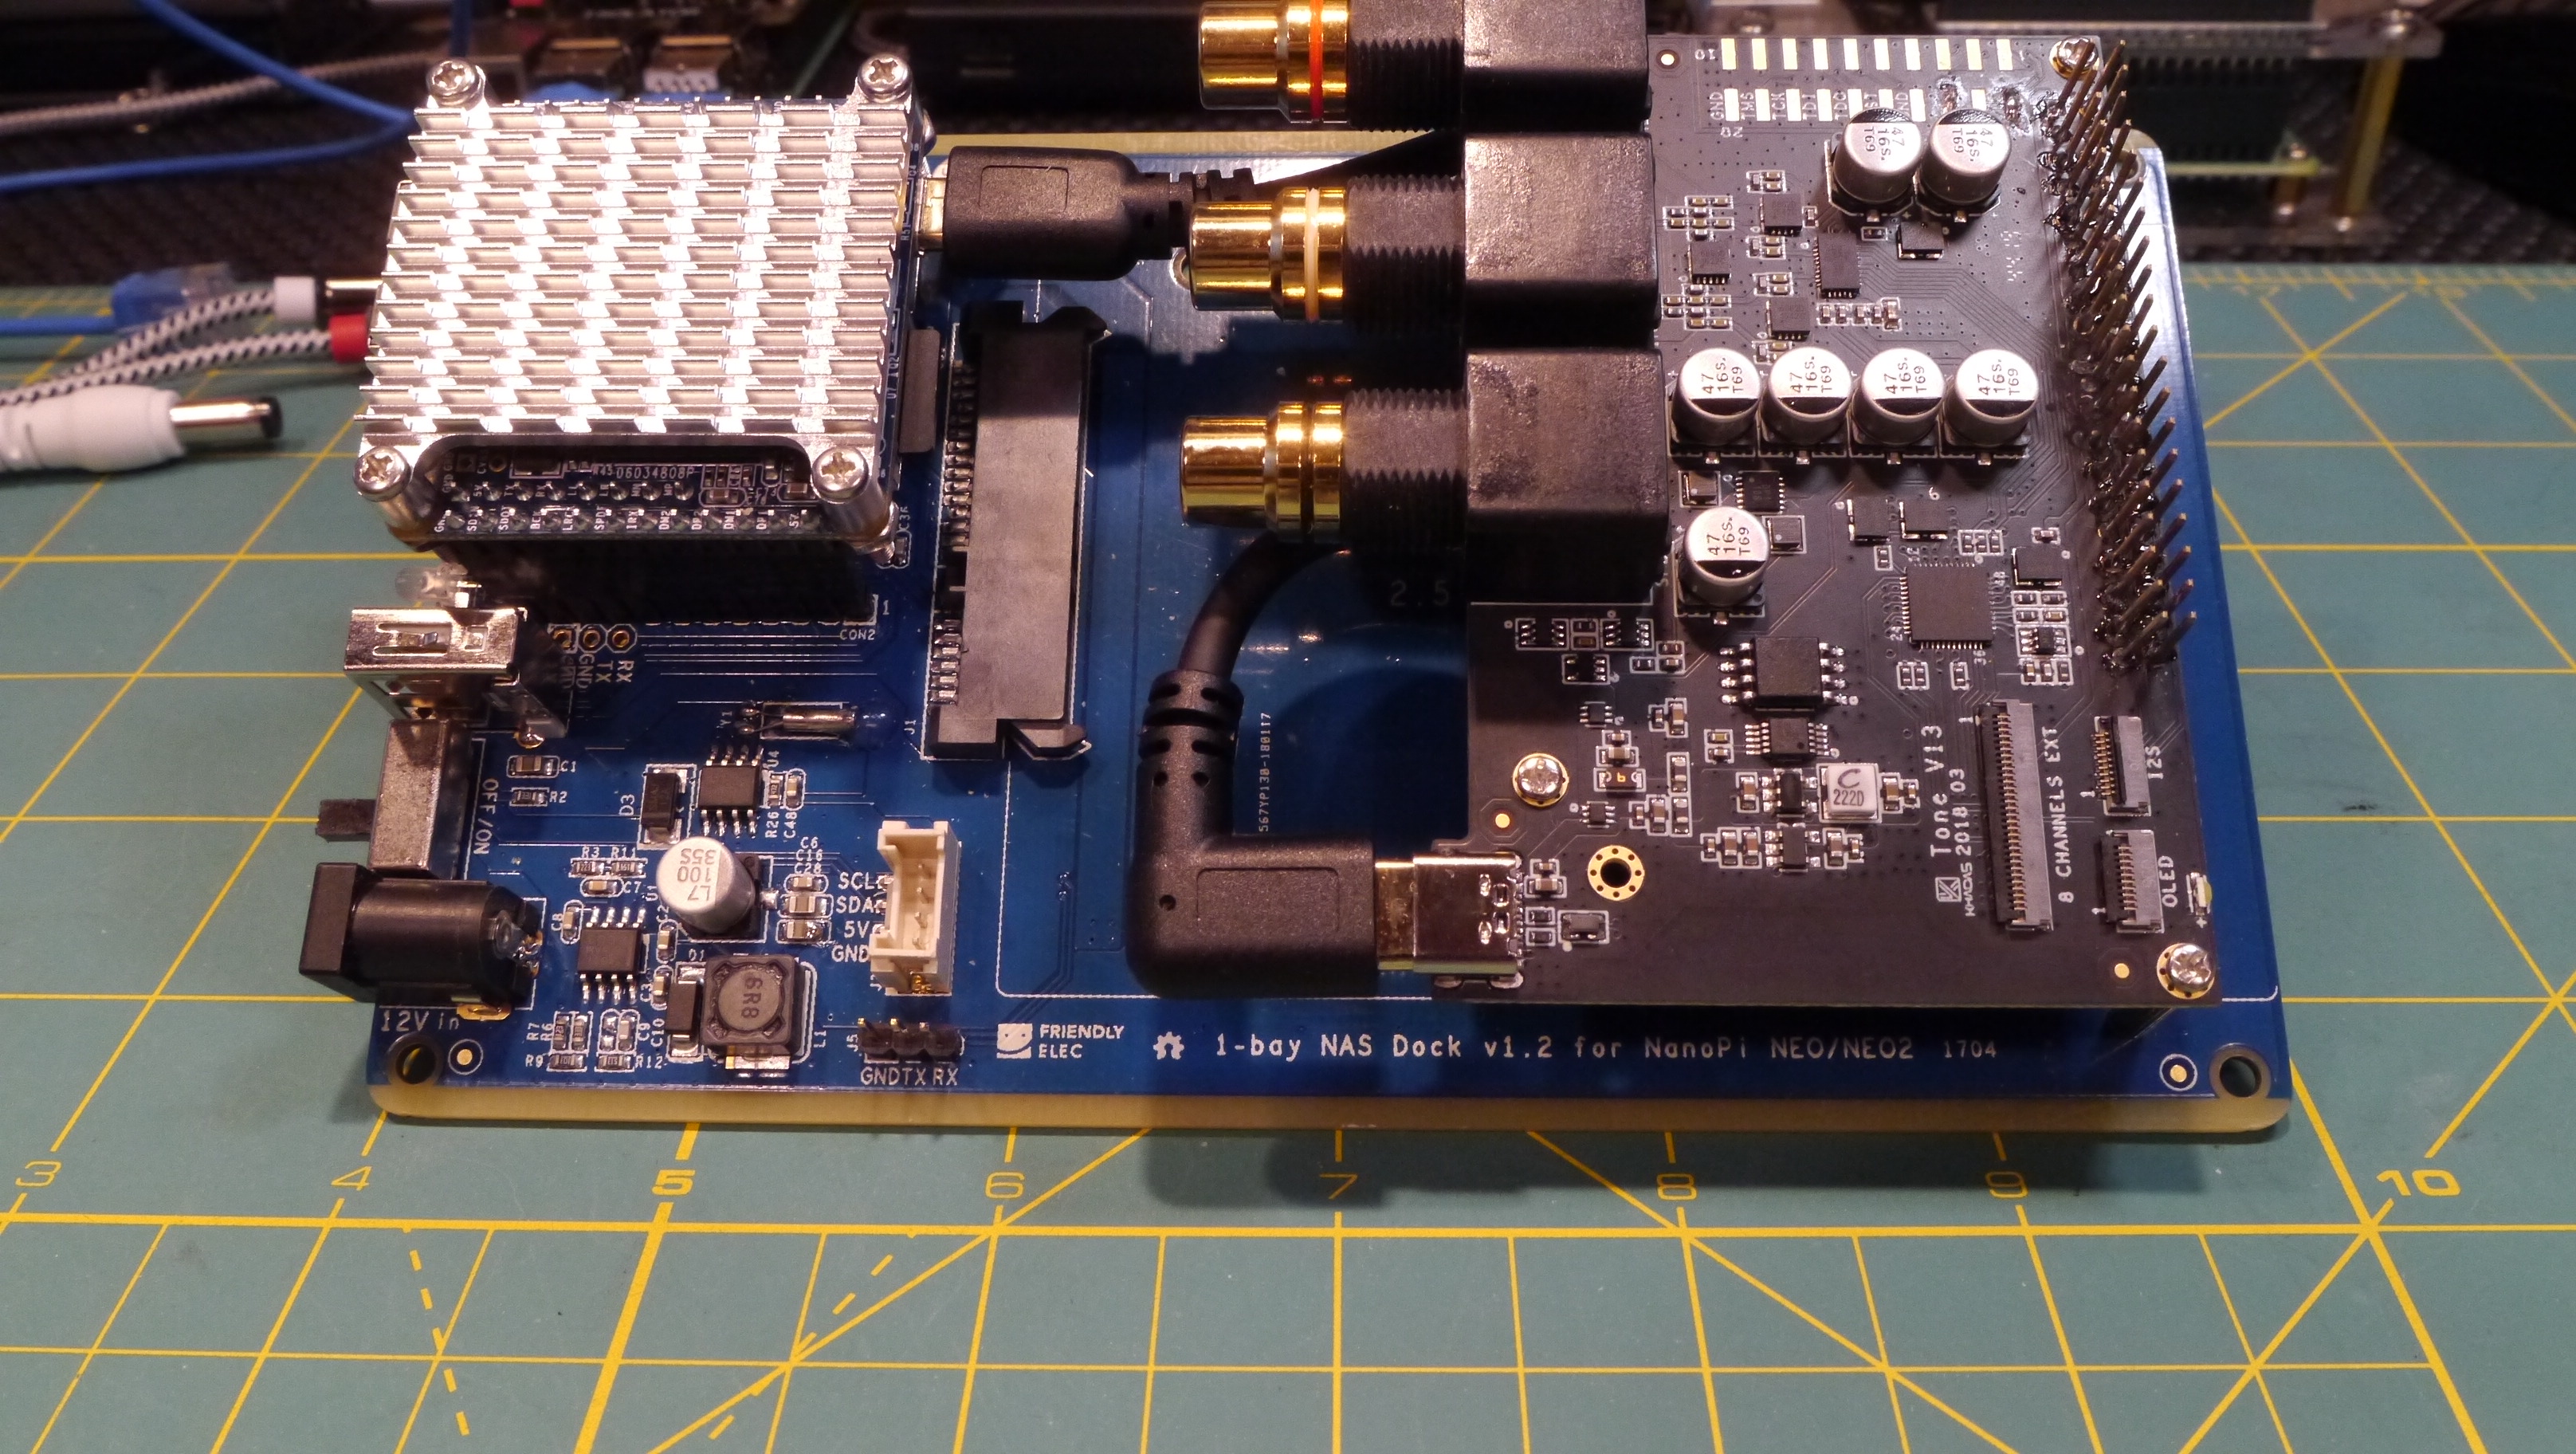
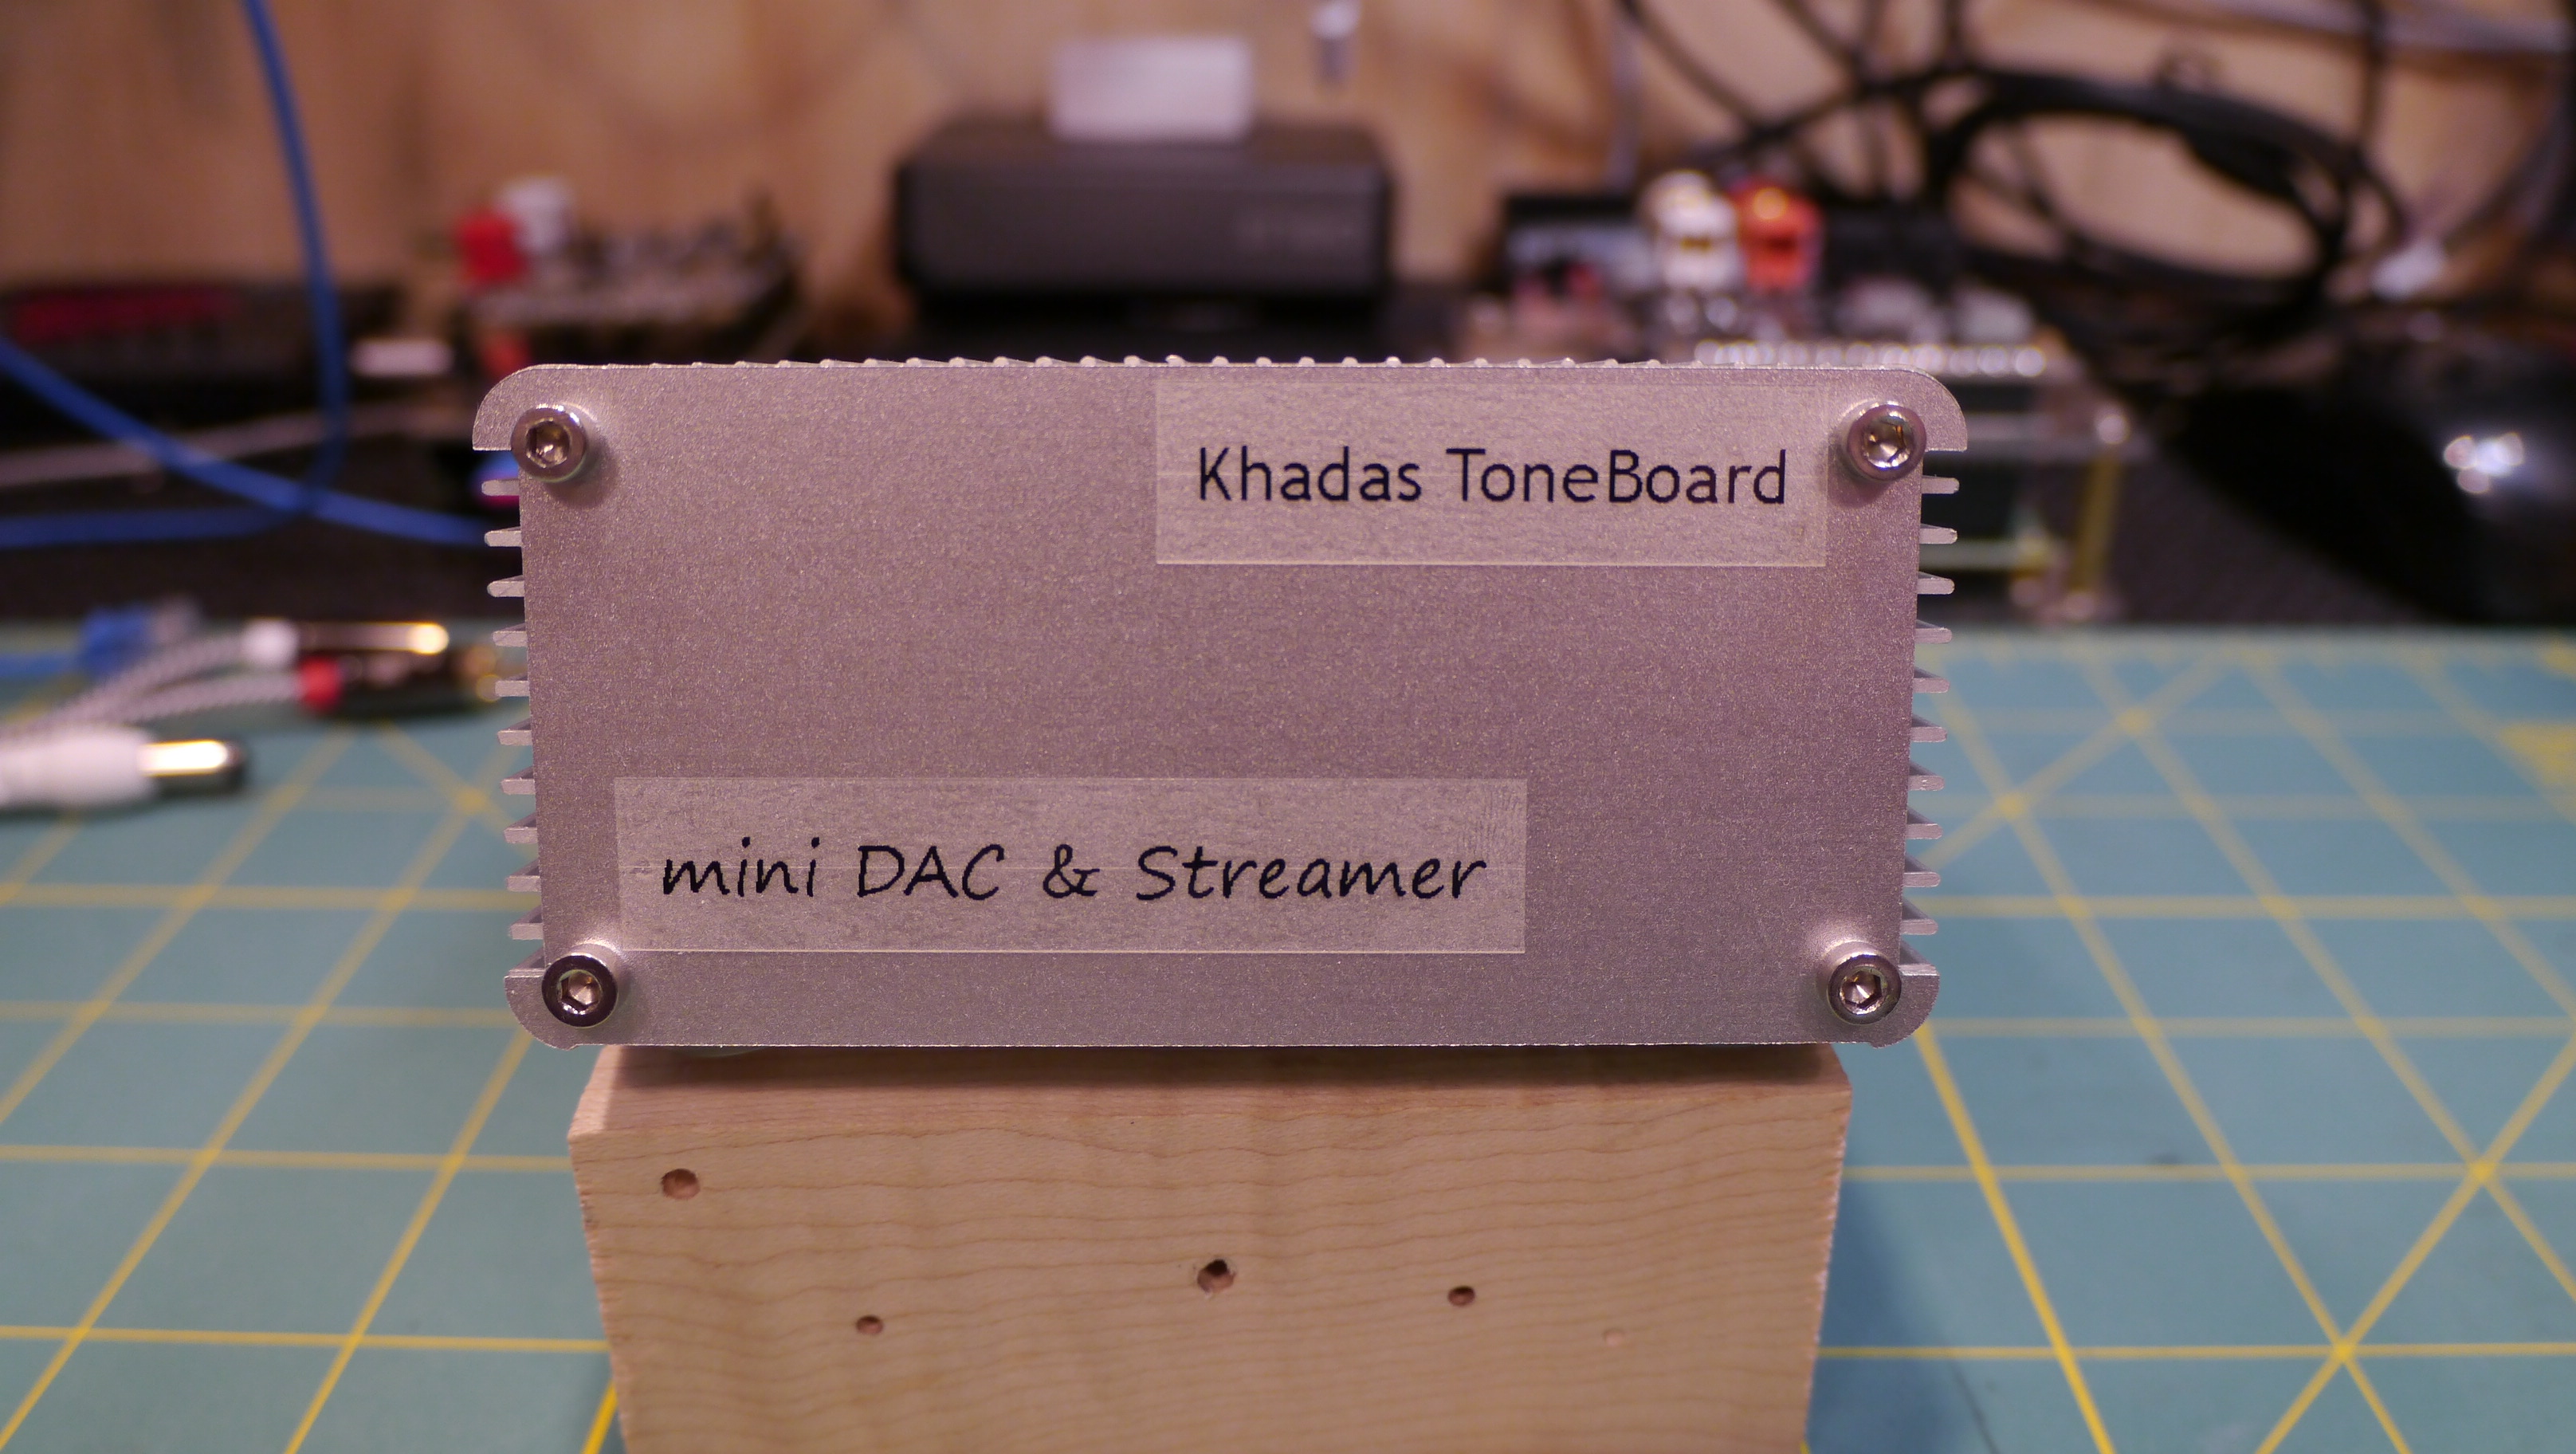
(1) For the DAC I chose a Toneboard (TB) from Khadas. This little DAC is based on the Sabre, ESS9038Q2M chip, and has been designed well, and provides excellent sound for only $99USD. It can be used as a stand-alone DAC with USB, or coaxial input. I’m using the ‘generic’ version, but I ended up soldering an extended 40-pin header to it as it was a prototype for using their SBC (VIM 2) - which I am not using at the moment. The 40-pin header is not needed for this project.
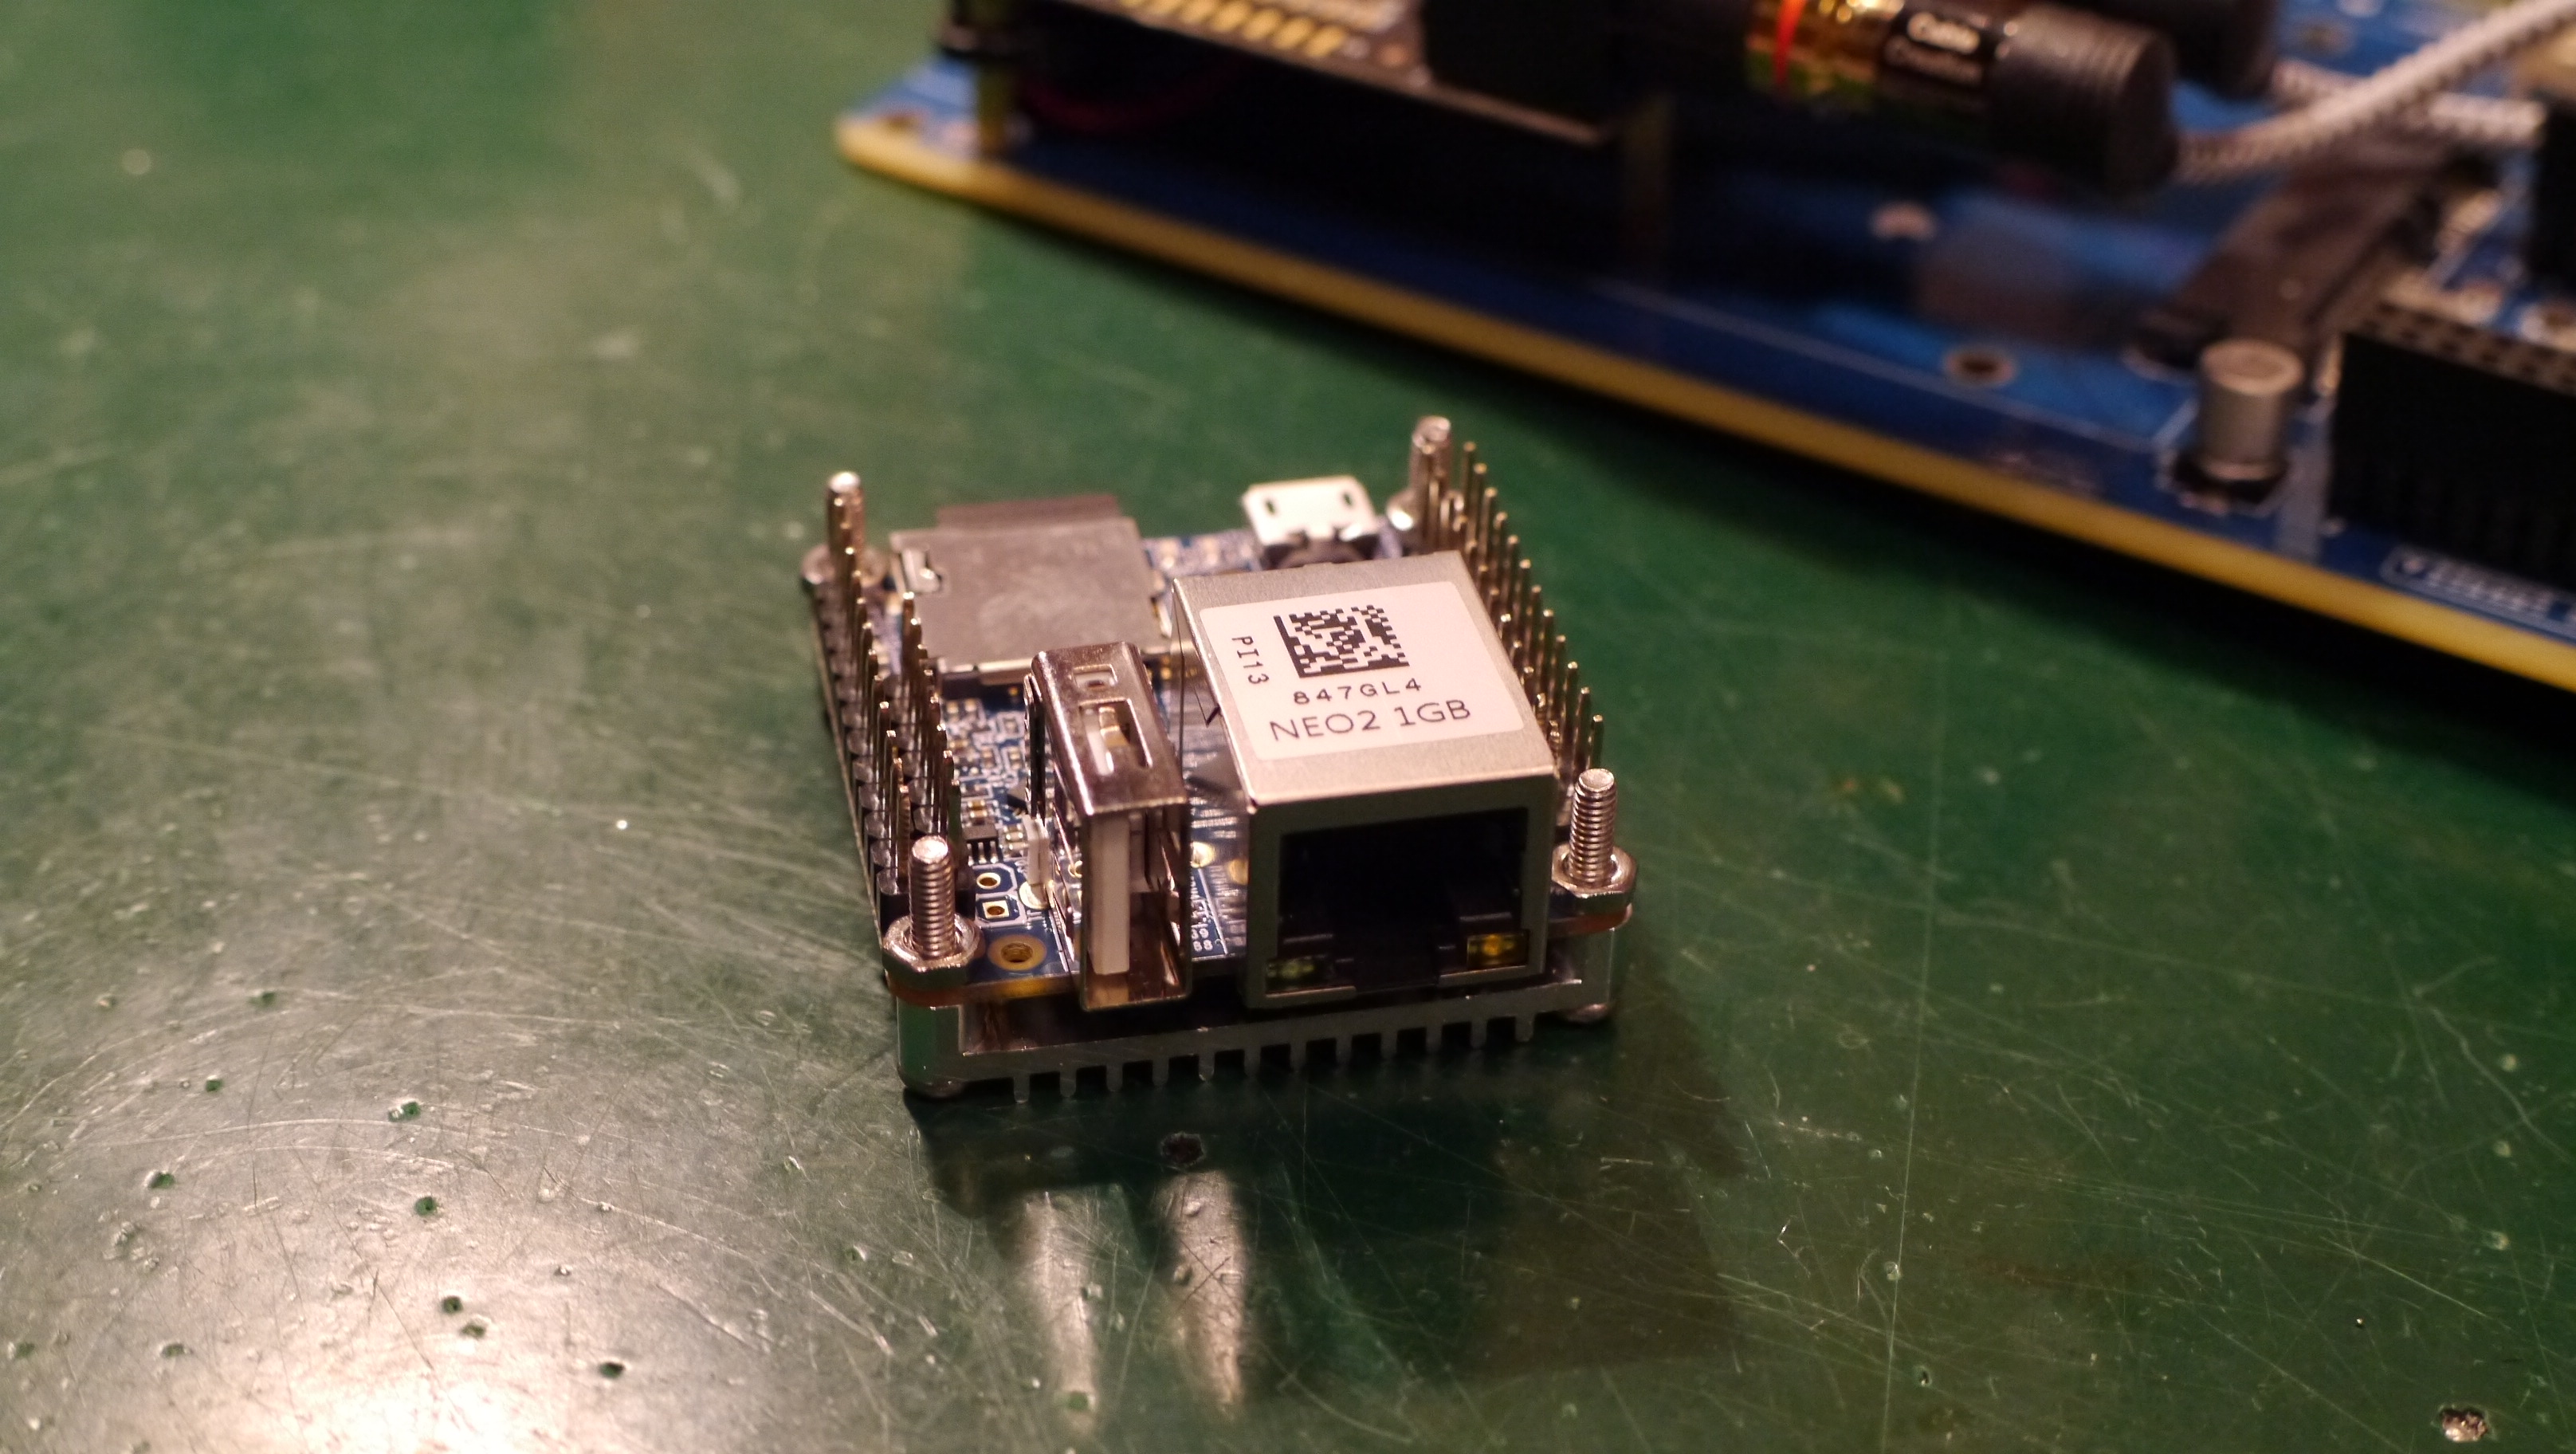
(2) As I wanted streaming capabilities, I need to pair the DAC with an SBC that had ethernet capability and USB. I could have used I2S, but opted not to for this streamer. Besides, the USB-in on the TB DAC uses the well-known XMOS chip so you’re getting a well-established interface from the get-go. The SBC I chose was the NanoPi NEO2. This little guy has a very small form-factor and works perfectly for this project. It has all the necessary elements required for streaming duty. The following link is to the newer ‘black’ version than the one I had (a couple years old), but is essentially the same PCB using Allwinner’s 64-bit H5 quad-core SoC (ARM Cortex-A53) SoC. The NanoPi Neo2 costs $20USD. More information can be found here;
As you can see from the web-page for the NEO2 there are a couple extra parts I used, and you may find them there to purchase along with the SBC.
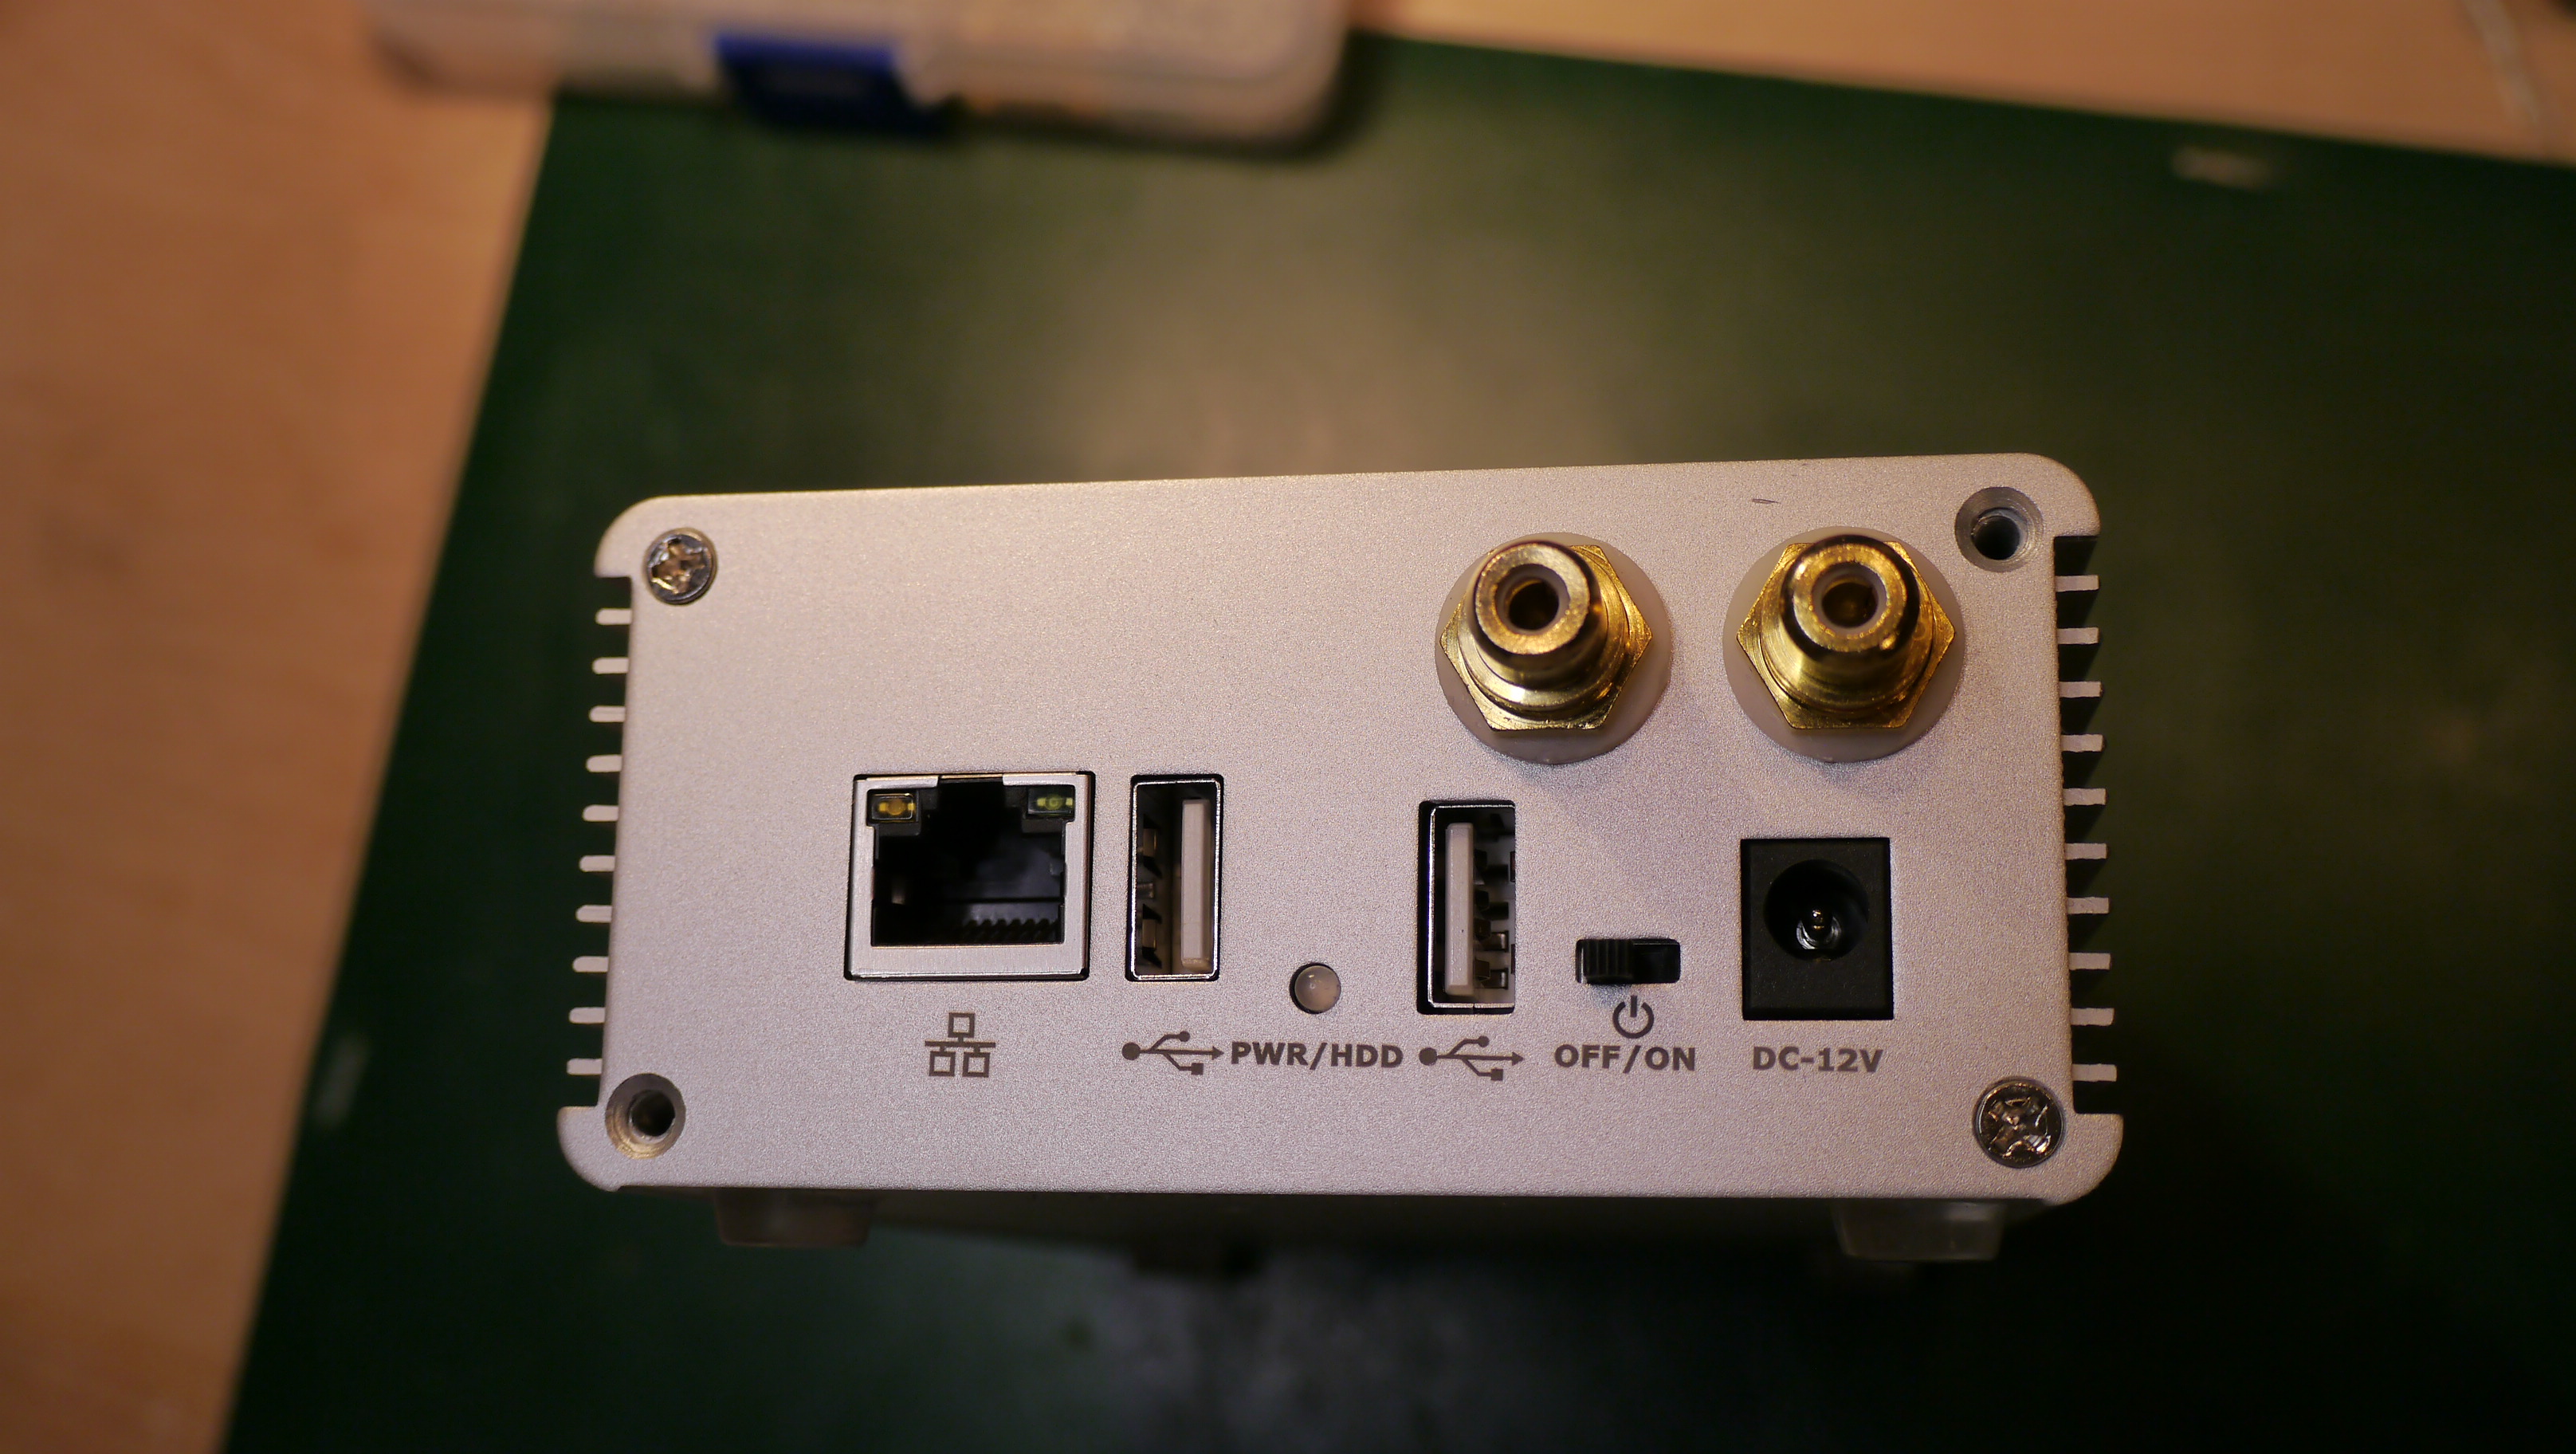
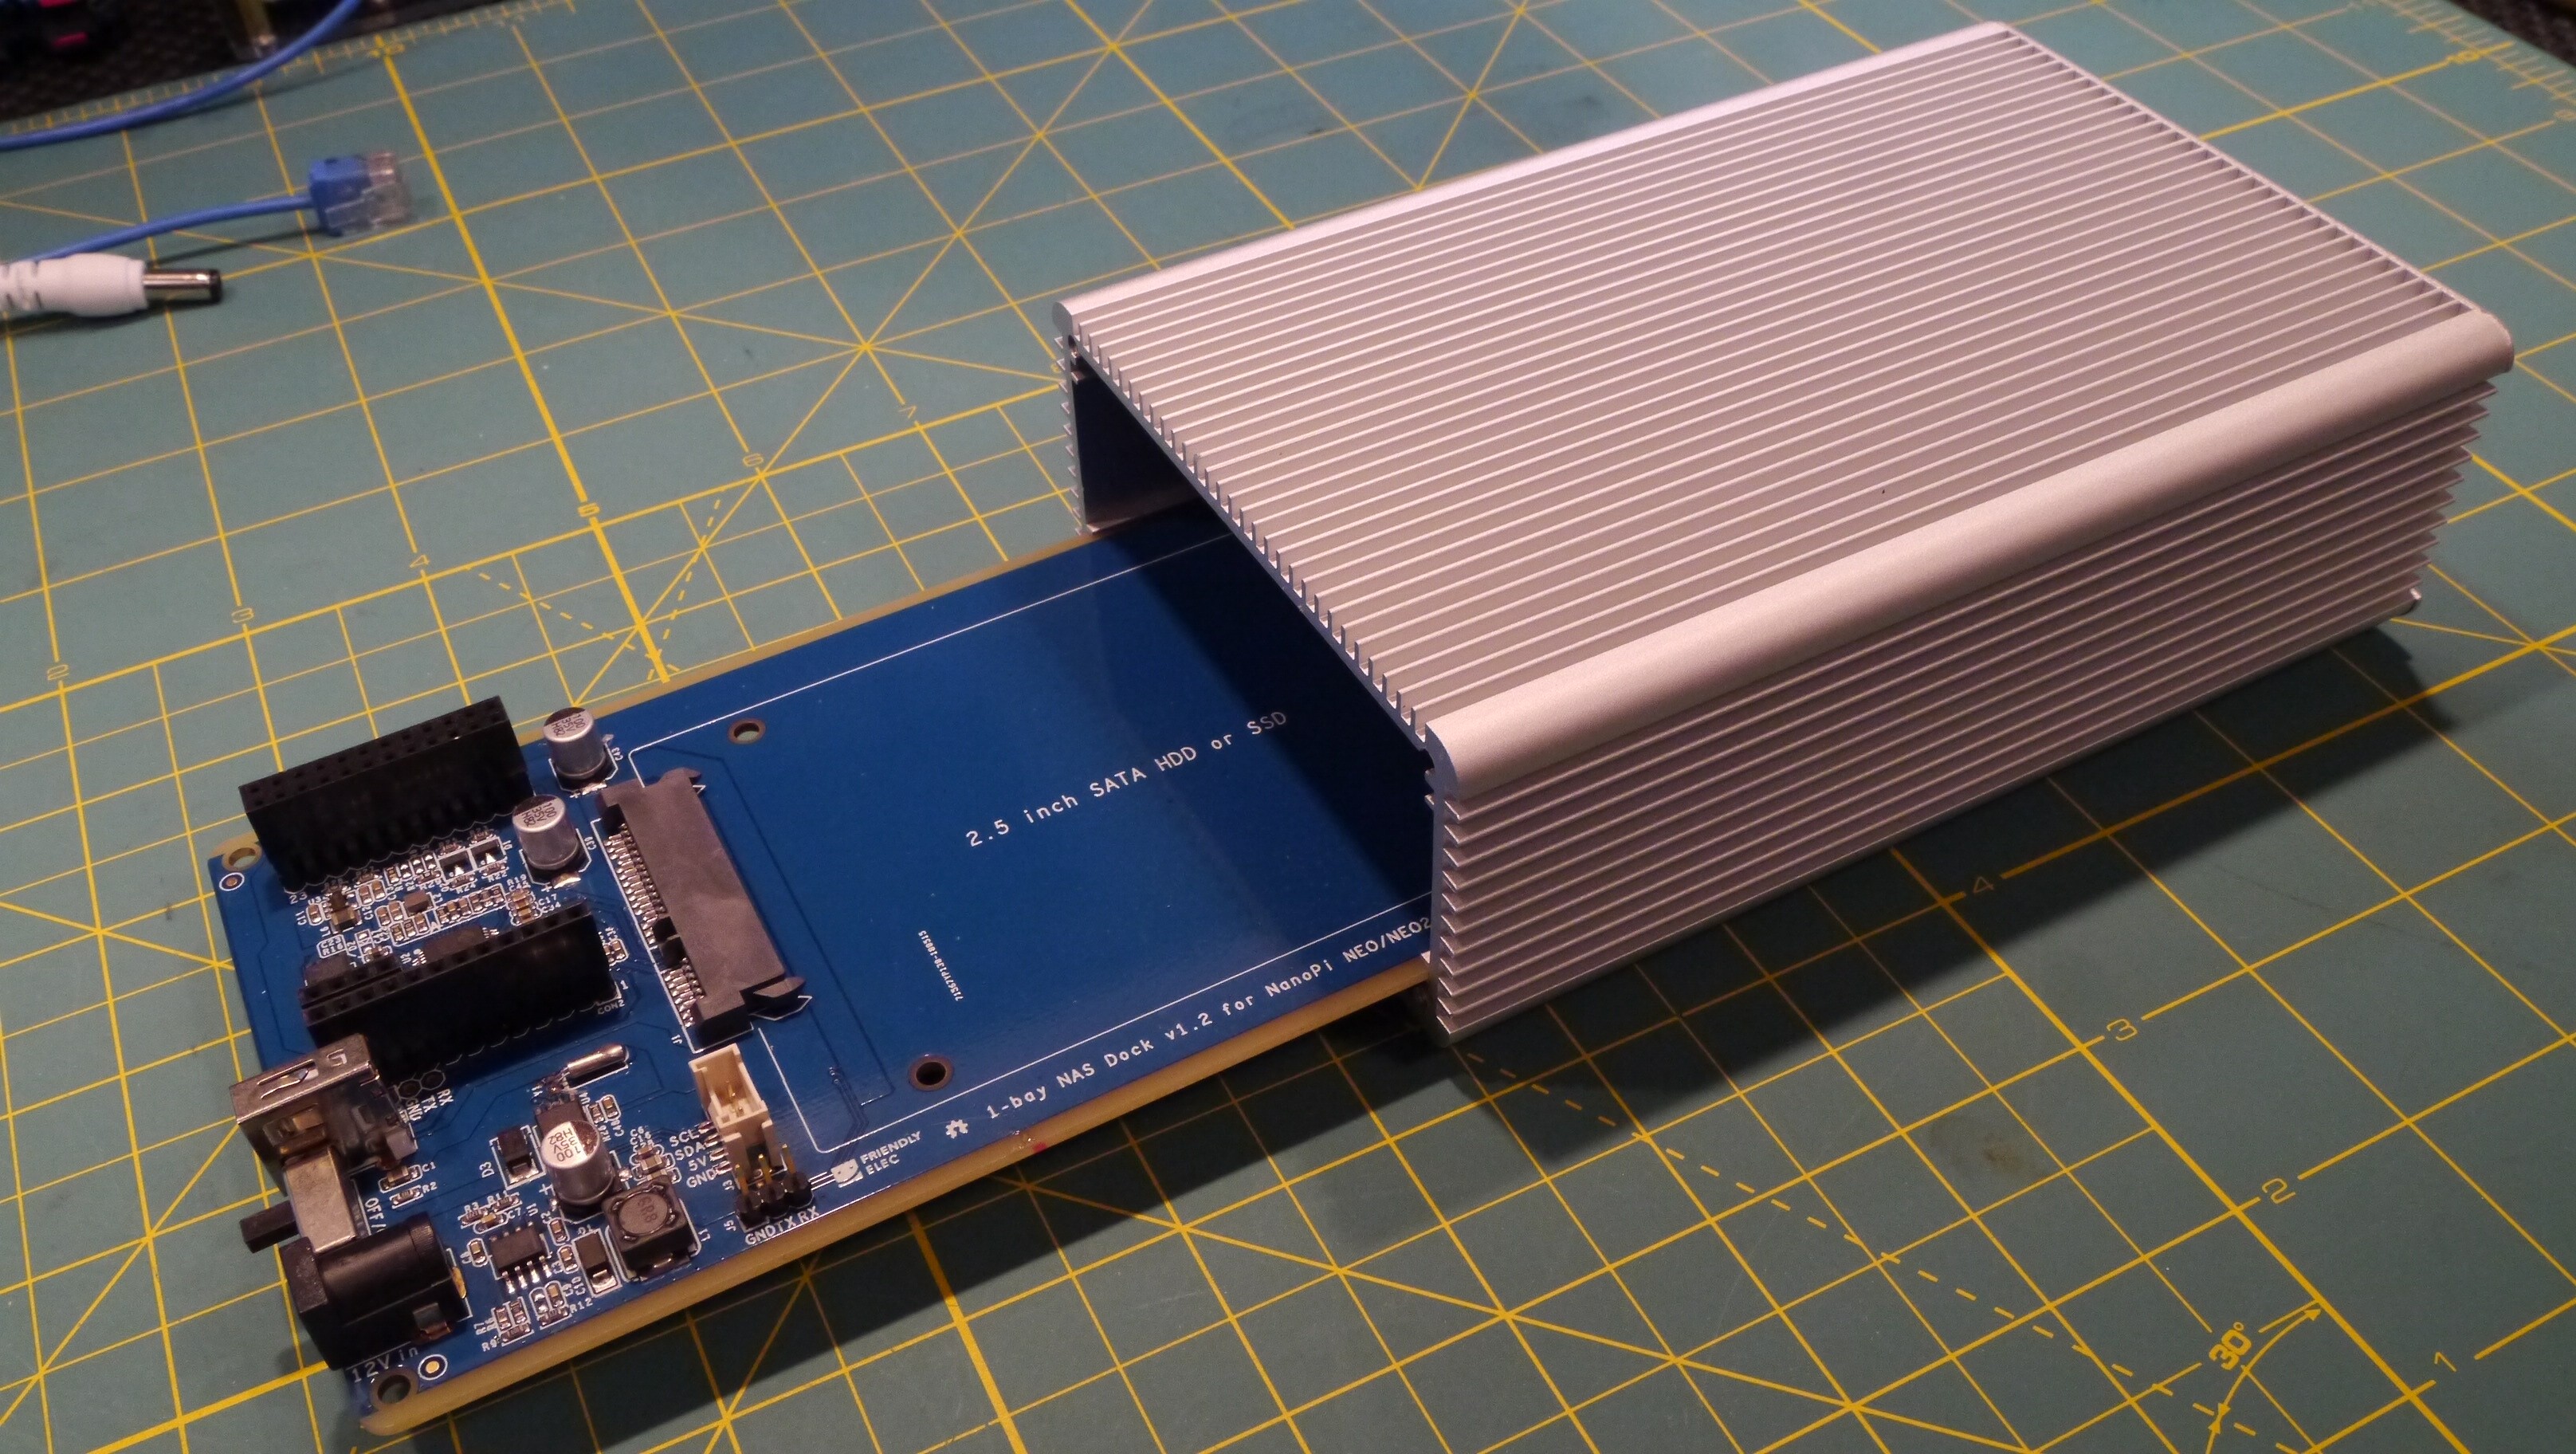
(3) Since I was going for a complete, single and fully self-contained unit, I needed a suitable and reasonably attractive looking enclosure that could house both the SBC and DAC, and still looking good sitting in a rack, or shelf. So, I had remembered a year or so ago, FriendlyELEC was having a sale on an enclosure that was designed for a single 2.5" hard drive NAS box, using the NEO2 SBC. At the time, I was intrigued enough to buy one as they were only $12USD for the PCB and aluminum case! Quite the bargain I thought. In addition, it was specifically deigned for the NEO2 form factor and connectors! Voila. I had a solution. Now if I could get everything to fit into the case, along with a minor amount of modding - necessary for the DAC and some RCA jacks on the back panel. You simply plug the NanoPi into the dock and you’re ready to go. You get a 12VDC power jack, an extra USB (2.0) port and an on/off switch. If you don’t have a suitable 12VDC PSU, you can purchase one for $10USD on their website. Here’s the link to the enclosure.
As of late Feb 2020, looks like they are still available on their site for $13USD each. A bargain even if you didn’t get the included electronics that turns into a little NAS box. But we’re not using it for that purpose. As I write this I’m testing a good 12VDC linear wall-wart from Jameco. This should help to improve the sound. I think it sounds better than an iFi PSU.
Software:
As I mentioned above, I chose to use roon as my digital streaming software. Actually, roon is a whole eco-system for digital streaming. However, with a little bit more effort and other software, you should be able to get any Linux version that runs Volumio, or Moode functioning as the MPD, if you setup a backend server like LMS (Logitech Media Server) to access a NAS library. I started out trying to get Volumio working with an LMS a couple years ago prior to discovering roon. It worked, but not reliably so I abandoned that approach. Now I use roon exclusively and have an Intel NUC running the server and end-points throughout my house. I will say roon is expensive at $600 now for a lifetime license/subscription. This offer may be going away at some point too. Now is the time to pop for it if you can. Here’s the link to everything roon.
The second piece of software we’ll be using is Dietpi. I discovered it a couple years ago, and if you like to play with SBCs and Linux, Dietpi is where all the action is. It’s free to use and allows the Linux noobie like me to configure just about any kind of software/application using a menu system! And, it’s available on just about every SoC SBC board on the market from Raspberry Pis to ARMs and other CPU based boards. Why is it important for this project? One of the options it provides is to turn your SBC into a roon end-point with about 3 keyboard strokes. Literally? It’s that easy, so that’s why I chose it for this ARM SBC end-point. I believe this is the correct/latest version of DietPi for the SBC (Cortex A35).
[DietPi]
Attached below are some pictures of my build at various stages.