Here’s some information on how I put together a Roon Bridge for my Home Theater System. It was a fun little DIY project and I’m happy with the results. Hopefully others will find this write-up helpful.
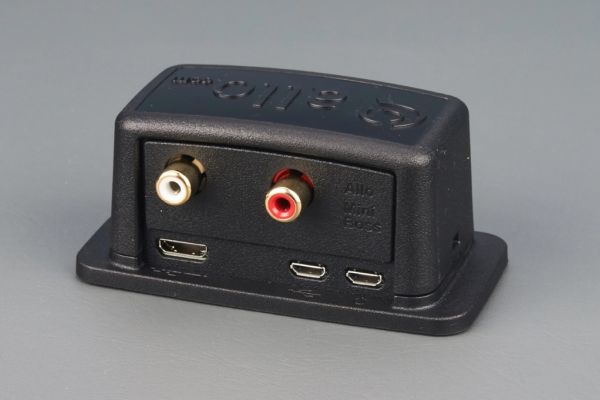
I wanted a small device that I could tuck away behind my AV Receiver. I decided to go with a Pi Zero 2 W and the miniBOSS DAC Hat from Allo. I also found this nifty little case that was purpose built to house them:
Not everything needed to purchased “brand new” for this project. I had an unused Chromecast Ultra power supply that could perform double-duty: Micro USB power and 100Mbps ethernet. In my ocean of spare cables I found a short pair of RCA from JDS Labs. Finally, I chose a random 32GB microSD card from the junk drawer in my computer desk. (I wouldn’t go less than 16GB for this purpose.)
Parts List:
- Raspberry Pi Zero 2 W
- Allo miniBOSS for RPI Zero
- UniPiCase Zero - Allo miniBOSS
- Chromecast Ultra Ethernet Adapter
- JDS Labs RCA Stack Cables
- SanDisk Ultra 32GB microSDHC
First things first, we need to get everything assembled.
NOTE: None of the US resellers for the Pi Zero 2 W offer a model with headers pre-installed, so you’ll need to handle this. If you’ve never soldered before, this is not the worst project to learn on. There are plenty of tutorial videos on YouTube, even one from Raspberry Pi Foundation itself. If you’re dead set against it… you can use Hammer Headers and an Installation Jig.
Use the standoffs and bolts included with the miniBOSS DAC HAT and attach it to the Pi Zero 2 W. (Don’t bother putting it in the case for now, as it prevents easy access to the microSD card.) Speaking of which, now is a good time to prep the card.
NOTE: I’m going to run this setup “headless” (no display or peripherals) and connect to the Pi through SSH. That influences some choices I make when setting up the card. I’m also choosing to run 64-bit because the Pi Zero 2 W supports it and I wanted to see if would run Roon Bridge armv8.
Writing image to the microSD card:
- Download and install the Raspberry Pi Imager.
- Connect your microSD card through your favorite method and launch the Raspberry Pi Imager.
- Click the “CHOOSE OS” button. Under the “Raspberry Pi OS (other)” section, select “Raspberry Pi OS Lite (64-bit)”
- Click the “CHOOSE STORAGE” button and select the device that corresponds to your microSD card.
- Click the Gear Icon in the lower right-hand corner. IMPORTANT!
- Select the check box for “Enable SSH”.
- Set the password for the pi user and click the “SAVE” button.
- Click the “WRITE” button and follow the prompts to finish writing the image.
Now let’s get the Pi connected to the network and powered on:
- Make sure your microSD card is loaded into the Pi.
- Plug an ethernet cable into the Chromecast Ultra adapter, connect the other end to an available port on your LAN.
- Plug the Chromecast Ultra adapter into a power outlet.
- Plug the Micro USB cable from the Chromecast Ultra adapter in the Pi. (Make sure it’s NOT the port closest to the end. IMPORTANT!)
Now you need to find the IP Address of your Pi on the network. There are a couple ways to go about this:
- By default the hostname your Pi should be “raspberrypi.local”. Try pinging this and see if it comes back with an IP.
- Login to your router. Most have a way to show all the currently connected hosts.
Once you got the IP Address, let’s get connected through SSH and finish the setup.
First, we need to edit the /boot/config.txt file. This will allow us to enable the miniBOSS DAC Hat and disable some things we don’t need. (Well, I don’t need them.) Bluetooth, WiFi and HDMI audio are getting switched off. Below is a snippet of the file with the changes I made:
...
# Enable audio (loads snd_bcm2835)
dtparam=audio=off
dtoverlay=allo-boss-dac-pcm512x-audio

# Disable Bluetooth/WiFi
dtoverlay=disable-bt
dtoverlay=disable-wifi

# Automatically load overlays for detected cameras
camera_auto_detect=1

# Automatically load overlays for detected DSI displays
display_auto_detect=1

# Enable DRM VC4 V3D driver
dtoverlay=vc4-kms-v3d,audio=off
max_framebuffers=2
...
Now reboot the Pi (sudo reboot -r now) and get reconnected through SSH. Let’s see if our miniBOSS DAC Hat is working:
pi@raspberrypi:~ $ aplay --list-devices
**** List of PLAYBACK Hardware Devices ****
card 0: BossDAC [BossDAC], device 0: Boss DAC HiFi [Master] pcm512x-hifi-0 [Boss DAC HiFi [Master] pcm512x-hifi-0]
  Subdevices: 1/1
  Subdevice #0: subdevice #0
Fantastic! ALSA has detected our DAC. Now let’s get the necessary software installed by running the following commands:
sudo apt update && sudo apt upgrade -y
wget https://download.roonlabs.net/builds/roonbridge-installer-linuxarmv8.sh
chmod +x roonbridge-installer-linuxarmv8.sh
sudo ./roonbridge-installer-linuxarmv8.sh
And that should be it. Let’s check the status of our new Roon Bridge:
pi@raspberrypi:~ $ systemctl status roonbridge
● roonbridge.service - RoonBridge
     Loaded: loaded (/etc/systemd/system/roonbridge.service; enabled; vendor preset: enabled)
     Active: active (running) since Sat 2022-06-11 21:28:26 EDT; 23h ago
   Main PID: 567 (start.sh)
      Tasks: 30 (limit: 191)
        CPU: 4min 59.349s
     CGroup: /system.slice/roonbridge.service
             ├─567 /bin/sh /opt/RoonBridge/start.sh
             ├─571 RoonBridge --debug --gc=sgen --server RoonBridge.exe
             ├─584 RoonBridgeHelper --debug --gc=sgen --server RoonBridgeHelper.exe
             ├─590 /opt/RoonBridge/Bridge/processreaper 584
             └─595 RAATServer --debug --gc=sgen --server RAATServer.exe
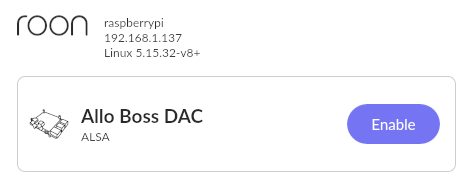
Now you can shutdown the Pi (sudo shutdown -h now) and disconnect the power. Install your completed Roon Bridge into it’s new case and hook it up to your amplifier. Reconnect the power and in a few minutes you should see it available in Roon: