Check out the thingyverse
Anyone looking for a cheap way to go wired… I had a power adapter from an old Chromecast Ultra that includes 10/100 ethernet. Works right out of the box with the Pi Zero 2.
Sorry, I don’t understand; how are you connecting the Chromecast to the Pi Zero 2??
It’s the power adapter from an old Chromecast Ultra. It has a built-in OTG ethernet adapter.
1 Like
That’s actually a great idea as I have a couple of those around the house 
I imagine this works too, but I’ve not tried it. I have my first Pi Zero 2 arriving in a week or two, so I’ll give it a go since I have a few of these kicking around.
1 Like
Hi Neil,
Would you mind pointing me in the right direction to find the instructions to replicate what you have done please.
I’m currently running a hifime UDA38Pro Dac on a Pi3B+ dietPi Roon endpoint.
I use this to stream TIDAL and the SQ is really nice.
I found a really nice case for a Pi Zero and would like to swap over to that hardware and I also didn’t realize there was a way to enable airplay which would be perfect for Podcasts.
I have some computer skills but I’m no expert when it comes to Linux.
If you could point me to a resource to help build the image - enable the DAC and enable Airplay I would be quite thankful.
Regards
Mark
OK, lets see if I can create a little guide for setting up a Raspberry Pi Zero 2 as a Roon & Airplay endpoint from scratch using just Raspberry PI OS. For this guide I’m going to assume you are never going to connect the Raspberry Pi directly to a monitor.
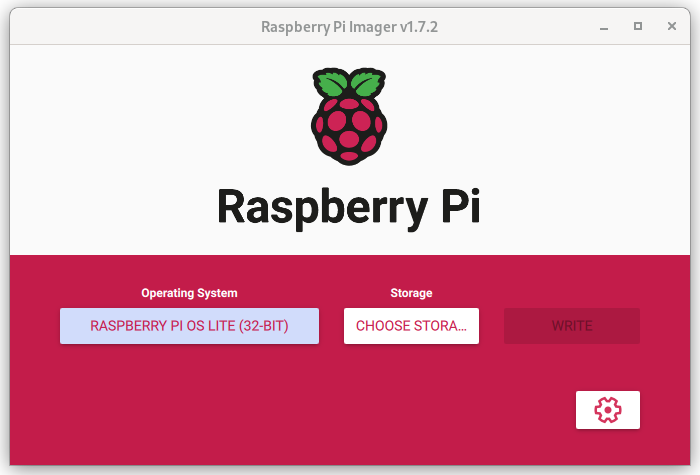
First of all download the Raspberry PI Imager from Raspberry Pi OS – Raspberry Pi as we’ll be using this to prepare the Micro SD Card for the Raspberry Pi.
Run the imager and then press ‘Choose OS’ and then select ‘Raspberry Pi OS (Other)’ and then ‘Raspberry Pi OS Lite (32-bit)’. We don’t need a graphical interface on the Raspberry Pi.
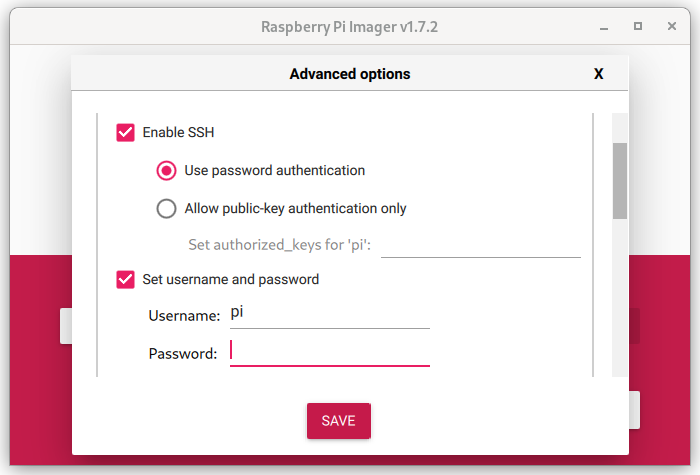
Then you need to press the ‘setup’ icon (looks like a gear). This will then let us setup the Wifi on the Raspberry Pi. Check the ‘Set Hostname’ option and enter a name. This is the name the Raspberry Pi will appear as on your network. Then check the ‘Enable SSH’ checkbox and then select ‘Use password authentication’. You can use a public-key, but that’s more complicated and a bit beyond what I want to document here. Selecting SSH will automatically enable the ‘Set username and password’ option so you will need to enter a username and password.

Now you can configure the Wifi. In the same advanced options page of the Imager software you can select ‘Configure wireless LAN’ and from here enter the name of your Wifi network and the password needed to connect.
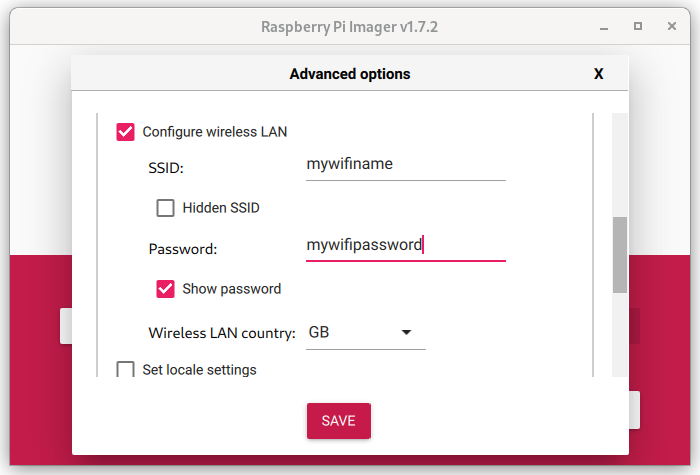
Finally press the ‘Save’ button to return the main screen of the Imager software. Carry on to select the Micro SD card to write the image to (using the storage button) and finally press the ‘Write’ button to create the image.
Now put the SD card in the Raspberry Pi, connect your USB DAC and power the Pi on. Give it a few minutes to startup and connect to your Wifi.
We’re going to connect to the Raspberry Pi using SSH. If your PC runs Windows I recommend using PuTTY and that’s what I’m going to use here. Install and run PuTTY and you will be presented with the initial connection dialog.
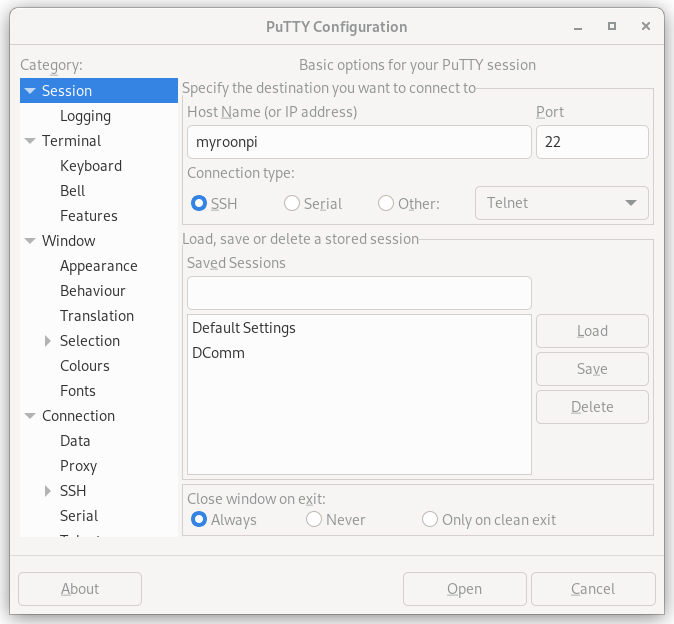
In the ‘Host Name’ box enter the name you gave to your Raspberry Pi earlier when creating the SD card and then press the ‘Open’ button. Hopefully this will find your Raspberry Pi and connect to it. When connecting for the first time you will see a ‘PuTTY Security Alert’ appear. This is just PuTTY telling you that you are connecting to a device you’ve never connected to before and asking whether you want to trust it. Press the ‘Accept’ button to carry on connecting.
You will then need to login with the username and password you created when creating the SD card.
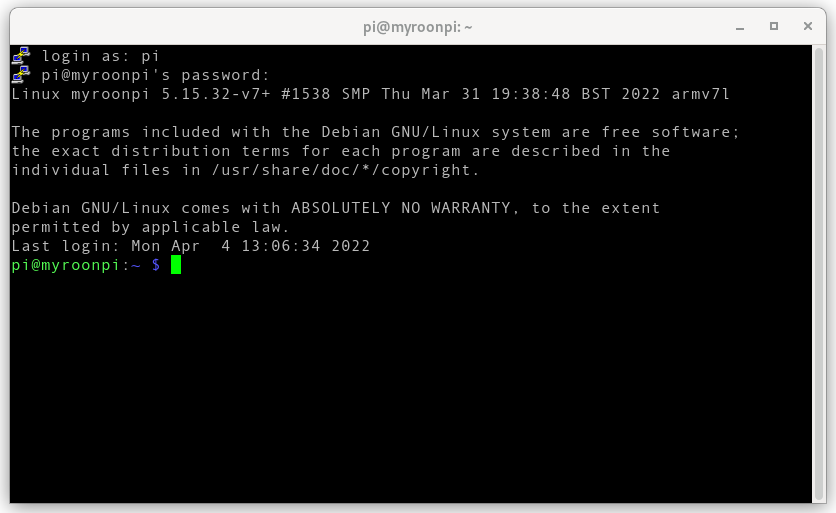
Now you are connected to your Raspberry Pi and are ready to install the software you need to have Roon and Airplay support. First step is to make sure everything is up-to-date on the Raspberry Pi. You’ll need to copy and paste the commands below.
sudo apt update
sudo apt upgrade -y
These two commands tell the Pi to update it’s list of updates and then to upgrade everything to the latest version. This may take a while, so just be patient will it completes.
This next step is optional, but recommended. By default the Raspberry Pi will not be able to use all the space available on the SD card you have booted it from. You can make it able to access all the available space by typing the following commands.
sudo raspi-config --expand-rootfs
sudo reboot
The Raspberry Pi will reboot, so wait a few minutes and connect to it using PuTTY again.
Next you will want to ensure that the Wifi on the Raspberry Pi does not go into power saving mode so it’s always ready to have music streamed to it.
sudo systemctl --full --force edit wifi_powersave@.service
This will open the ‘nano’ text editor. Paste in the following:
[Unit]
Description=Set WiFi power save %i
After=sys-subsystem-net-devices-wlan0.device

[Service]
Type=oneshot
RemainAfterExit=yes
ExecStart=/sbin/iw dev wlan0 set power_save %i

[Install]
WantedBy=sys-subsystem-net-devices-wlan0.device
And then press CTRL+X and type ‘Y’ and press ENTER to save and exit. Now type:
sudo systemctl enable wifi_powersave@off.service
sudo systemctl disable wifi_powersave@on.service
sudo reboot
Now the Raspberry Pi will reboot again so you will need to connect to it again. But this time the power saving on the Wifi will be disabled. You can check this by using the following command.
iw wlan0 get power_save
If should respond with the message ‘Power save: off’.
Once that has been done you can now start installing the software we need. We’ll start by installing RoonBridge.
Download and install RoonBridge using the following commands on the Raspberry Pi.
wget https://download.roonlabs.net/builds/roonbridge-installer-linuxarmv7hf.sh
chmod +x roonbridge-installer-linuxarmv7hf.sh
sudo ./roonbridge-installer-linuxarmv7hf.sh
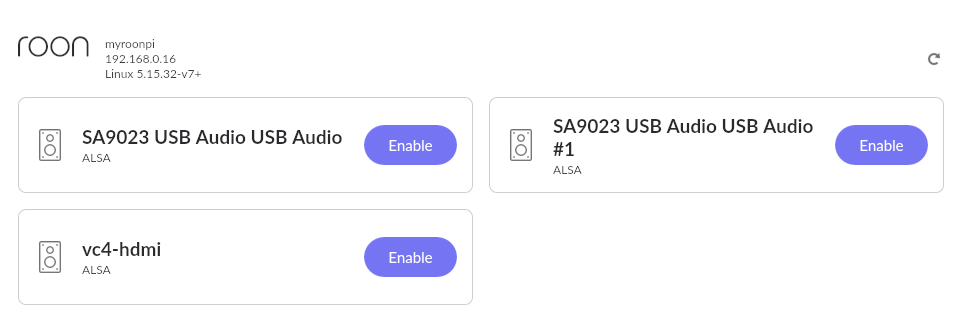
And follow the prompts shown on the screen. You will now turned your Raspberry Pi into a Roon Endpoint and you can add it using the settings in Roon.
Next you can enable Airplay on the Raspberry Pi. This is more tricky than setting it up as a Roon Endpoint as you need to manually edit some a configuration file on the Raspberry Pi.
First step is to get a few things that Airplay support depends on.
sudo apt install --no-install-recommends build-essential git xmltoman autoconf automake libtool \
libpopt-dev libconfig-dev libasound2-dev avahi-daemon libavahi-client-dev libssl-dev libsoxr-dev
We are going to install an application called shairport-sync to get Airplay support. These instructions are all taken from the Github page for shairport-sync - GitHub - mikebrady/shairport-sync: AirPlay audio player. Shairport Sync adds multi-room capability with Audio Synchronisation
git clone https://github.com/mikebrady/shairport-sync.git
cd shairport-sync
autoreconf -fi
./configure --sysconfdir=/etc --with-alsa --with-soxr --with-avahi --with-ssl=openssl --with-systemd
make
sudo make install
Now you need to find the name of your USB sound card. Thankfully shairport-sync can tell us the names, just type:
shairport-sync --help
It will display quite a bit of information but the bit we want is right at the end.
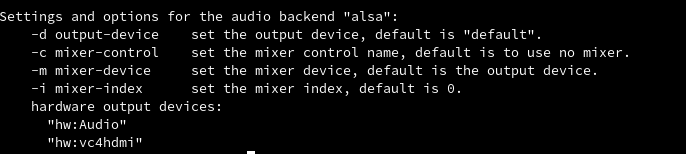
My HifiMe USB DAC is identified as ‘hw:Audio’, yours may be something different. Just make a note of the name.
Now type:
sudo nano /etc/shairport-sync.conf
Use the cursor keys to move down until you find the bit that says ‘alsa=’ and change the settings
alsa =
{
//    output_device = "default";
//    mixer_control = "PCM";
To be
alsa =
{
    output_device = "hw:Audio"
    mixer_device = "PCM"
Note I have used the name of the USB sound card found earlier for the output_device. The mixer_device is to control volume through the hardware volume control on the USB sound card. For my HifiMe DAC, it just uses the default name of ‘PCM’.
Now just press CTRL+X then type Y and press enter to save your changes.
Finally type:
sudo systemctl enable shairport-sync.service
sudo systemctl start shairport-sync.service
You should have now enabled Airplay support on your Raspberry Pi. It will show up using the same name as you used to connect to it on your network. Enjoy!
Hi Neil,
Thank you for such a comprehensive response - I appreciate the time you have generously committed to assisting another music lover navigate through the complexity of the technology.
I’m not sure if the HiFime DAC you mentioned in one of your posts is your only DAC?
I have a couple of DACs and the UDA38pro is one of the best I have tried with an analogue output to date (to my old ears)
I also have a HiFime UDP320 DAC which has a digital amplifier output stage.
I would encourage you to try and find a UDP320 to audition.
I have two AEON Australian made amplifiers - one for each channel and a pair of Australian Whatmough 303 speakers streaming Tidal Masters through a wireless pi 3 model 3+ endpoint running Dietpi.
The reason for describing my setup is to say this is a modest system by modern standards but as a boy of the 60’s and having had various setups over the years that this is the most rewarding sound I have been able to afford to date.
Tidal has been a total game changer for me as have the DACs.
But - with the arrival of the UDP320 I can replace the mono blocks with the UDP and go straight to the same speakers and I’m struggling to accept how clean and engaging the sound is at reference volume.
With a little pi - the UDP320 and a the right speakers this makes a very accessible system for any budding music enthusiast.
Anyway - that’s my two bobs worth.
Thanks again
Mark