I’d been very pleased with my Allo DigiOne, it was providing a solid low jitter feed to an Auralic Vega at my girlfriend’s place, enabling use of the Exact clock without a hiccup. But it had a tendency to crash if left on indefinitely. A number of other users had the same issue and Allo tracked it down to a DC choke creating a static electricity vulnerability.
Allo offered to exchange boards but also provided a picture of the board identifying the component (see the DigiOne thread in Audio Products) and brief instructions to enable those who wanted to replace it with two 0 resistors or some wire jumpers.
Well how hard could that be ? I had a magnifying light with third hand clips, a variable voltage iron, a flux pen, solder and wick. So on New Year’s Day I watched a few YouTube videos on desoldering surface mount components and got to work.
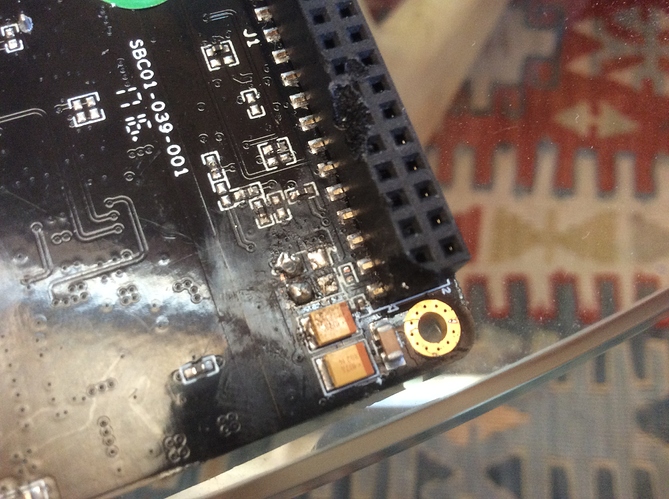
After farnarkling round unsuccessfully with bits of wire etc. I chipped the choke off with a screwdriver and cleaned up the pads with flux and some fresh solder. This wasn’t so hard. I got the first length of wire jumper connected and felt quite pleased with myself. Then I noticed that the handy black thing that I’d braced the soldering iron on … wasn’t just a handy black thing:
Allo have kindly maintained their offer to exchange, notwithstanding my amateur efforts. Replacement board arriving soon.
