Edit: in this post, I’m assuming that you have an internal SSD drive in the NUC that you’re using for ROCK and you want to backup your music files to an external USB drive. Others above have described how to backup your Roon database to an attached thumb or USB drive.
Unfortunately, there’s no way to tell Roon OS to “sync” the music files that you have on an internal SATA SSD to an external USB drive. And, there’s no SSH access for you to login and run rsync to do a backup manually.
However, if you have another computer on the same 1 Gbps LAN as your NUC, you can use the SMB protocol to mount the Data share on the NUC to that computer. Once mounted, you’ll find the internal storage and any connected USB drives mapped as subdirs under Data/Storage. For example, the internal SSD will show up as Data/Storage/InternalStorage.
If your computer is running macOS or Linux, you already have rsync installed. You’ll be able to run a backup manually using a command-line like this on macOS:
$ cd /Volumes/Data/Storage
$ rsync -avi --progress --stats InternalStorage/. LABEL-OF-EXTERNAL-USB-STORAGE/.
Of course, you’ll have to replace “LABEL-OF-EXTERNAL-USB-STORAGE” with the actual subdir where your external USB drive is mapped. For example, mine looks something like this: 1_42_6-4458_WD_Elements_1023_575843314137303233353239_eed00ec1-9880-4386-9ec0-de77fd4d3917-p1
To connect the Roon OS share to my MacBook Pro (running macOS), I opened Finder and typed CMD+K (⌘+K) to get the dialog for mapping network storage. I then entered smb://ip-address-of-NUC:
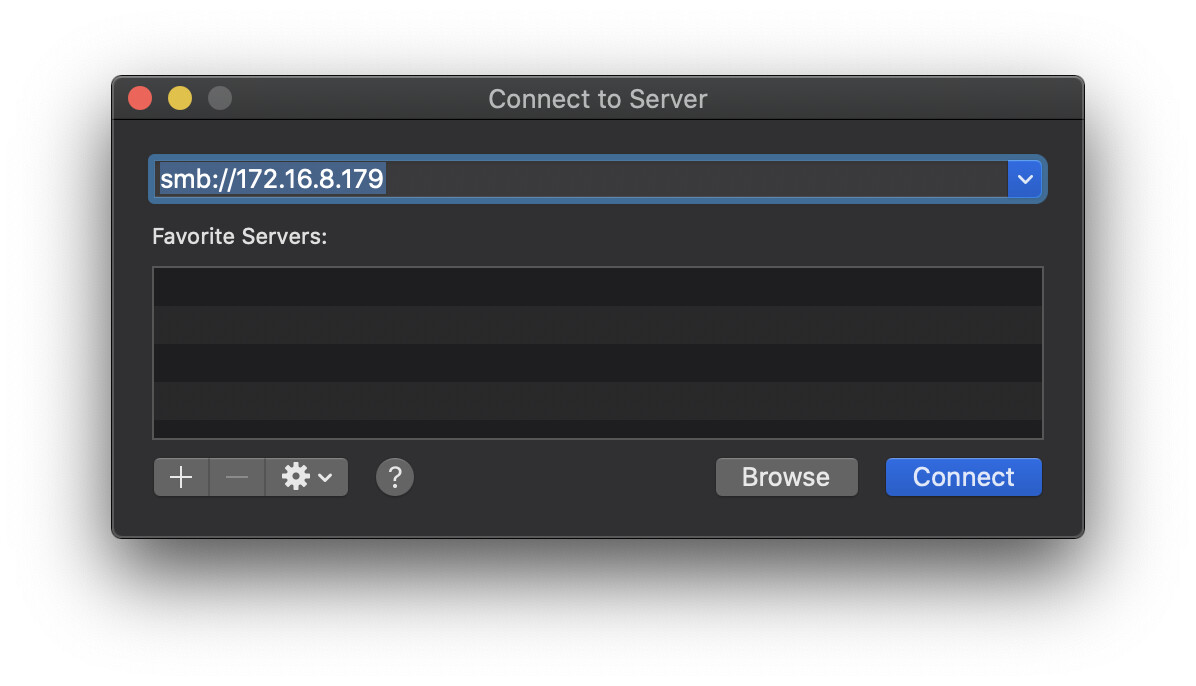
I connected as “Guest”. Once connected, the share from Roon OS was mounted under /Volumes/Data on the Mac. At that point, I used a script like this from a Terminal window to do the backup:
#!/bin/bash

MNT="/Volumes/Data/Storage"
SRC="InternalStorage"
DST="1_42_6-4458_WD_Elements_1023_575843314137303233353239_eed00ec1-9880-4386-9ec0-de77fd4d3917-p1"

cd "${MNT}" || exit 1
[ -d "${SRC}" ] && [ -d "${DST}" ] || exit 2
rsync --recursive --itemize-changes --progress --stats "${SRC}/." "${DST}/."
Linux users will be able to do the same thing, but I’ll leave mapping the storage from the NUC as an exercise for the reader. Hint: you have install the cifs-utils package and specify smb version 2.0 on Linux. For example:
$ sudo apt update
$ sudo apt install cifs-utils
$ sudo mkdir -pv /mnt/samba
$ sudo mount.cifs //172.16.8.179/Data /mnt/samba -o guest,vers=2.0
MS Windows lacks an rsync command. The easiest way I’ve found to solve that is to install the Chocolatey package manager for Windows. The instructions involve pasting a command like this into a PowerShell that is run as Administrator:
Set-ExecutionPolicy Bypass -Scope Process -Force; [System.Net.ServicePointManager]::SecurityProtocol = [System.Net.ServicePointManager]::SecurityProtocol -bor 3072; iex ((New-Object System.Net.WebClient).DownloadString('https://chocolatey.org/install.ps1'))
Once that’s complete, I found it worked best to exit PoswerShell and then start a new PowerShell, also run as Administrator. I then installed rsync using this command-line:
choco install rsync
I verified that rsync was installed by typing rsync --version.
The next trick is getting a usable shell on Windows. In five minutes of looking, I could not find a good package in Chocolatey, so I installed Git BASH instead. Once installed, I have rsync available in a Bash shell, and I can see the storage that I mapped from the NUC running Roon OS (the “Z” drive, in my case):

With that set up, the same script that I used on macOS works on MS Windows via the Git BASH terminal window. I just needed to update the mount (“MNT”) variable to reflect the drive mapping:
#!/bin/bash
MNT="/z/Storage"
SRC="InternalStorage"
DST="1_42_6-4458_WD_Elements_1023_575843314137303233353239_eed00ec1-9880-4386-9ec0-de77fd4d3917-p1"
cd "${MNT}" || exit 1
[ -d "${SRC}" ] && [ -d "${DST}" ] || exit 2
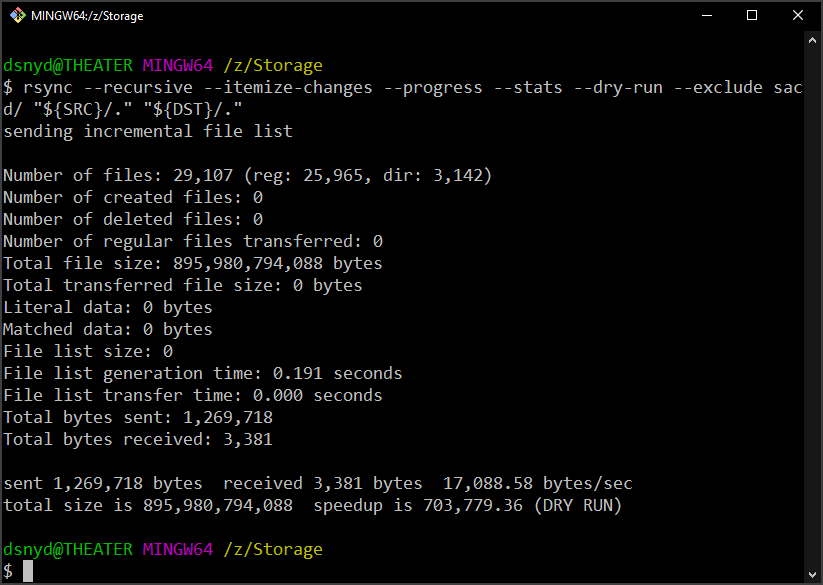
rsync --recursive --itemize-changes --progress --stats "${SRC}/." "${DST}/."
Here’s a dry-run that I just ran (excluding my sacd folder to save space):
Note: the same sort of thing can be done with the external USB drive connected to the computer instead of the NUC. I’ll leave the modifications up to the reader. 
Sorry if this is all a bit technical, but PM me if you have questions. Happy to walk you through it.
Cc: @kevin - in case something like this is worth adding to the Roon Help Center