Right, so we’ve established that your HiFi person has added the network address of your music files and folders held on your Synology NAS into the Settings > Storage page of your new Roon setup, and these have been imported into the Roon library of the Nucleus.
As you have discovered, any edits that you made in the old Roon library held on the Synology, have not been carried over, because what he/she did was make a fresh import of your music into the new Roon library.
What he/she should have done is to follow the Nucleus Migration Guide, and first restored a Backup (made of your Synology’s Roon) instead of doing the import of your music. That way a copy of the Roon database held on the Synology would be made on the Nucleus, and this would hold all the edits you had made on the old Roon.
Then, instead of importing the music files into the new Roon, all that needed to be done would be to edit the location of the Watched Folder in the Settings > Storage page of the new Roon. Restoring the database from the Synology onto the Nucleus would have this storage location showing as a folder held internally on the Synology. Now that you are using the Nucleus, you need to edit this to set it as a network location.
I think we can remedy this fairly easily, but you or your HiFi person will need to understand the following steps. If you’re unsure about anything, just ask.
-
You need to have made a Roon Backup on the old Roon running on your Synology. From your first message, I believe that you have such a Backup.
-
You need to know the username and password required to access network folders held on the Synology NAS.
I assume that since your HiFi person has set up a Watched Folder in the Settings > Storage page of the Roon running on the Nucleus, these credentials are known and valid.
That Watched Folder in the new Roon will probably have a network address of the form:
- \\NASDRIVENAME\Music (for example)
- smb://NASDRIVENAME/Music (for example)
-
You need to ensure that the folder called “Back up” (that you mentioned in a previous message) can also be accessed over the network. In a later step, you will be using the Nucleus to access the Roon Backup held in the RoonBackups folder in the Back up folder.
-
Right, if all the previous steps have been done, you can now delete the current Watched Folder on the Nucleus. On the Roon running on the Nucleus, go to Settings > Storage, click the “3 dots” menu next to the Watched Folder name, and choose “Remove”. Now you have no albums in your Nucleus’ Roon library.
-
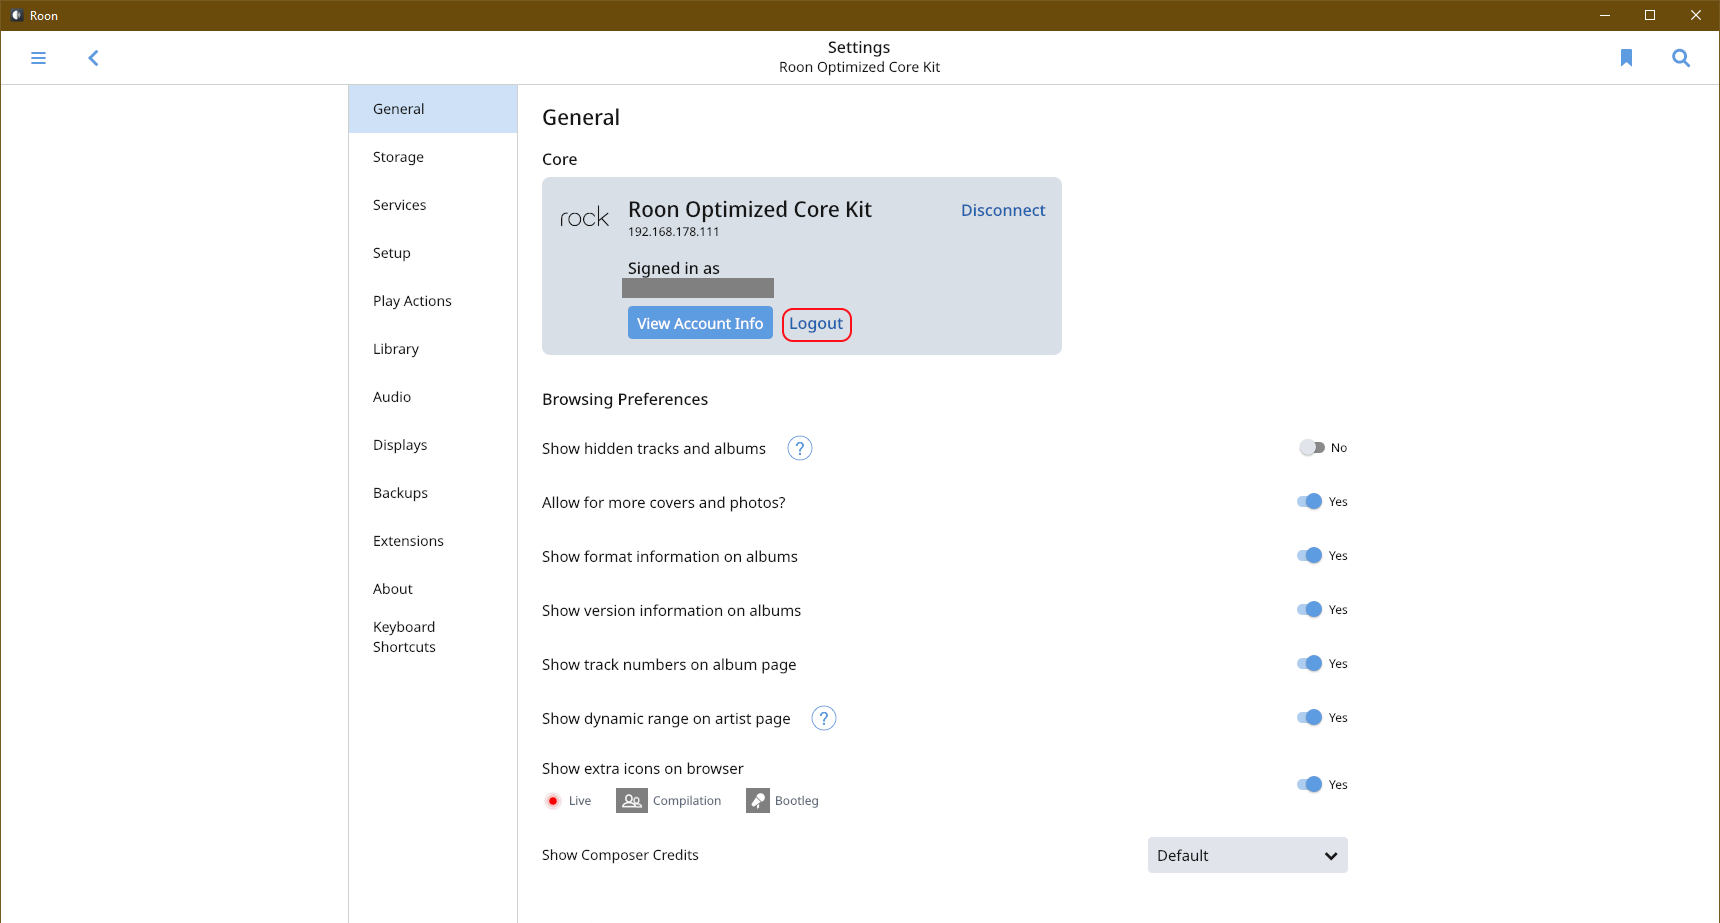
Now go to the Settings > General page of the Roon on your Nucleus. You’ll see a page similar to this (I’m running on a NUC using ROCK, but you should see that your Core is running on the Nucleus).
-
Click the “log out” link. Now you should see the Login or Signup page as shown in the Nucleus Migration Guide article.
-
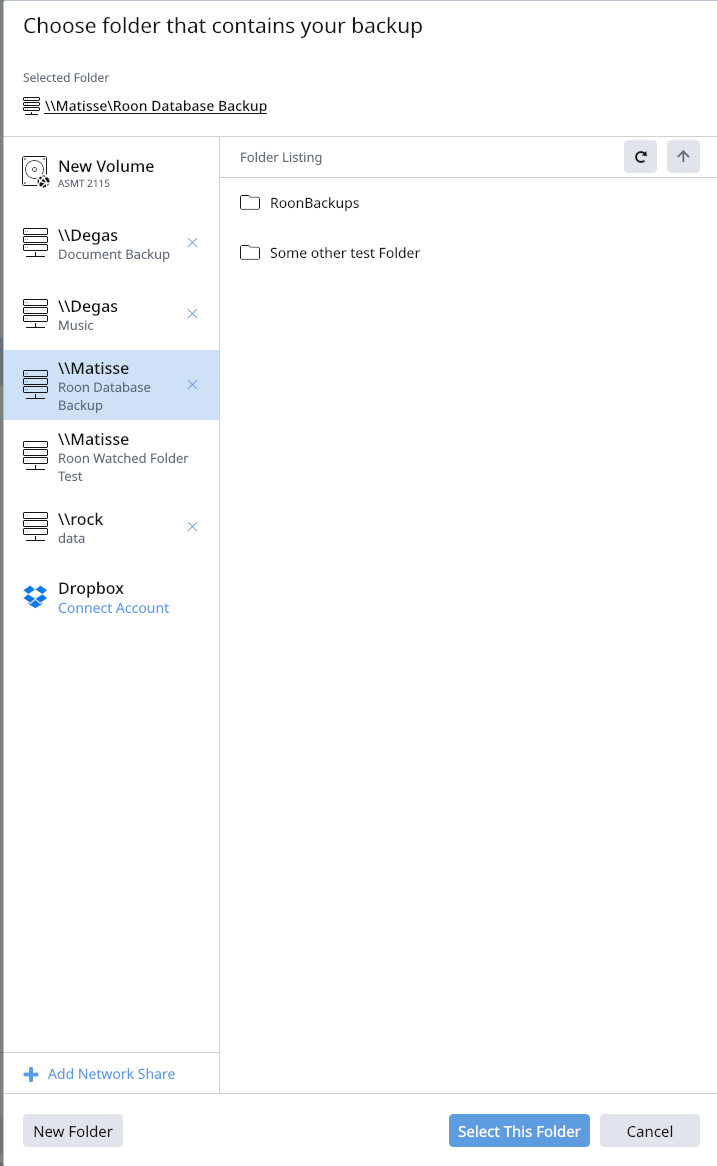
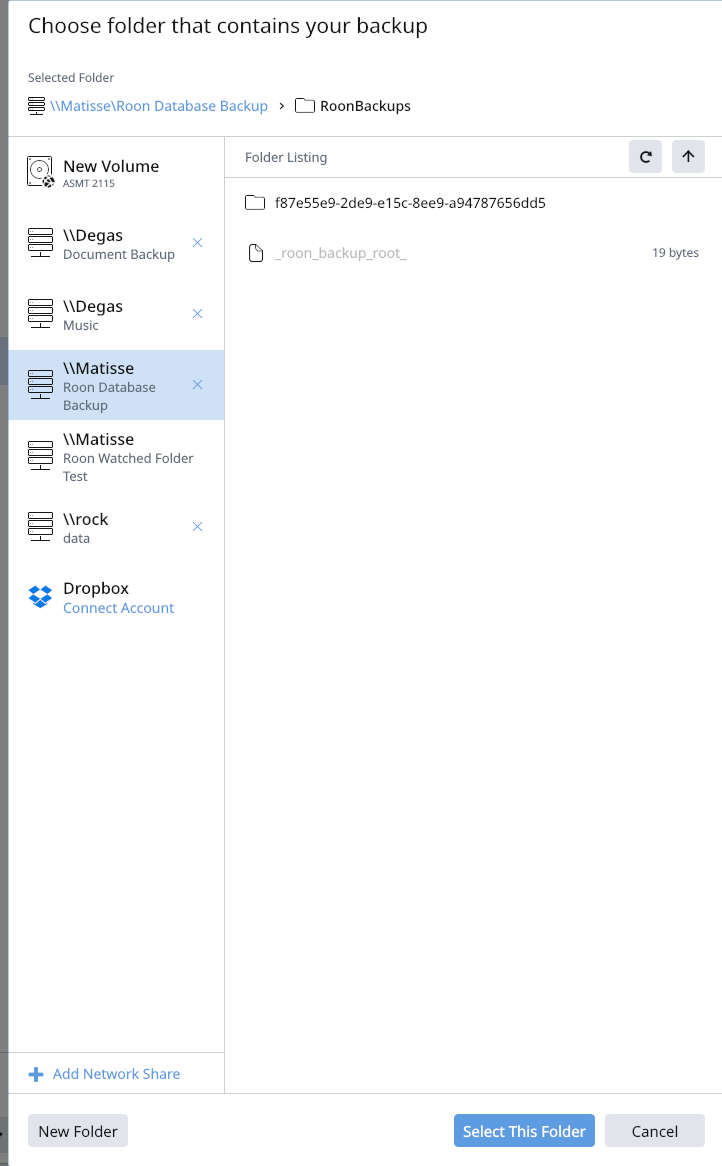
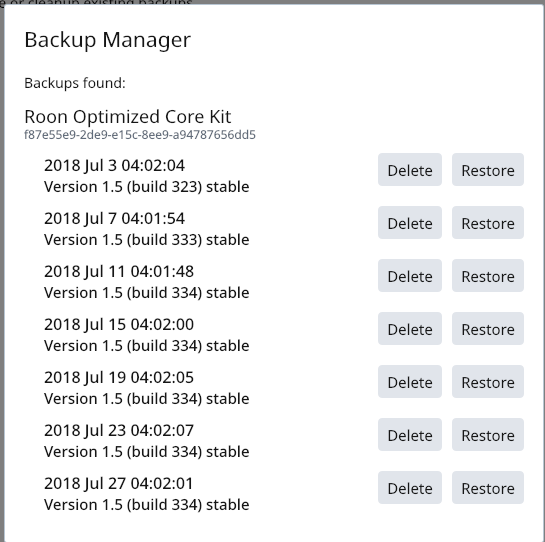
This time, click on the Restore a Backup link, as the Guide says. You’ll get a screen that says “Choose folder that contains your Backup”. Click on the “Add Network Share” link and add the address and credentials to access the “Back up” folder held on your Synology. Click the “RoonBackups” folder, and then “Select This Folder” and you should see a list of the Backups that you have made. As an example, here’s what I see on my system in these steps:
-
Click on “Restore” of your most recent backup.
-
Once the Restore is complete, go back to the Settings > Storage page of your Nucleus’ Roon. You should see a Watched Folder entry for the music held on your Synology, but because the Backup was made on the Synology, the address of the folder will be a local address, instead of a network address. So we need to edit the address to make it into a network address that points to your music files held on the Synology.
-
Click the “3 dots” menu, and choose “Edit”. Enter in the network address and credentials to the Music folder held on your Synology.
If all has gone well, you should now have your music library transferred to the Nucleus, with all the edits that you have made preserved in the new library.