I’ve been using an Intel NUC for quite some time with ROCK. I need a tutorial on how to add an extension to Roon. (The one I’m considering adding is Deep Harmony to integrate the Logitech Harmony Hub.)
2 Likes
Having just done this, I agree it was a bit daunting. This link made it simple:
@Jan_Koudijs has done a lot to make extensions practical. Kudos for his efforts.
1 Like
You don’t run them on Rock, you need to use another computer. The easiest is to get a pi, run dietpi, and enable Roon extensions.
3 Likes
This sounds promising. Does the Roon server (the ROCK) “find” extensions on other machines? If that is the case, I do have a windows server that I could use too. What is dietpi…?
Dietpi is a small operating system that runs on the Raspberry Pi lines of ‘microcomputers’. These little guys can also do Extensions.
I installed the extension manager on my Windows PC that I use as a Roon Client (I run ROCK as the core). I’ve got Ropieee running on a RPi as a RoonBridge, but that variant of OS does not run the Extensions AFAIK.
Yes, you can load the extensions on a windows machine. I had been doing it that way. A windows update to v2004 broke it so I went with the pi since I was already using it as an endpoint.
I’m interested in this as well; mainly for the same extension that the OP is interested in; Deep Harmony. I do keep one of my Windows PCs (which is an endpoint/control in itself) running all the time, so I guess I could install the extension on that. But I’ve been looking for an excuse to set up an RPi unit. Would it work better if I set up a separate RPi (I guess configured with DietPi) connected to the network that was just dedicated to running Roon extensions, particularly Deep Harmony?
Besides my Roon ROCK NUC core, I have two Roon ROCK NUC endpoints (used as endpoints only). I use Harmony remotes with both my Audio/AVR setups, which have those separate dedicated Roon ROCK NUCs as endpoints (not the core) that feed DACs that in turn feed the Audio and/or the AVR components.
What would be the preferred way to add Harmony control (or other extensions) to the whole Roon network – a separate dedicated Rpi (running 24/7) or my existing Windows PC? Kinda wanted to use an RPi with Ropiee, or moreover, RopieeXL, for this application, but I guess that may not work? (DietPi instead?).
What would be the preferred way to accomplish this? Hope I wasn’t too confusing with all the preceding info & pathways, and I realize I may be showing my ignorance of the whole concept of Roon Extensions with this post.
1 Like
Great questions. I look forward to one of the wizards here answering them. What extensions are you using?
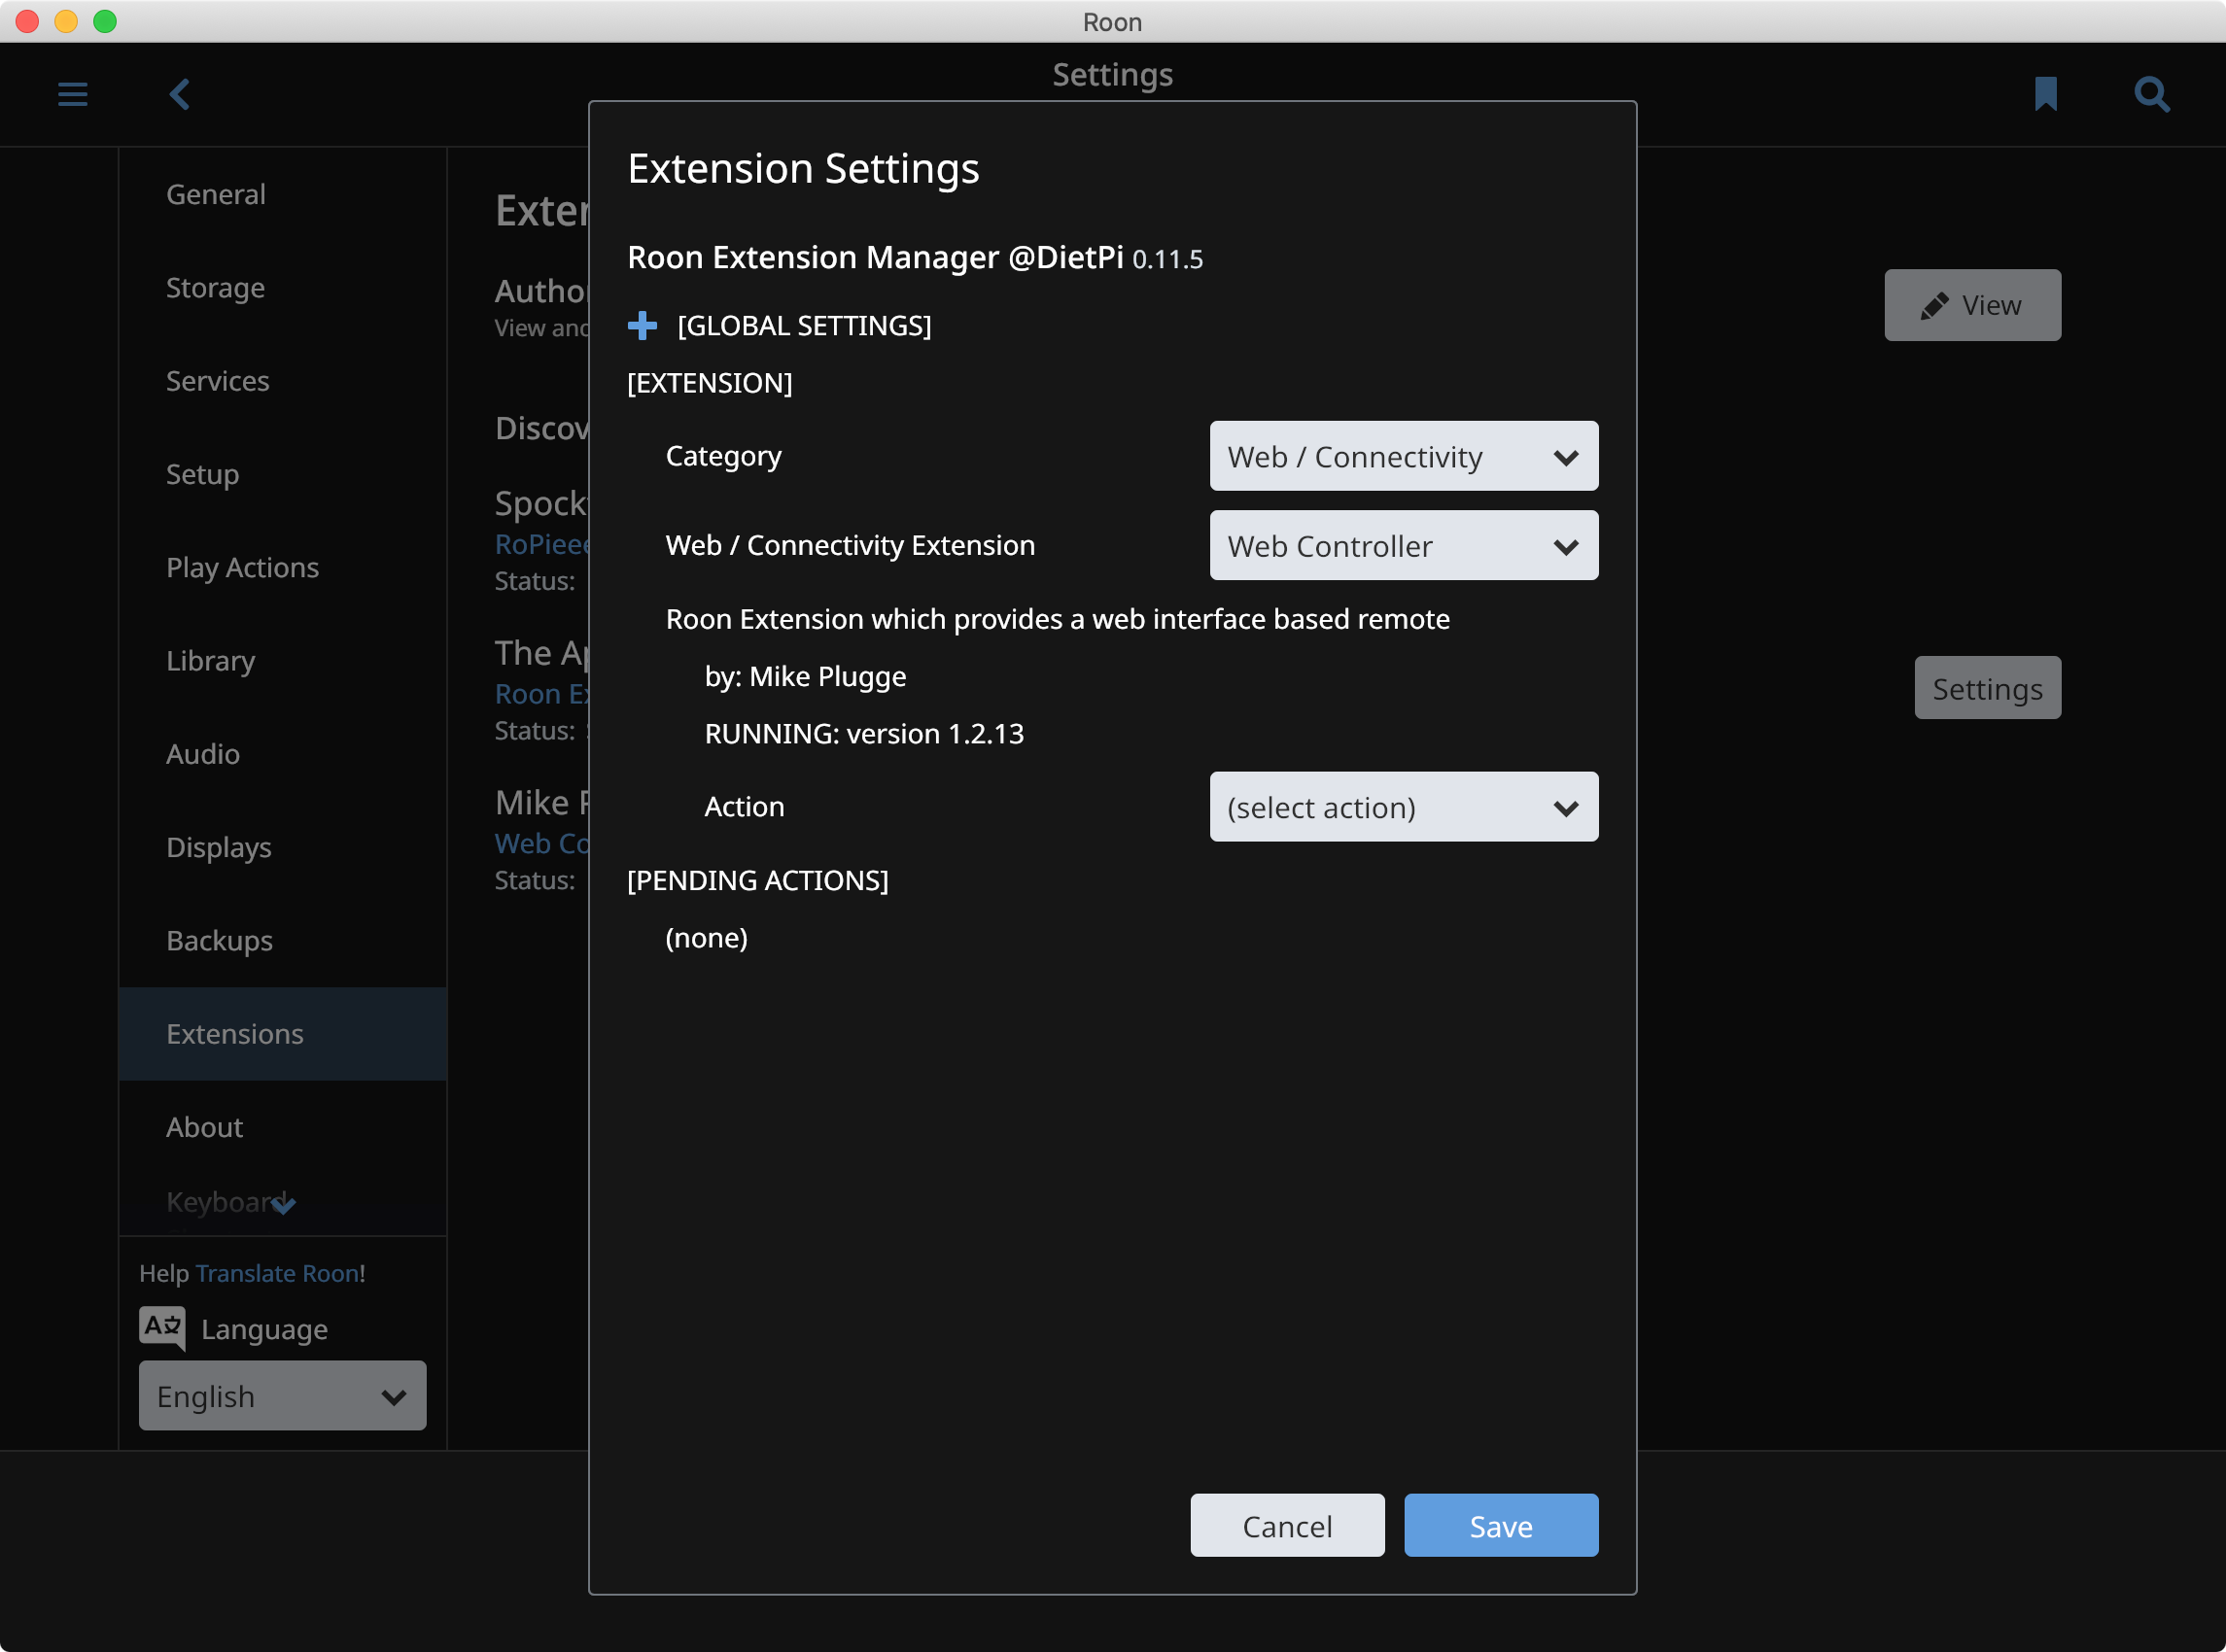
Scott - those DietPi installation guides are now outdated - DietPi now has the Extension Manager as part of the standard software package…
4 Likes
I setup extensions in DietPi recently, it’s very easy. Roon Server/Bridge and extension manager are in the DietPi-Software list, you can then administer extensions from with Roon: settings > extensions.
1 Like
I’m going to be setting up my first pi 4 so I can use extensions (alarm mainly for house sitting when on holiday) I might come and haunt you 
Not a problem 

Thanks for bringing me up to speed Geoff!
Scott
1 Like
For Deep Harmony on Windows you can use the console application from the Latest Release page (scroll down to the bottom of the page).
Installing Deep Harmony via the Extension Manager requires a Linux system (e.g. DietPi) with Docker installed. The Extension Manager Wiki has information about installation, links to videos and more.
1 Like
Sounds like that’s the best way to go.
Now to the specifics. I set up the Raspberry Pi’s that I’m now using with Ropieee. If I wish to set up a dedicated extension server with a new Raspberry Pi, I suppose I would get the circuit board and a case / power supply. Where do I get DietPi and how do I install it? (I don’t routinely use Linux and I’m always very pleased with myself when I can get a Linux-based system working ![]() .)
.)
Download it and burn it onto an SD card, put it in the Pi, boot up and log in. While there is a web ui control front end with Diet Pi, doing some of the admin stuff requires command line. I use Putty.
You can tell you’re old when in your mind putty refers to the glazing of windows, not something you can run on windows.
2 Likes
Have a look at Step 1 and Step 2 of this guide.
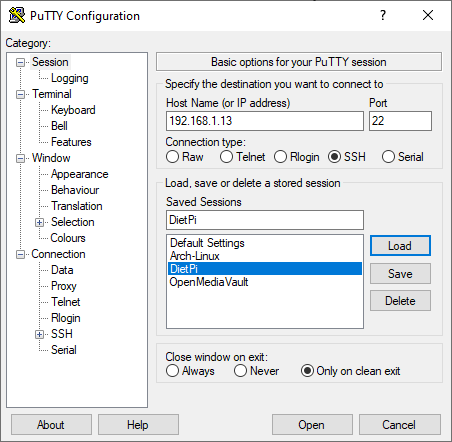
I just realized that the PuTTY tool where @Rugby referred to isn’t described yet. You should take these extra actions at the end of Step 1
- Download and Install PuTTY, it is available for Windows and Linux
- Get the IP address of the Raspberry Pi via your router or other tool
- Setup an ssh connection in PuTTY, use the IP address you found in the previous step, set other settings as in screenshot and select Open
1 Like
Step 1. Understood.
Step 2. I assume I’m logging in to the new Raspberry Pi. Do I need to buy a screen for that too? I’m not ever going to use it for anything else. Also, I assume it won’t recognize my wireless keyboard and mouse. Or can I simply login to some web interface as instructed here for installing PuTTY?
Download and Install PuTTY. I have downloaded both the Windows 64-bit version and the Linux version. Which do I use? I know how to install the Windows version - no problem. Will that then work like Balena Etcher and transfer needed files over to the new Raspberry Pi? Or do I need to install that as a Linux program directly onto the Raspberry Pi? I’m not proficient in Linux. Is there some place I can learn how to do that installation (if it must be by Linux)?