Thanks for the detailed help Michael , I will take it into consideration but I’ll try removing the $2.00 rubber snake first 
I did some upgrades/updates/changes - so I wanted to share:
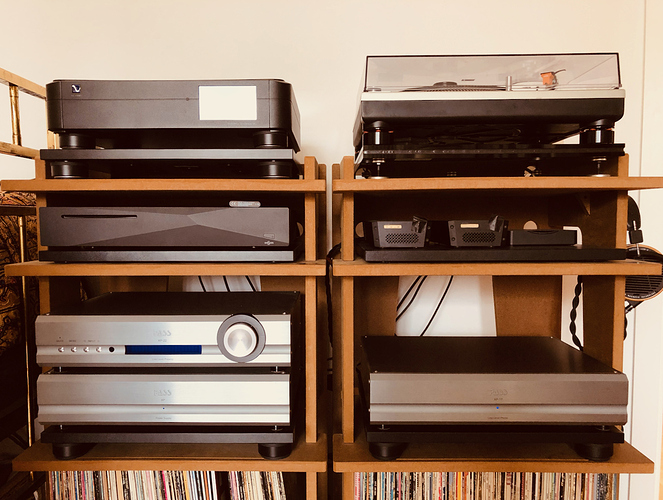
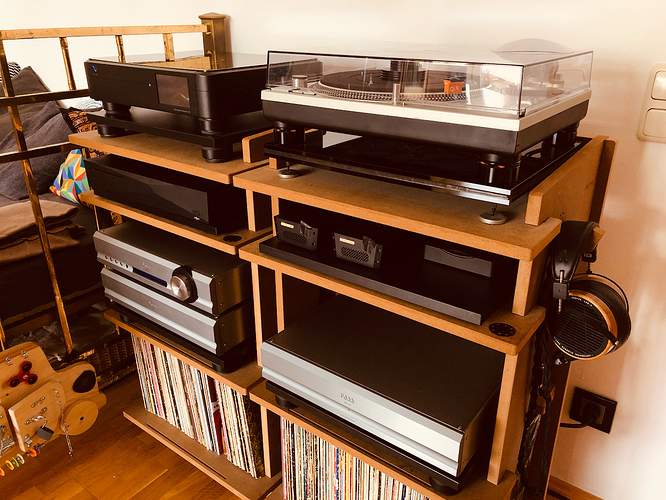
- Pass XP-17 phono preamp (replacing Musical Fidelity MX Vynl)
- Iconoclast OFE 4x4 XLR interconnects (replacing Vovox textura XLR IC Balanced, now used with the phono system) to connect PS Audio DirectStream DAC to Pass Labs XP-22 line level preamp
- Furutech wall outlets for active speakers and system
- Isonoe Audio Isolation System replacing the original Technics TT feet
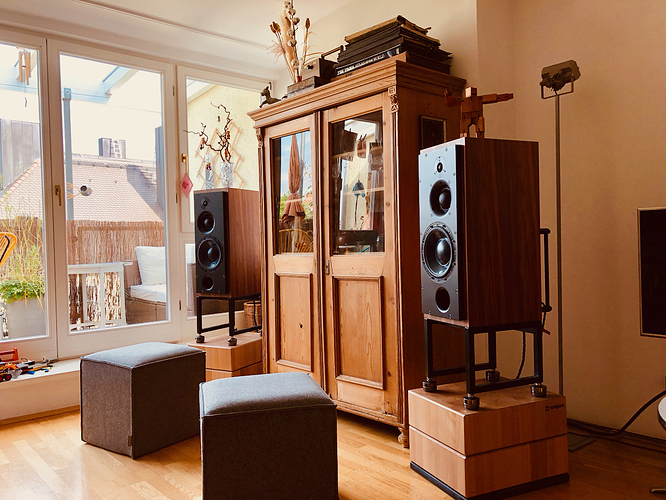
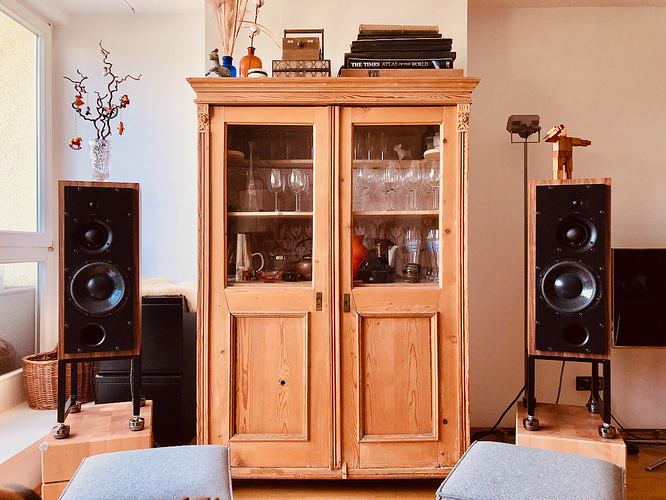
- added another butcher block under the ATCs to bring the midrange speaker to ear level
- swapped the ATCs (left/right) to bring tweeter/mids on the outside
Sounds better than ever.
And yes, room acoustics is next on the list (and tricky). But it’s not as bad as it looks – at least to my ears…
I see townshend seismic bars…
Do you have these under your speakers as well, by any chance?
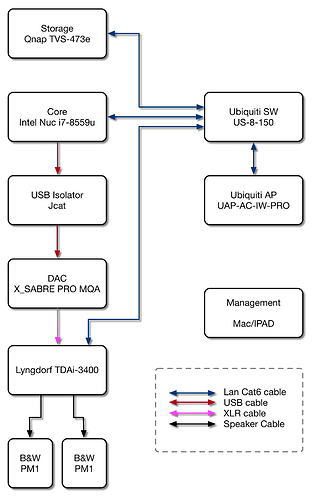
The TDI-3400 is RoonReady - but dont let me poison you. I can’t run this other than as a preamp. I am considering the MP-50 as a HT processor tho however one day.
All my speaker setups are active and use multichannel amps with electronic analogue crossovers before the amps. my left and right use 5 channels each!!! another set uses 4 amps each side
I used the Townshend bars under my speakers and they made no difference to the sound at all, so I went back to putting my speakers on foam.
So I used the bars for my Innuos Zen and Shunyata power block.
Shunyata charge an extra £250 for isolation feet and the Townshend do a better job.
I also have a Townshend podium for my 25kg turntable that has no inbuilt isolation.
The bars provide damping, the podium provides complete isolation.
The spring rating for use under speakers and a power block is likely very different.
The bars should isolate completely under speakers, which is their raison d’être - are you sure you had the correct rating for your speaker weight?
The bars do not completely isolate. It also depends on the speaker. Most speakers are designed to be completely rigid with a very low resonant frequency and the energy has to go somewhere. I use Harbeth, which are thin wall speakers that are designed to flex and move and hence dissipate energy without resonating. It’s one reason why they work so well and generally are put on open frame stands so as not to inhibit that movement (there are several specialist manufacturers). How they are anchored to the floor becomes pretty irrelevant, I use foam but spikes will do. Beer crates and telephone directories are also allowed.
Harbeth are very light, the Shunyata UK6 is heavy, plus the weight of the cables, so they are well matched, and I put the Innuos on a fairly heavy plinth to add some weight.
The fact is that damping is all that is required for these units and the bars do the job well. The turntable needs complete isolation. Mounted on a Townshend Podium with a vibration meter on top, I can jump up and down and there is no trace of vibration. Mark Baker argues that higher frequency vibrations are equally important to turntables, and I won’t disagree because I consider him an audio-megastar. They are of course low energy and you would need professional equipment to measure, which I don’t have.
The Podium completely isolates because it has a highly sensitive calibration system that you dial in to your equipment. A fraction out and it is ineffective. The bars do not have the same level of calibration.
I have measured the effectiveness of various pucks (DSMD, IsoAcoustics etc. - we did this one afternoon at my local pro audio store), which generally do very little and are no better than using $5 of sorbothane.
Of course another way to avoid resonance is not to have any contact with the floor at all. Mark Baker came up with a solution to that as well.
RE: Room accoustics
In a few set-ups I’ve had one side of the room was glass like you’re set-up. It was impossible to get any kind of “good” imaging in such a set-up. Toeing in helped, with my speakers, but then destroyed any chance of getting the soundstage to extend beyond the outside edge of the speakers.
Anyway, just wanted to drop that note as you start down your room acoustics journey. The most improvement I got was from removing toe and putting panels at the first reflection on both sides of the room. This allowed for equal first reflection for both channels. Then I moved on to the “normal” testing of back of room, behind speakers, ceiling, corners… etc. etc. until the room went dead and then I backed off and removed things. Being able to borrow panels, any panels, was a big help and then I bought something that was more pleasing, to me at least, to look at. Good luck.
I’m dealing right now with a glass bay window next to the right channel and big open space on the left. Imaging and soundstage are the goals. I made big improvements by bringing the speakers way out into the room (a bit more than 5 feet/1500 mm). However, I took a hit in how the bass couples with the room, despite using measurements to find the best bass that far out. It’s nice, but I want that bass coupling back.
My next trick will be to set up the speakers coaxially with the 45-degree line from the right corner. The idea is to get some symmetry that way. It will allow me to use a version of the speaker placement method that got me such good bass: the Sumiko method.
If I can get both imaging and bass using that kind of diagonal placement, I will then play again with DSP room correction. And when I get the room remodeled, I will post pics here, including the hendecagram-shaped absorption panels that will be mounted at the first reflection points on the vaulted ceiling!
Thanks, I always like the updates to peoples equipment. I think your set-up looks excellent!
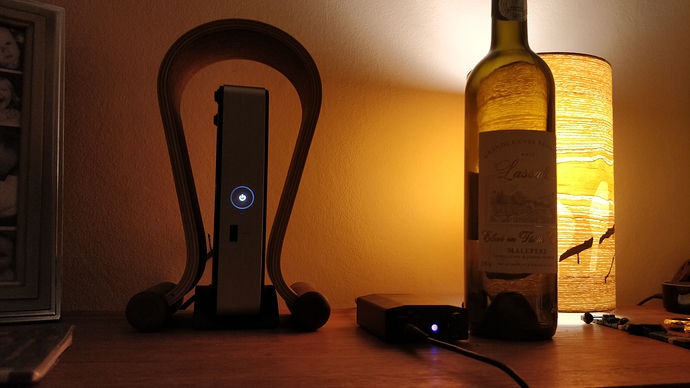
Updated headphone rig with a fanless NUC kit DE3815TYKHE running ROCK as an endpoint. Better sounding than the old pi. Nice bottle of Malpere to.
#
I’ve got 2 subs in my setup so pulling the towers from the wall does not impact my low end. From a purely “how clean is your bass” perspective it’s not as clean as what my towers can do on their own but where I give-up that precision I get a response curve that extends well below what I could do with the towers alone. When the budget is right I plan to switch to REL subs and use the high level input directly from the amp.
Your idea to use the room at 45 degrees is a good one. I discovered the benefits of this configuration after I bought a couch that won’t fit in that orientation. But, very interested to hear your impressions after you get it set-up.
Nah the wine was coincidental, happened to be there at the right time.
I am surprised he is still alive 
I’m running the Roon Core on a brand new MacBook Pro with an i9 processor, and I maxed out the RAM. Specifically: 2.3GHz 8-Core Processor with Turbo Boost up to 4.8GHz 512GB Storage
- 2.3GHz 8-core 9th-generation Intel Core i9 processor
- Turbo Boost up to 4.8GHz
- Radeon Pro 560X with 4GB of GDDR5 memory
- 16GB 2400MHz DDR4 memory
- 512GB SSD storage1
- Retina display with True Tone
- Touch Bar and Touch ID
- Four Thunderbolt 3 ports
I either use my iPhone or an older iMac as a remote controller.
I output the Roon Core on the MacBook Pro using an HDMI cable and input that directly into a NAD 765 Home Theater System, which has its own internal DAC. Specific specs on the NAD (140W x 7 (FTC) Power.
- 7 x 80W Minimum Continuous Power into 4/8 ohms, all channels driven simultaneously, 20Hz – 20kHz at 0.05%THD (NAD Full Disclosure Power)
- PowerDriveTM amplifier technology
- MDC (Modular Design Construction) allows future upgrades, includes AM 100 Dual DSP Audio module and VM 100 Video Module
- Lossless decoding: Dolby TrueHD and DTS-HD Master Audio
- Dolby Digital, Dolby Digital Plus, ProLogic II, ProLogic IIx, DTS, DTS ES, DTS 96/24, DTS NEO:6, EARS and Enhanced Stereo Surround Modes
- Audyssey Setup and Calibration of all speaker settings using supplied microphone
- 5 A/V Custom Presets store unique speaker level and tone control settings
- Direct access speaker level adjustment for surround, centre and subwoofer
- NAD Soft ClippingTM
- 7 Analogue Stereo Audio Inputs including 1 Audio Front Input in the front panel
- Media Player MP front panel input
- 6 Analogue Video Inputs including 1 S-Video and 1 Composite Front Video input in the front panel
- 3 Component Video Inputs
- 7 Digital Audio Inputs - 3 Coaxial and 4 Optical including Optical Front input in the front panel
- 4 HDMI Digital Video Inputs and 1 Output, freely assignable
- Cross Conversion of all analogue video formats
- Analogue video to HDMI Conversion
- 3 Analogue Audio outputs including Zone 2 Audio Out and with the 2 other Audio outputs assignable also as Zone 3 and Zone 4 Audio Out
- Back Surround Amplifier Channels can be reassigned as Zone 2, 3, 4 or Main Front (Bi-Amp)
- 4 Video Monitor Outputs – HDMI, Component, S-Video and Composite formats
- 3 Analogue Video Outputs - 2 Video (Composite and S-Video) and 1 Zone (Composite)
- 7.2 Analogue Pre-Out (2 Subwoofers)
- 2 Digital Outputs - 1 Coaxial and 1 Optical (TOSLINK)
- 7.1 Analogue Input
NAD output to 2 AS-61 ELAC Adante right and left speakers on stands, 1 Klipsch center channel, and 2 PSB rear/surround combined speakers, and 1 ELAD Debut 2.0 3030 sub-woofer for 7.1 sound (if I want that from the NAD DSP options).
I realize the MacBook Pro for Roon Core is overkill, but I had a lot of issues running the core Roon on an original AirBook.
I have no problems with this system, except that the HDMI output from the MacBook Pro also displays to a Mitsubishi 82 inch TV, which is great to see the Roon Metadata, but I can’t control the video HDMI display from any of my Roon remotes. So if I change to a different album on the Roon remote, the HDMI display stays on the previous album, unless I go to the Roon Core and change it on the MacBook Pro. It is difficult to reach my MacBook Pro, but I’ve rigged up a wireless mouse so I can control it from my listening chair, but still not optimal.
Interestingly, prior to using the HDMI connection from my MacBook Pro to the Nad,
I sent output from Roon wirelessly to an Apple TV also connected to my NAD. This was superior in some respects, because when I changed albums on Roon using remote the video display also changed. Not so with my HDMI connection.
P.S. Integrated with Tidal. I burned about 600 CDs directly to the MacBook Pro, but I made a huge mistake by applying DSP while burning. I recorded them as 24 bit, 192Khz files, and now that I play them back on Roon, the audio quality is terrible. Unusable. So I wiped those out, and will re-burn them as 16 bit FLAC files.
Forgot to add that I can also send sound to the harmon kardon speakers on my iMac remote, and also to a single Sonos speaker in my bedroom.
This doesn’t sound right, no pun intended.
What did you use? Many people use dbPoweramp. On my Mini, I’ve used PhileAudio.
You probably should rip a couple of test files to see if there is a difference, before you go whole hog on 600 CDs.
Slim: yes, used dbPoweramp. I don’t know why the DSP applied via dbPoweramp resulted in issues on playback via Roon. I was warned by other Roon communuity members not to apply DSP in advance. Anyway, yes, this time I will perform a few tests prior to re-burning 600 CDs!
I agree with the “other Roon community members:” DSP should be tailored to your then current system, room and speaker placement. If you later change any of those you’d have to re-record your entire collection. If you are going to use Roon in the end, just set the DSP once and it will be applied to all your files; that way if you later want to change it you just update Roon and your whole collection sounds good.
