Up and running in one go, on wireless even. This is boring stuff, Harry. 
On a more serious note: great, great job. Good to see that Ropieee has come this far this quickly.
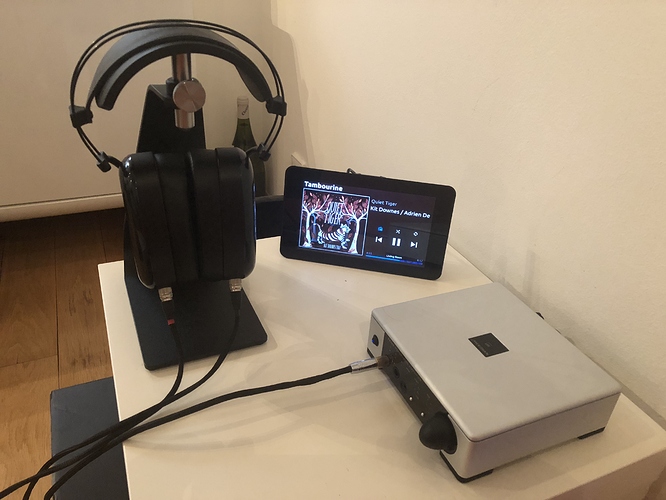
Now let’s see if my little peek-a-boo screen offers some lasting value. I imagine I’d like to check every now and then when Roon Radio is playing, but we’ll see.
Off to make a fresh donation…
great job Rene! (and Harry)
been thinking about doing the very same, lately. great to know it works on wifi as… that was my only doubt
think I’ll follow soon 
… as soon as I get how to install/where to get from the Roon extension 

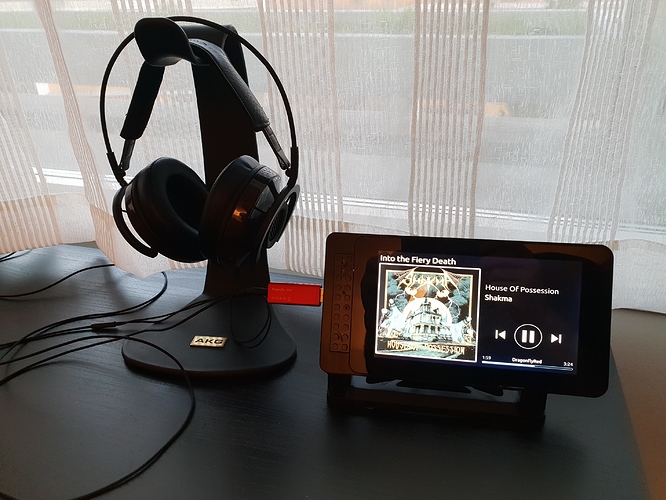
Rene it’s not in the third picture. How are you using the device? What did it replace?
The Roon extension comes preinstalled – nothing more to install than the Ropieee image itself.
Nothing, John – it’s an addition. The Prime HPA/DAC is fed by a USBridge. The Pi w/ Display is not an audio zone – it is just offering a view to what’s playing on my main system.
That – and it’s a great excuse to finally do something useful with my Pi 3B+. 
Neat!! I don’t have one yet but I am thinking about taking the plunge as I love to tinker with computer stuff. Thanks for the post and response.
I have 3 like this… one with an IQAudIO DigiAMP+ hat too … all work great
Great job indeed by Harry.
Nice cans there too Rene. Just picked up a pair of AEON closed myself.
That … looks like dark theme. What have you done with Rene evil bodysnatching alien ?
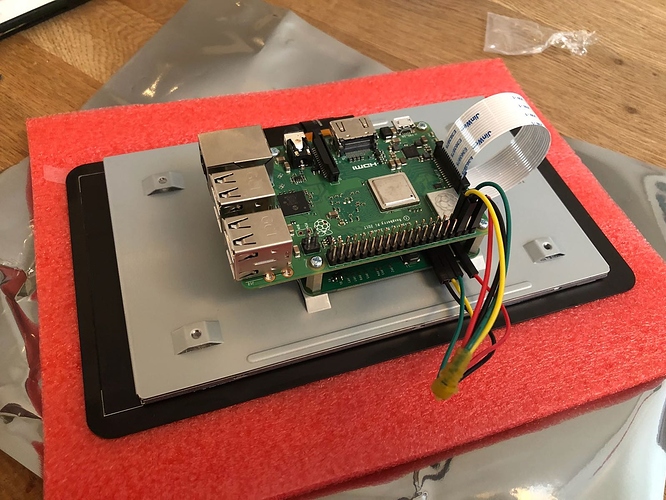
@RBM Rene actually you only need the red and black wires (+/- 5V) as the rest are via LCD connector. I have it this way on mine… Assuming its a RPi 3B that is… makes the tucking of things away a bit easier 
Also of the 3 LCD optioned I use, 2 are running USB DACs now as the device support is better for these on Ropieee than on ROCK 
 . The 3rd runs a DigiAMP+ amp hat and a pair of bookshelves in the bedroom…the clock in sleep mode is great as you can set it low enough brightness wise that its not annoying while sleeping. Just need to set the restart time to in the day so it doesn’t light up the room in the middle of the early hours
I have 3 other RPi’s with Ropieee running DACPRO or DigiAMP+ IQAudIO hats.
One other slight annoyance with the screen attached is that taking the SD card out means manoeuvring the ribbon out of the way 
I shelled out for the ModMyPi case, which tucks Pi+cabling neatly out of sight, so no problems with cabling here:
The back is removable should I ever need to pull out the card. I guess you are right though about only needing 2 cables with a Pi3B/3B+.
The Pi+Screen will end up somewhere behind our couch, so my wife and I can casually glance at what’s playing. It’s the first time she actually likes one of my little black boxes. 
I’m totally intrigued by this; and really want to replicate it. But as a relative Roon newbie, and complete RPi neophyte, i don’t recognize all the pieces.
Could you help me out and provide a manifest of hardware and software that went into this? Not asking for a how-to. I’m able to deal well with ‘tech’, and given time I imagine I can figure that manifest out and replicate. But would really appreciate the direction in the form of a complete components list and I will take it from there and edjumacate myself with focused direction.
Much appreciated if you can find the time & have the desire. NP and understood if not. 
What you’ll need:
- A Raspberry Pi (if you’re buying new, get the latest and greatest 3B+ for better networking (wired and WiFi))
- A micro-SD card to flash the OS (Ropieee) on (4GB or more)
- A 5V/3A PSU
- The ‘official’ 7" Raspberry Pi touch screen (note this is the only screen supported by Ropiee)
- A case fitting the screen + Pi
If you want to use the combination as audio endpoint as well, you may want to add a DAC or Digi HAT of choice.
Screw it all together (the Pi is fixed to the back of the screen), flash the Ropieee image to the SD-card, boot it all up and off you go. 
Say, Could you comment on what you think of the audio quality output of the various forms? Are RPi DAC HATs capable of really clean detailed conversion feeding an extremely revolving loudspeaker or headphone system?
Or should I limit RPi DAC HATs use to affordable consumer grade self-powered speakers one could describe as resonably decent ‘mid-fi’ level music makers? ![]()
Much thanx Rene!
Funny that you point out what you did regarding the 7" screen. Much appreciated. Massdrop had had a couple of drops of 10.1" touch screens in the past by Seeed and another manufacturer. I wanted to buy one to try it with a regular computer, not a RPi. They just re-dropped it and I decided to buy two, expecting to enter the world of RPi/RoPieee. …Well, I have a few other places I can make use of it.  Again, much appreciated.
Thats a very subjective thing… its good enough for my ears. But maybe its so cheap to try that in an expensive resolving system you can just write it off as a well thats no surprise or you just might not.
I don’t like to get into these what sounds better as it’s so variable on source, content, system and room etc. Others might contribute with such remarks but I just enjoy the music with what I have and and what I am able to hear with my old and battered ears.
This post got my juices flowing and I decided to spring for a Raspberry Pi 3 Model B+. I bought a Vilros kit from Amazon for about $80. It came with a case and power supply and microSD card. It came about two hours ago. Building the unit was extremely straight forward. Could not have been easier. I downloaded all the software I needed including Ropieee and had the entire thing up and running in just a little over an hour from delivery of the box to music. This thing is really cool. Planning to make a donation to Ropieee because if I am going to use it I feel like I should drop them a nickel or two. Thanks to @RBM for the original posting. Fun project. The Ropiee tutorial was extremely helpful. I just followed the directions and had no issues except for formatting the microSD card. Had to do five minutes worth of digging to figure that one out but the Vilros site had clear and easy directions for how to overcome the problem and it was the only thing that slowed me down at all. Way cool.


