Two copies of Roon Core running on on one PC - I only want one!

Core Machine

Windows 10 PC: Intel i7 4770K APU, 32GB RAM (Runs 24x7).
Roon Server and Roon App on Core Machine, version 1.8, build 764.
Roon database on Samsung 256GB SSD.
FLAC files on separate hard disk.
Roon Remotes on Laptop and Android / iOS phones.

Network Details

ASUS AC3200 router, Roon Core on 1GB ethernet. Multicast routing enabled.
Remotes on Wi-Fi. No network problems.

Audio Devices

KEF LS50W, KSF LSX, headphones on PC/laptop/phone - sometimes via Chord Mojo.
Speakers on ethernet or power line.

Library Size

Description of Issue

Accidentally I have two copies of Roon Core running on the same Windows 10 PC: one as a Roon Server that runs 24x7 on start up and the other a Roon App that I run whenever I want to listen to music. The problem is that the Roon App is not just a Roon Remote as it has its own version of the Roon Core.

I would appreciate suggestions/guidance on how to fix this so that I have only one Roon Core running.

This is what I see …

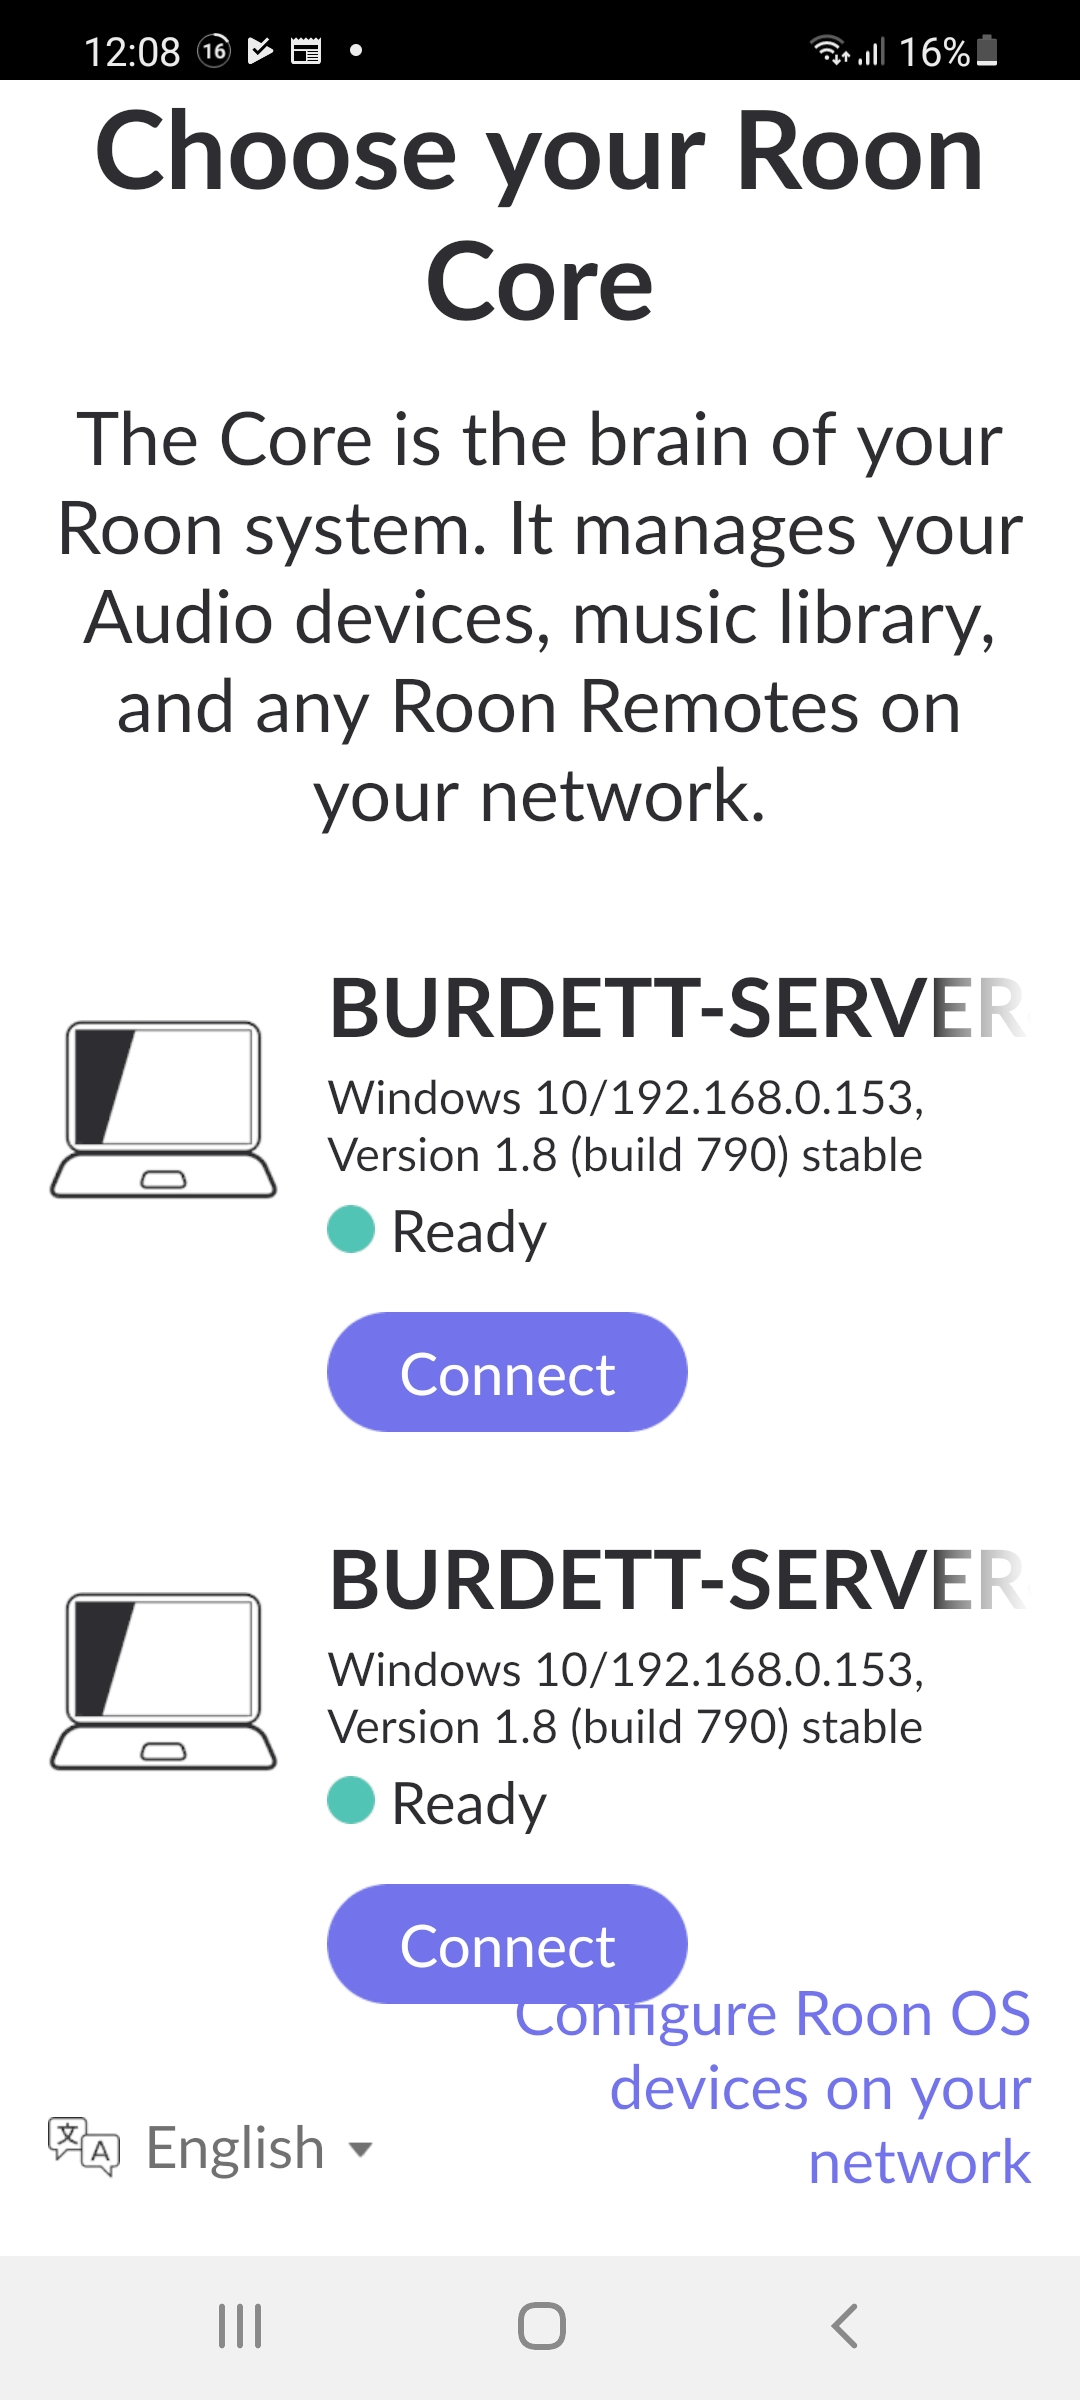
Two copies of the core!

I thought one might be the “real” core, i.e. the Roon Server, and the other the “Roon Remote”, i.e. the Roon App as both were running on the same PC.

So then I quit the Roon Remote (i.e. the App) and the screen on my phone changed to this …

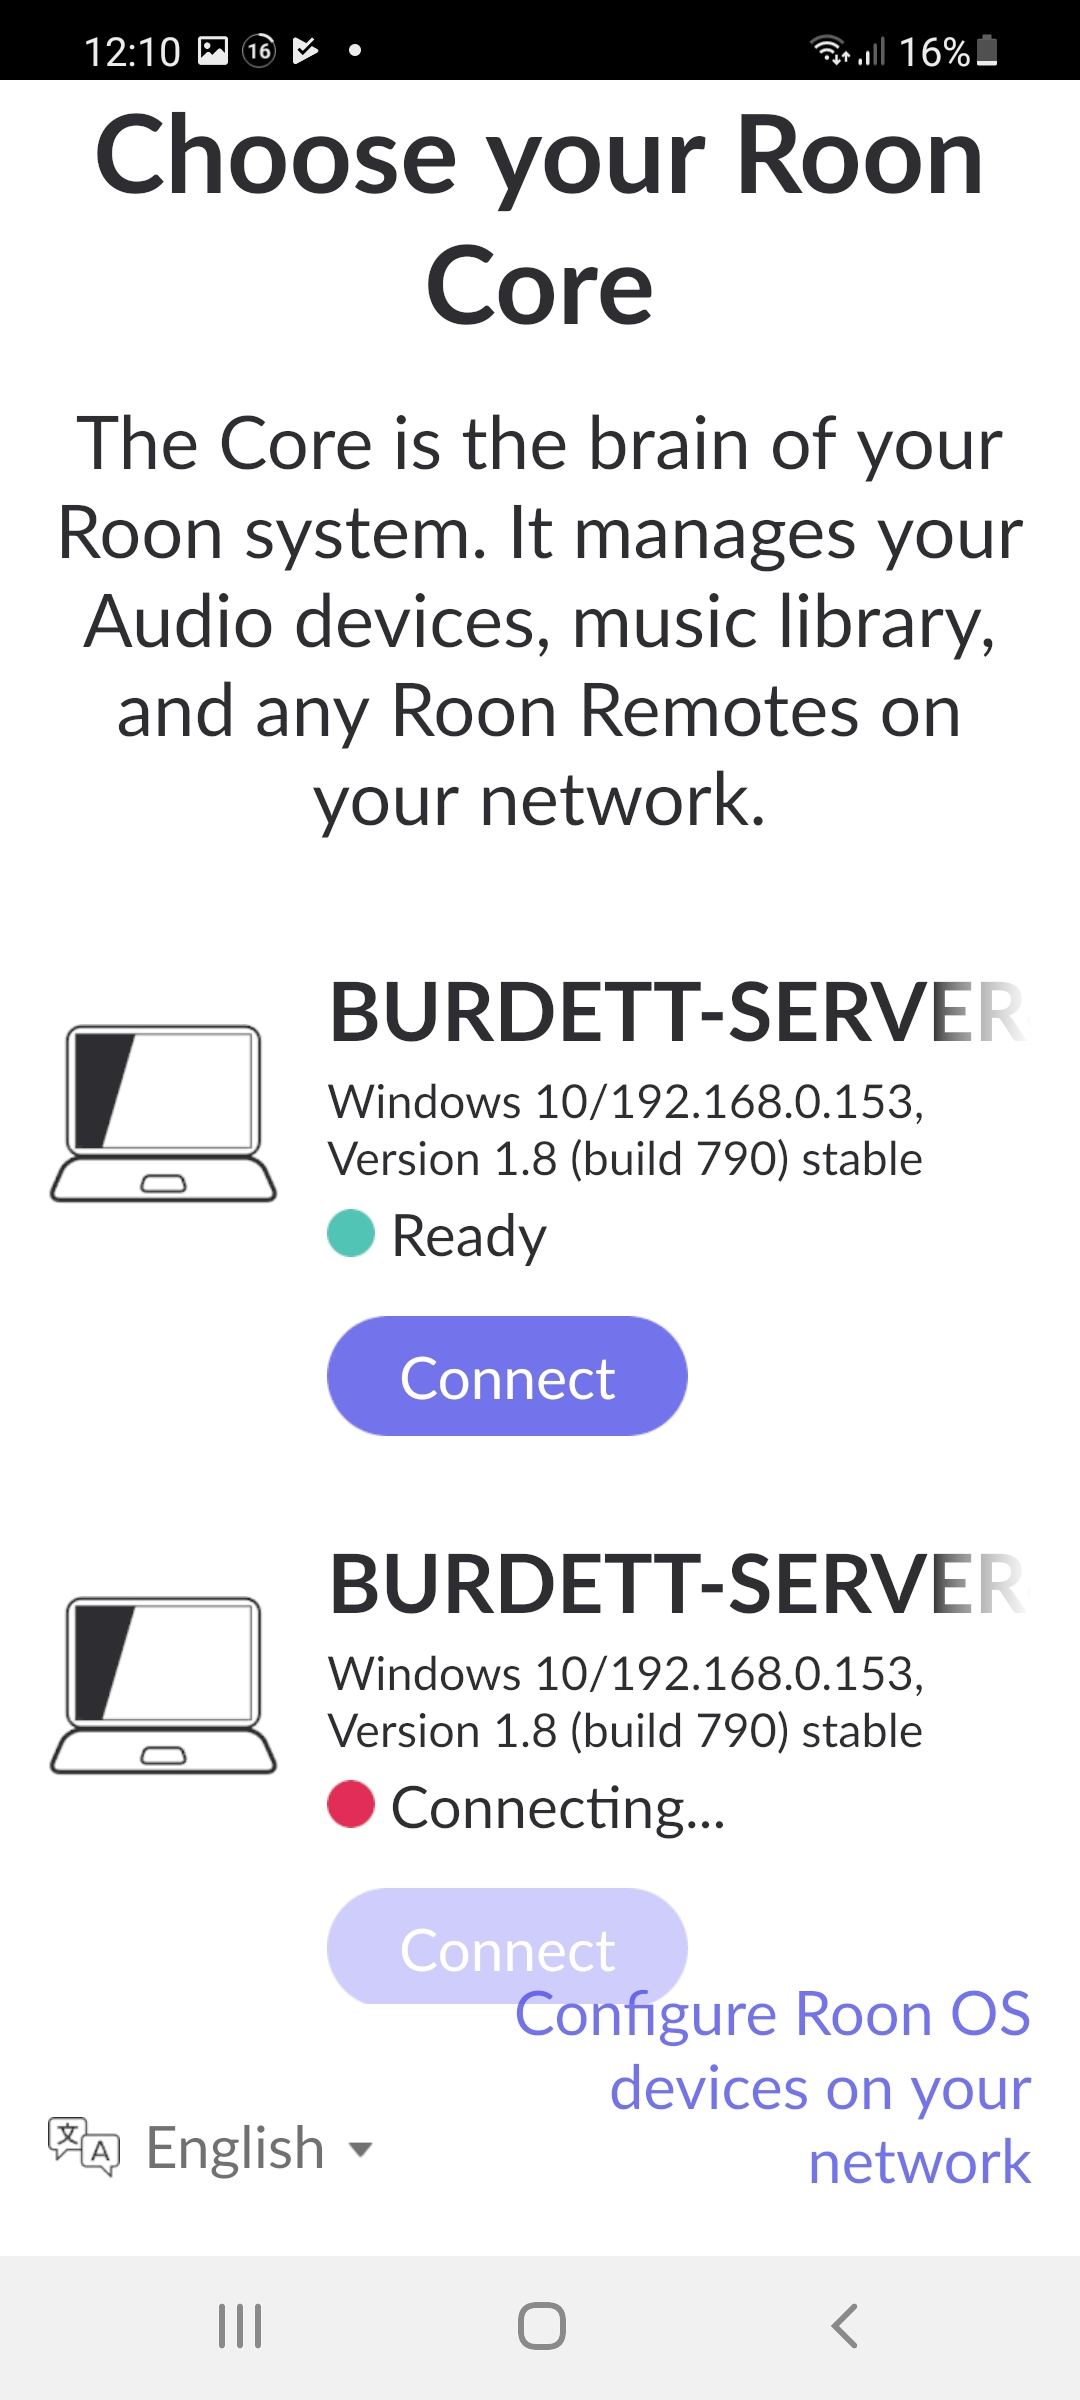
The connection to the second Roon Core presumably the Roon Remote /App, had gone away. So I connected my Android phone to the first one (i.e. the Roon Server).

Different Roon Histories
I then compared my history on the PC / Roon App with the history on my Android phone …
Roon App History …

…. and the Roon History on my phone …

They’re different histories with different number of “plays” even though the screen snapshots were taken a couple of minutes apart. The PC and the Phone also have slightly different Library content. This made me think I have two Roon Core databases running.

The fix I’d like to make
One of these two Roon Core Databases needs to go. However, I use the Roon App on my PC much more than the Roon app running on my phone, so I would prefer to keep the Roon App version of the core database rather than the Roon Server core database version. I will welcome suggestions/guidance on how to fix this.

Feature Suggestion
My suggestion would be for Roon to detect that there are two copies of the Roon Core running on the same PC/Server and either warn or stop the user from making this mistake.

Thanks to everyone for their help.

David
PS Loving version 1.8 of Roon

Hi @David_Burdett,

I’m wondering if you installed Roon Server after installing the Full Roon Application?
As that might explain why you have two active cores on that PC.

To summarise your request:

  • Retain Roon Server on the PC as Core
  • Disable Roon App Core (so it can be used just as a local remote)
  • Move over the Roon App Core database so it is used by Roon Server Core.

I think this method would be the simplest:

On the Windows PC …

  • Run the Roon Application and make sure it is connected the Core you wish to retain the data from.
  • Double check that play history and play counts are as expected.
  • Perform a Roon Database backup to a USB connected drive.
  • Stop the Roon Application and uninstall it (will be reinstall later).
  • Rename the Roon installation folder (from roon to roon.save) just in case something goes wrong.

On your laptop …

  • Run the Roon Application and make sure it is connected as a remote the Roon Server Core.
  • In Roon Settings → Backups → Find Backup … select the DB backup that you created, and restore it.
  • Once the restore has completed, the Roon Server Corn should be using the data you require.

On the Windows PC …

  • Install the Roon Application and when it runs make sure it is connected (as a remote) the existing Roon Server Core that’s on that PC.

Hope this helps.

Roon Labs Help Centre - Reference Documents:

Hi Carl

Thanks for your suggestions above on how to fix the problem. That said, I had a go myself earlier today and it worked. It’s very similar to your approach, but I only used the one PC, i.e. with the one with the two cores. Here are the steps:

  1. Latest Version of Roon Run Roon on the PC to ensure that Roon is running on its latest version. Sometimes a Roon update can cause a database update which we don’t want.
  2. Hard Drive Backup. Probably not necessary, but useful (i.e. essential) if the database became corrupted - it didn’t
  3. Manual Backup. Run the Roon App (on my PC) with the version of the database that needs to be kept. In Roon Settings go to Backups and do a “Backup Now” to save the backup to a separate location, e.g. your Desktop (a USB drive could also be used)
  4. Fresh Downloads. Downloaded fresh versions of the RoonServer and the Roon apps from the Roon website. In my case it was the Windows 64 bit versions.
  5. Uninstall Existing Apps. This is in two parts:
    a) Uninstall the Roon App through Settings. Make sure that Settings and Databases as well as Application Files are ticked. We want to completely remove the database because it will be restored later.
    b) Uninstall the Roon Server. Two parts: i) Stop the Roon Server - using the tray icons in the taskbar; The Roon Server can’t be uninstalled unless it’s stopped. ii) Uninstall the Server in Settings. Again tick “Settings and Databases” as well as “Application Files”.
  6. Reboot the PC. Again this is probably not needed, but should ensure no trace of the old Roon Apps are present.
  7. Install the Roon Server using the version downloaded earlier. There may be a Microsoft warning that the application is not recognized - ignore it. Make sure to run the Roon Server at the end.
  8. Install the Roon App using the version downloaded earlier (ignore the warning). Make sure to run the Roon App at the end
  9. Setting Up Roon. At the end of the install the Roon App should start automatically. The next steps are:
    a) Accept the Terms and Conditions on the first screen
    b) On the next Connect to Roonserver screen you should see the Roon Server that was set up in Step 7. Select it. Don’t chose “Set Up Roon on this PC” option
    c) At the log in screen don’t log in. Instead click “Restore a Backup” at the bottom…
    d) On the next screen, browse to the Manual Backup made in step 3 and restore the backup and wait for it to complete…
  10. Restart Roon when requested. At this point Roon should be running as normal.
  11. Update Roon Remotes. Go to each of your other Roon Remotes, e.g. on phones, laptops, tablets etc. then Start Roon. Roon should ask you to select a different core (as the original core has been removed). There should only be one core shown, select it.

After following these steps, all the Roon Remotes were working on the same version of the Roon database. Checking the Roon file sizes on on disk, the Roon App database was empty while the database on the Roon Server was about 2GB which is what you would expect.

1 Like

Perfect, glad your all sorted. I’ll make this as solved but if you have a further issue, just flag it and request it re-opened.

This topic was automatically closed 36 hours after the last reply. New replies are no longer allowed.