Following Roon’s documentation for router configuration, I was unsuccessful enabling ARC to connect to Roon Core. It turned out I needed a “Modem Port Forwarding rule”, which is outlined below.
NOTE: One of the first tests I did was to connect my NUC (Roon Core) directly to my Zyxel Modem and see if Roon ARC could connect to Roon Core. This test was successful, leading me to believe there was a configuration that will work, even though I was getting an error after configuring UPnP and Port Forwarding on my UniFi Router (diagnostics/debug JSON below).
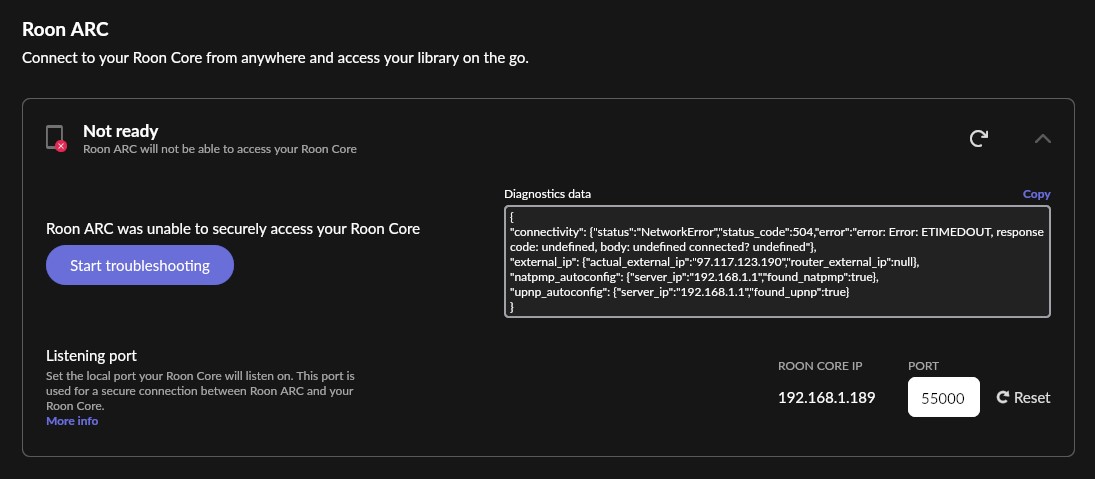
For reference, here is the error diagnostic from the Roon ARC tab under “Settings”, after making the recommended UPnP and Port Forwarding configuration entries on the UniFi router:
{
“connectivity”: {“status”:“NetworkError”,“status_code”:504,“error”:“error: Error: ETIMEDOUT, response code: undefined, body: undefined connected? undefined”},
“external_ip”: {“actual_external_ip”:“97.117.70.51”,“router_external_ip”:null},
“natpmp_autoconfig”: {“server_ip”:“192.168.1.1”,“found_natpmp”:true},
“upnp_autoconfig”: {“server_ip”:“192.168.1.1”,“found_upnp”:true}
}
After logging into your UniFi router, select the “Settings” icon, as shown below.

Next, in the Search box, enter “upnp” (without the quotes). Select “UPnP” from the list of Search results. Scroll down until you see the “UPnP” option to “Enabled” UPnP, and make sure you have checked the “Enabled” box. You should see the same four checkboxes selected in the screenshot below.

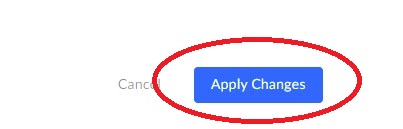
NOTE: Don’t forget to scroll down and “Apply Changes” to save your changes.
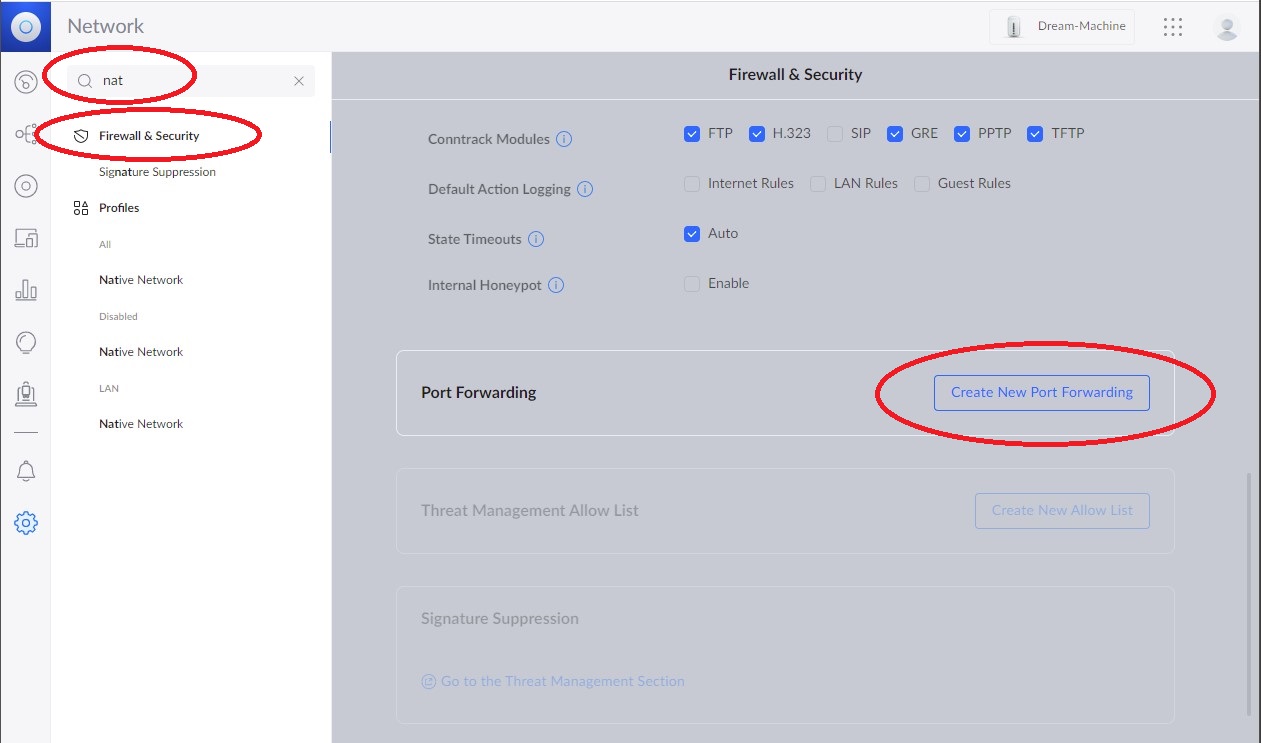
Next, in the Search box, type “nat” (without the quotes). Select “Firewall & Security” from the list of Search results. Scroll down until you see the “Port Forwarding” → “Create New Port Forwarding” button. Select it to navigate to the page where you will configure a new Port Forwarding rule.
On the “Port Forwarding” page, follow the example below to make your entries.
NOTE: The “Name” can be any name you choose. You want to make sure you choose a name that you will recognize in the future. For simplicity, I chose “Roon ARC”.
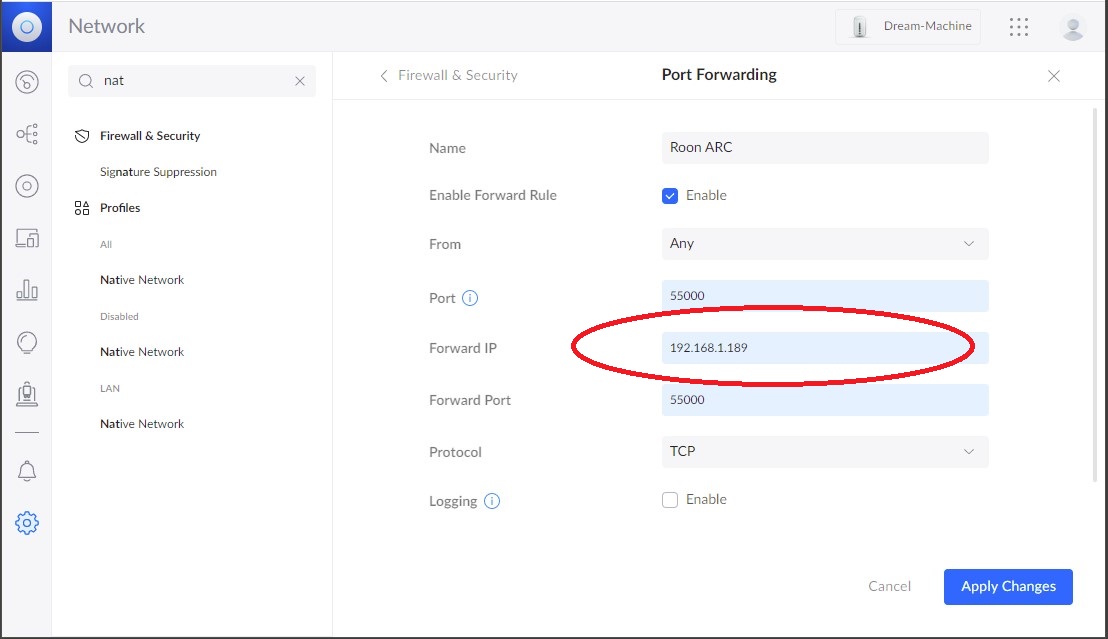
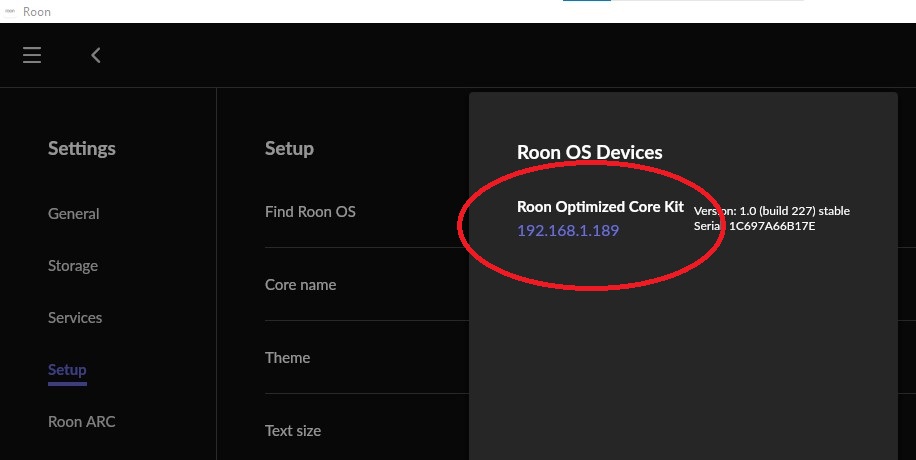
IMPORTANT: The entry in the “Forward IP” field is the IP address of your Roon Core (Do not copy the address of my Core unless your Core happens to have the same IP address). You can find your Roon Core IP address under “Settings → Setup → Find Roon OS” in Roon Remote or under “Settings → Roon ARC → ROON CORE IP”. Enter your Roon Core IP in the “Forward IP” field.

NOTE: Don’t forget to scroll down and “Apply Changes” to save your changes. You should now see your new Port Forwarding rule in the UI.

At this point, go back to “Settings → Roon ARC”, and select the retry icon shown below.

If you are successful, you will see the message “Roon ARC can successfully access your Roon Core”. If you see this message, you have successfully completed the steps necessary for Roon ARC to communicate with your Roon Core.

If you see the error message “Roon ARC will not be able to access your Roon Core”, you will need to make a “Port Forwarding” entry in your Zyxel Modem/Router (Gateway).
The Zyxel Modem/Router is a device that acts as both a modem and a router. This is known as a “Gateway”. For clarification, we’ll refer to the Zyxel as a “modem”, not a “router”, so there’s no confusion which device we’re configuring.
NOTE: I was unable to change the Zyxel modem from “Router” to “Bridge” mode due to the protocol my ISP uses for authentication (IPoE). “Bridge” mode failed to authenticate, leaving me without an Internet connection. This is why the additional Port Forwarding rule was necessary.
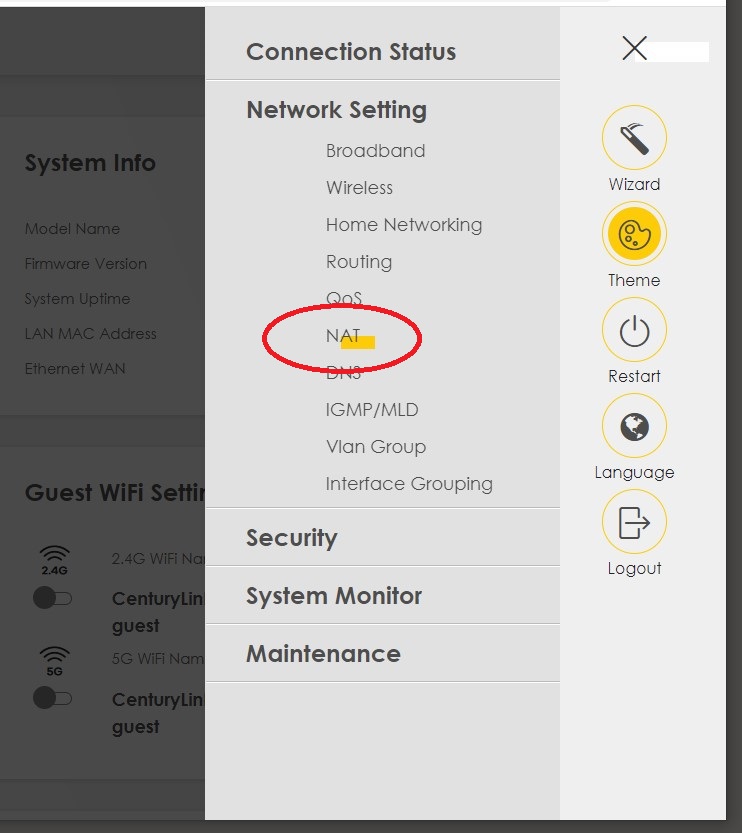
After logging into your Zyxel modem, select the “Hamburger Patty” icon, then “Network Setting” followed by “NAT”. as shown below.
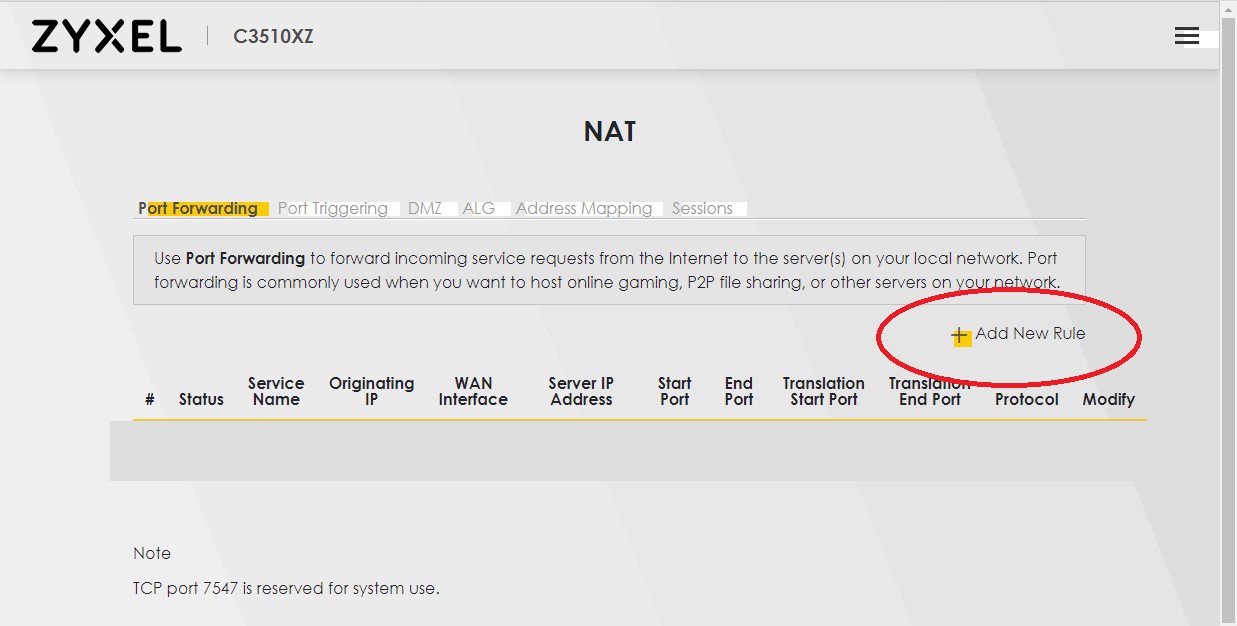
This will open the “NAT” page, where you will select the option “+ Add New Rule”, as shown below.
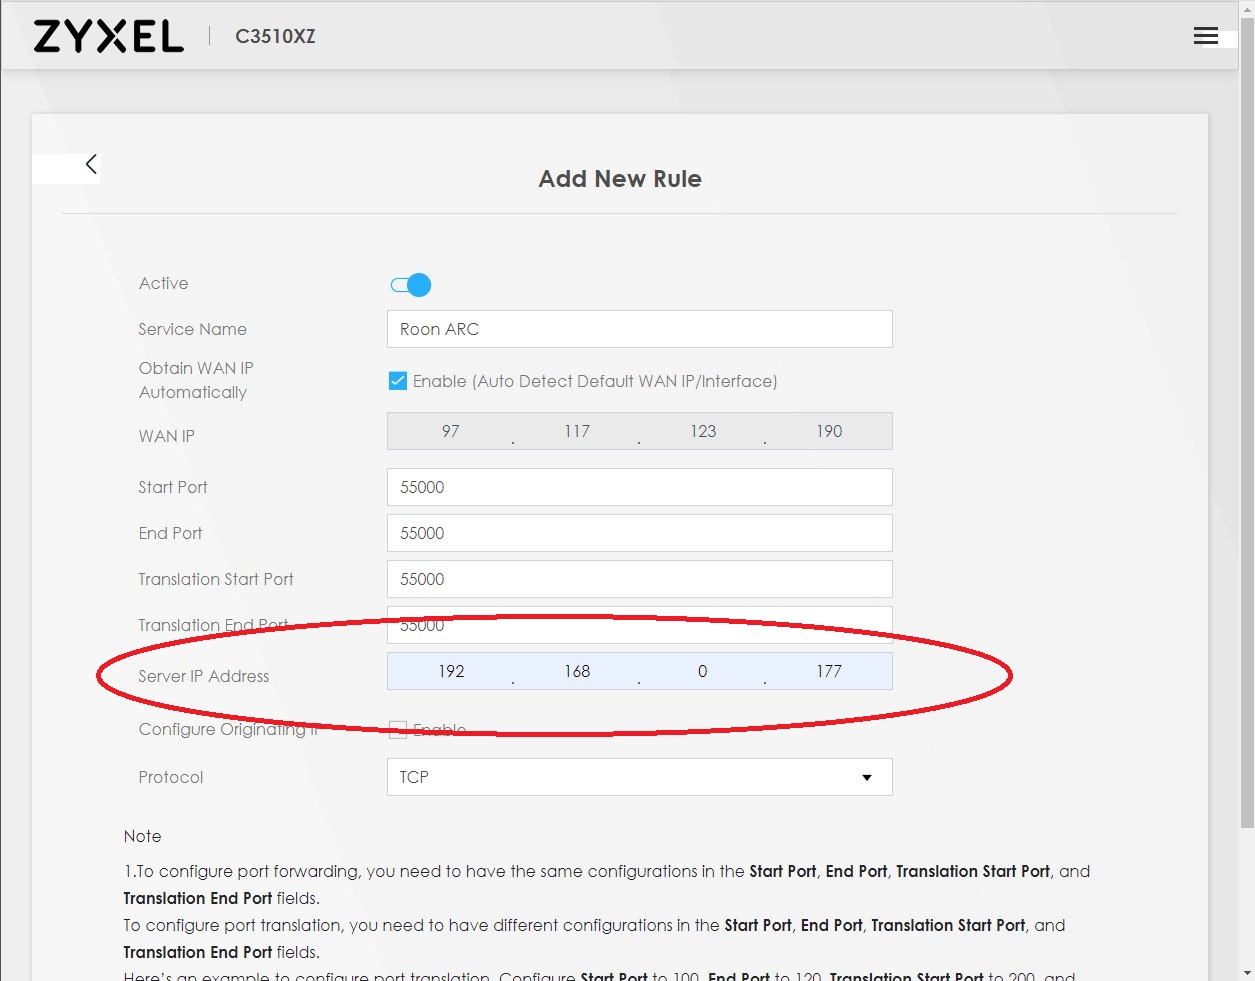
On the “Add New Rule” page, follow the example below to make your entries.
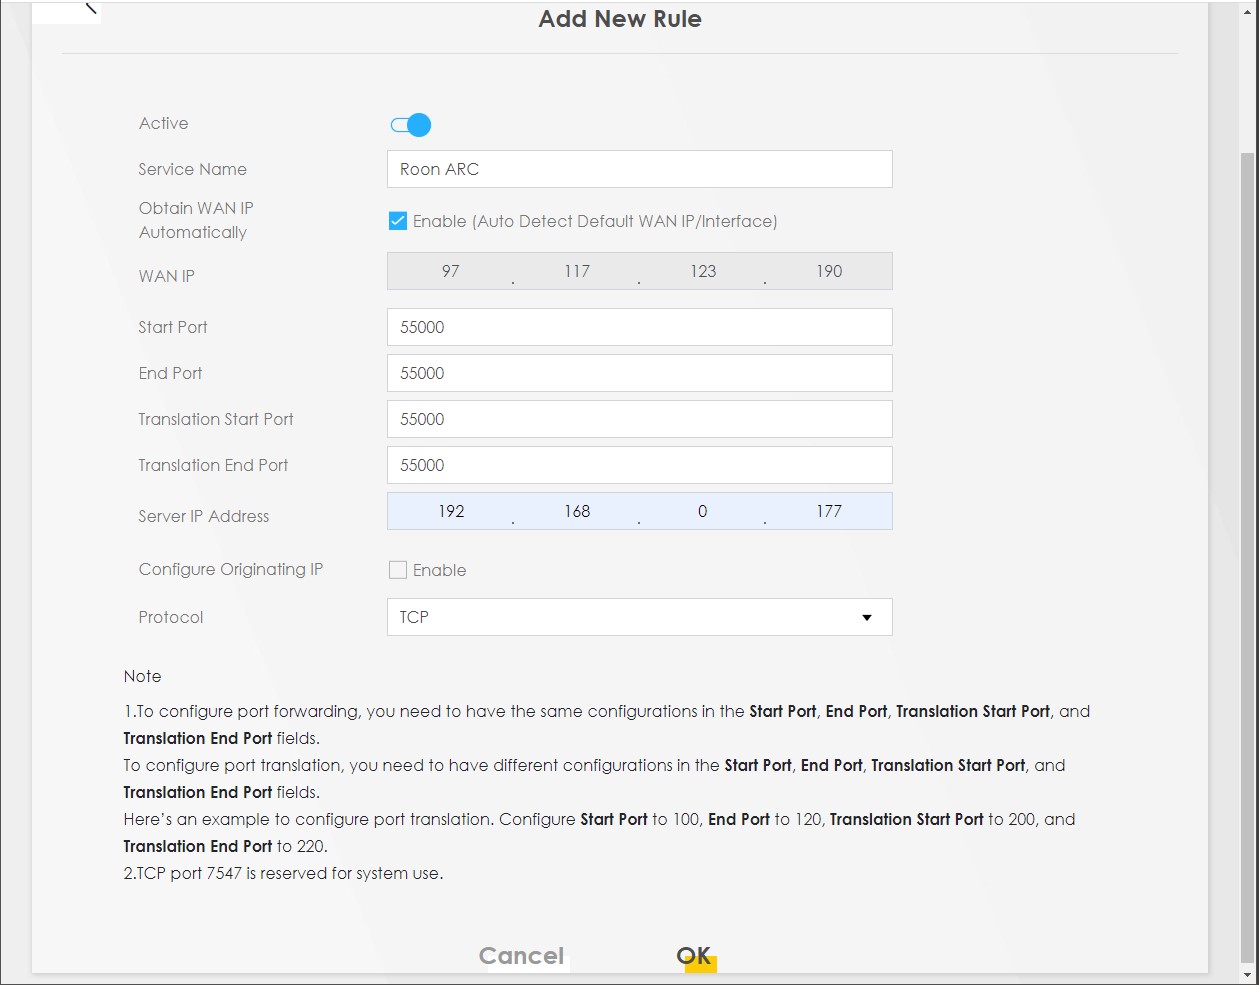
NOTE: The “Name” can be any name you choose. You want to make sure you choose a name that you will recognize in the future. For simplicity, I chose “Roon ARC”.
IMPORTANT: The entry in the “Server IP Address” field is the IP address of the WAN connection to your router. You can find this number on your router’s Home Page. See the example below for my “WAN IP (Port 5)”.
NOTE: This should also be the same port where your modem connects to your router (Do not copy the address of my WAN Port unless your WAN Port happens to have the same IP address).
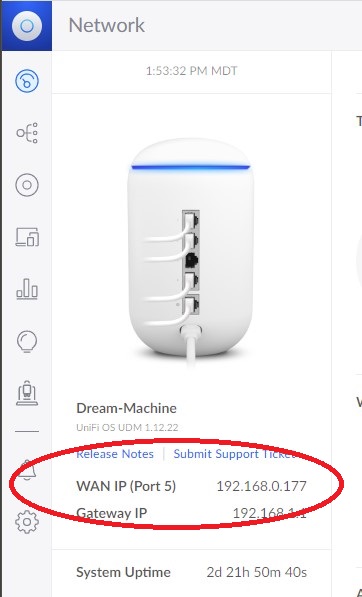
Enter your WAN IP in the “Server IP Address” field.
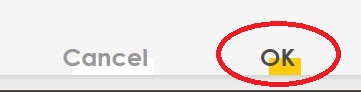
NOTE: Don’t forget to scroll down and “OK” to save your changes.
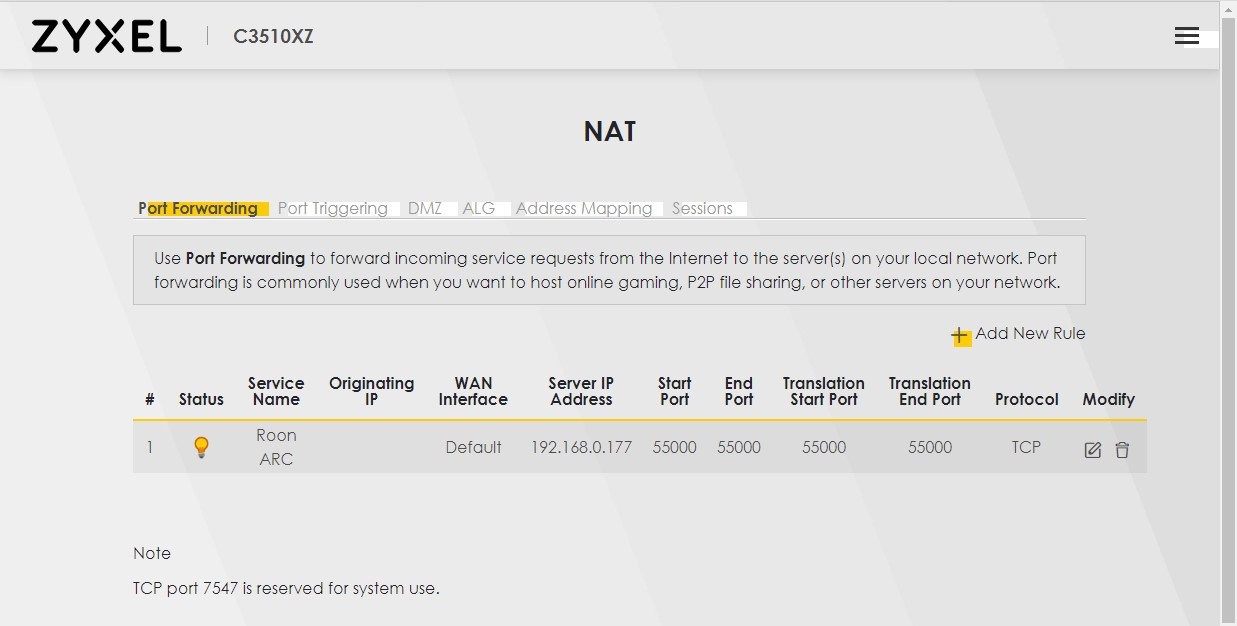
You should now see your new Port Forwarding rule in the UI.
At this point, go back to “Settings → Roon ARC”, and select the retry icon shown below.
If you are successful, you will see the message “Roon ARC can successfully access your Roon Core”. If you see this message, you have successfully completed the steps necessary for Roon ARC to communicate with your Roon Core.
My sincere thanks to the Roon Staff for taking the time to work with me and resolve this issue. Now that I can successfully use ARC, it’s time to test.
