This is a companion post to the Walkthrough : Roon in a Docker container on Synology DSM 7 guide I wrote some time back. This new guide assumes that you have previously used the initial walkthrough to get Roon up and running in a Docker container on a Synology NAS.
Thank you to @Steef_de_Bruijn for his continuing stewardship of the docker image that these guides reference. Steef recently updated the debian-slim version used by his Docker container. This guide is intended to help those of us running his image to update to the latest release.
- Begin by running the Docker app from the Synology “Main Menu”. Once in the Docker app, navigate to the “Registry” section and search for “steef”. Among the search results, you should see “steefdebruijn/docker-roonserver”.
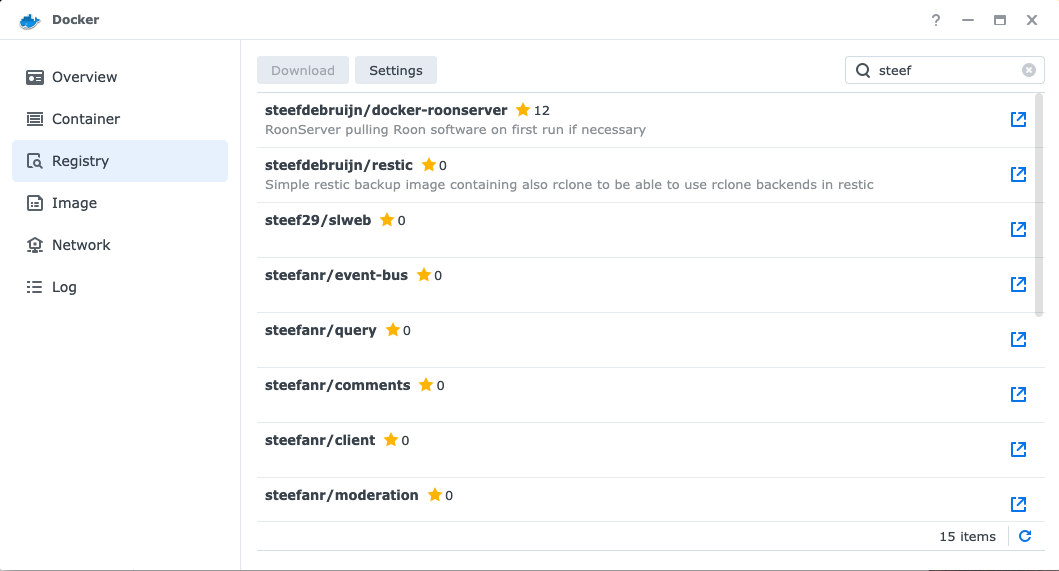
- Select the “steefdebruijn/docker-roonserver” entry in the list and click “Download”. Choose the “latest” tag and click “Select”.

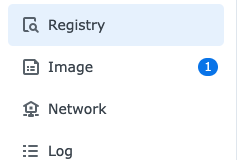
- While the image is downloading, you may see a download count appear next to the “Image” tab in the navigation section of the Docker app window. This count will disappear once the image has been fully downloaded. Wait for the count to disappear and then proceed.
-
Navigate to the “Container” tab, select your existing roon container, and stop it by selecting Action > Stop.
-
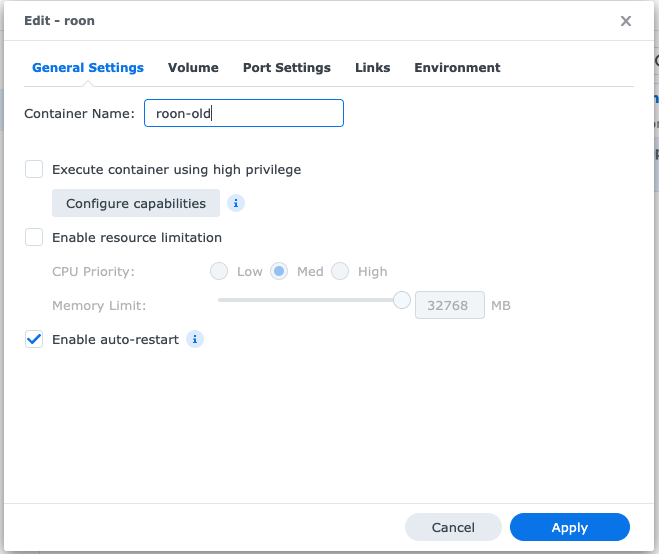
You’re now going to rename this container to clarify that it is the old version and to make it possible to reuse the current container’s name if you so choose. Select the stopped roon container and click “Edit”.
-
Rename the container to something like “roon-old”.
-
[Note : in my original instructions I forgot to note that you should enable auto-restart for your roon container. If the “Enable auto-restart” checkbox is not checked for your existing container, check it now. This setting will carry forward into the updated container.]
-
Once you’ve made these changes, click “Apply”.
-
Now select the roon-old container and click Settings > Duplicate Settings. This will bring up a dialog allowing you to specify the name of your updated container. It will propose a name which has “-copy” appended. You can safely choose the name of your original container. In my my case, this is “roon”. Once you’ve done that, click “Apply”.
-
You can now start the new container by selecting “roon” and then Action > Start.
-
Congratulations! You’re now running the updated image.
-
You should now run the roon app on one of your devices and confirm that it works as expected. Once you’ve confirmed that it is running as expected, you can safely delete the old container by selecting “roon-old” and then clicking “Action > Delete”.
If the new container is not running correctly, you can simply stop it and start the old one.
You have the option of leaving your old container in place, but stopped, for as long as you like to confirm that the update works as expected. If you choose to keep your old container around, you should edit its settings and uncheck the “Enable auto-restart” checkbox. If you do not do this, both container instances will start up the next time your Synology restarts and this will obviously create issues. Whatever choice you make, just be sure to not have multiple roon containers running at the same time or with auto-start enabled.
I hope this guide was helpful. Thanks you again to @Steef_de_Bruijn for providing the Docker image which makes this possible.