Try changing the flatness target to 2dB, or make some other minor adjustment. Failing that, add it manually (try with +7dB and q=4 on 48Hz, experiment and see what gives best predicted)
The set-target sets the target according to the average level according to REW, but I think its better to set it manually. So just type 70 and don’t press “Set target level”
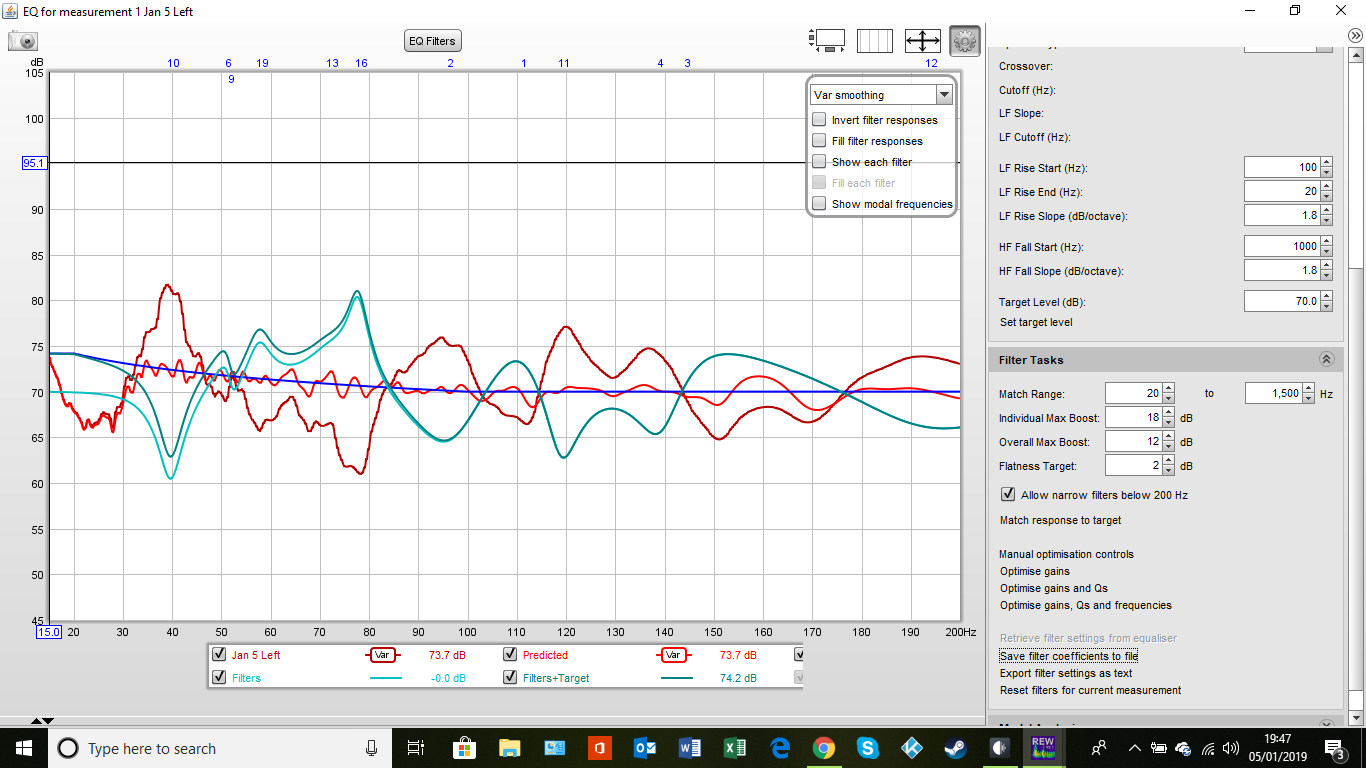
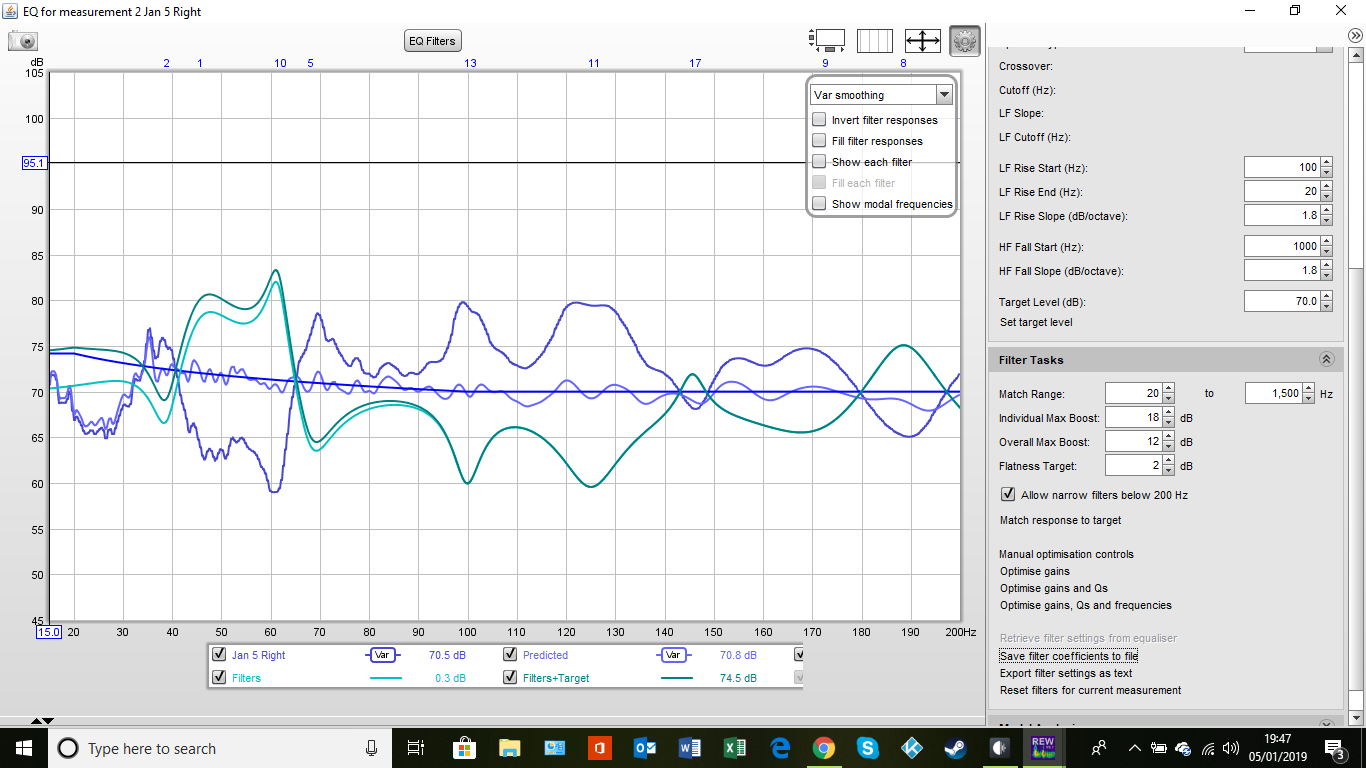
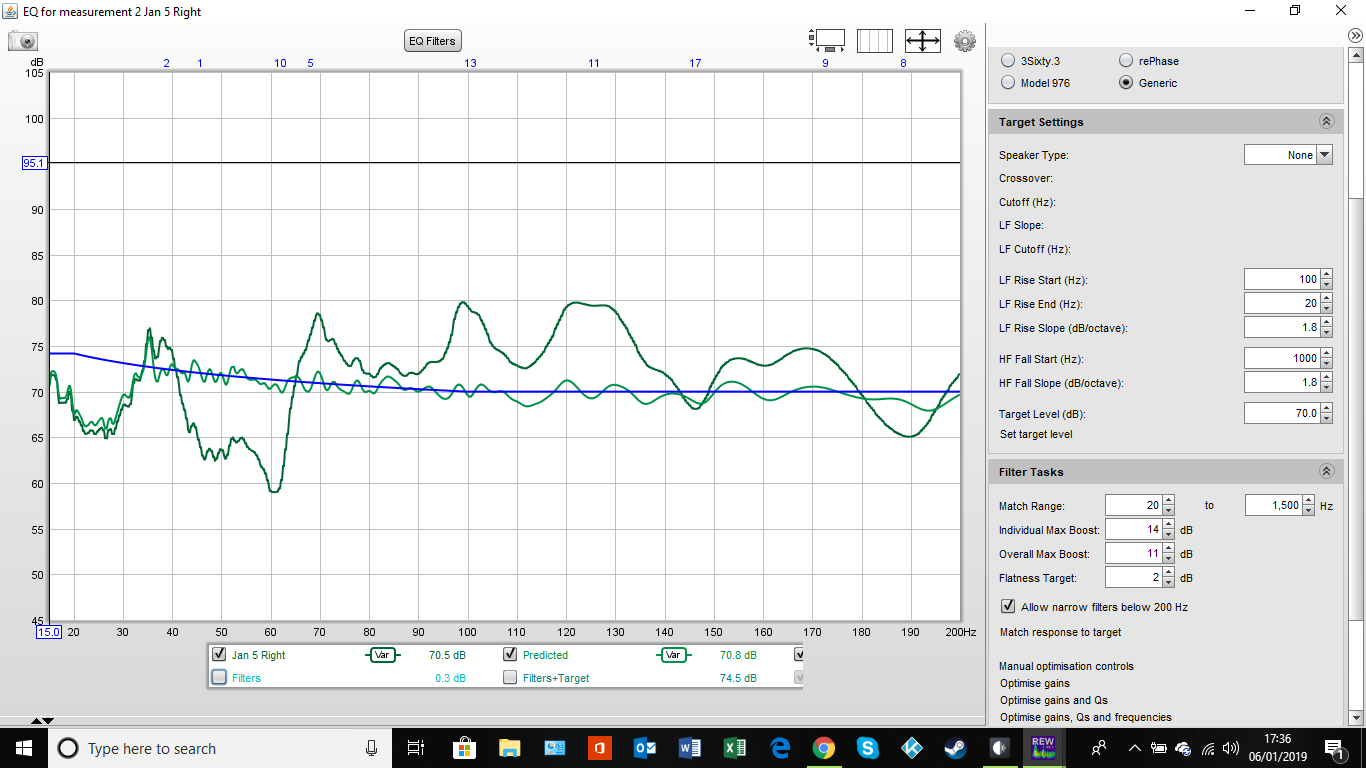
Hi Magnus - I thought I had it! I entered 70dB as you suggested and upped the flatness target to 2 and it seemed to sort it out - see screen shots. I just saved the various wav’s and uploaded into Roon but I am getting distortion, from the right speaker I think. Should I back off some of the boost settings or something else?
Update - I have played around with Individual max boost (changed to 14) and overall max boost (changed to 11) and I can maintain the signal but if I go below that I start to move away from the target line again. Playing music with those settings still leaves distortion in some tracks. I am not sure what to try next yet, any thoughts?
Yeah, I have never considered it before.
But a friend spoke glowingly of his results with Acourate, so I decided to roll up my sleeves and do it.
It is not something where intuition and trial and errors works.
I had to sit down and learn. Mitch’s book worked.
Once I had learned it, doing it again for another room was a piece of cake.
And the improvement was enormous, dramatically more impactful than anything else I have done, including buying stupid-expensive speakers.
And the investment was hundreds of dollars, and hours of my time, not days.
Just a thought, but you could employ a good live sound engineer to do the job. He would already have a mic and do the work in minuets.
I know a few and will have a chat about it next time we meet if we have time pre/post gig.
Follow the guide and experiment, it takes some tries to get the hang of it, but unless you run Pink PN at full volume (which would be very unpleasant for your ears and might be bad for your speakers), nothing bad will happen. At worst, you won’t like the corrections and go back to what you have now.
But start with some measurement and post them here (step 1-8), and then the “scary” part is done
Thanks. 1st question, well you did volunteer
My speakers get moved about a bit, they are returned to a floor mark but may not Exactly return to previous position. How much will this throw out the point of doing the process?
My speakers are upward firing and on plastic feet so placement isn’t as crucial as some other types, you see.
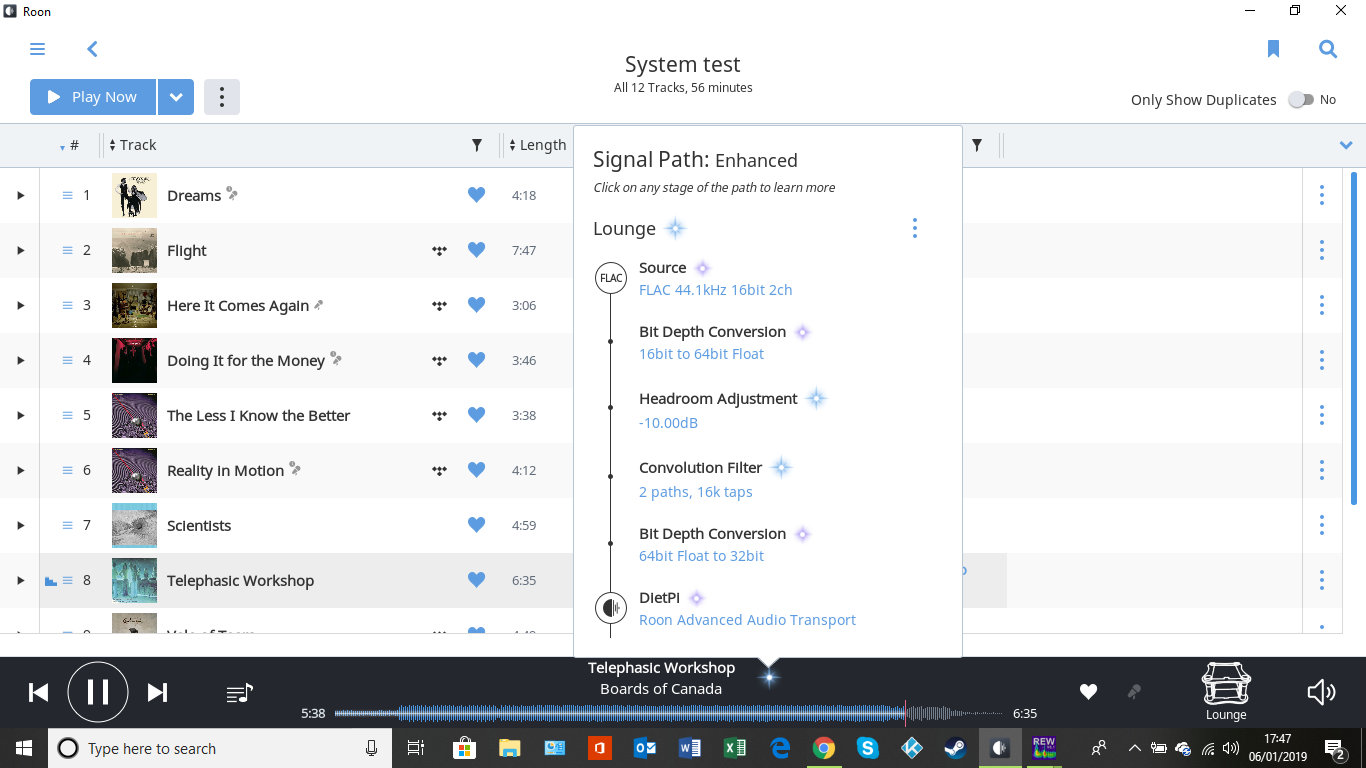
Hi @Magnus - the volume leveling sorted it, as you suggested. Once I enabled ‘Show Clipping Indicator’ it was showing mostly red. So I put the headroom adjustment to -10, again as you suggested. I tried a few settings lower down (-5, -6 etc) and still had clipping. I have quite a signal path now!!
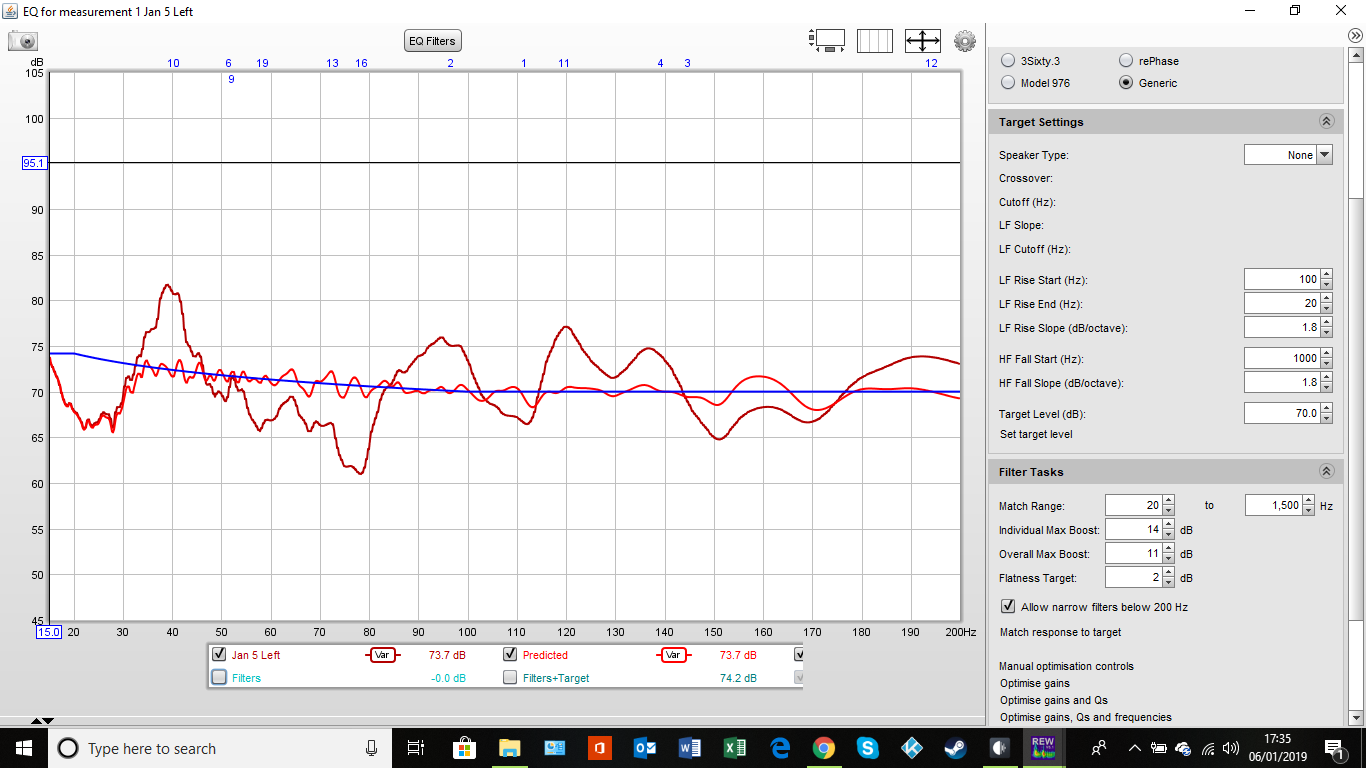
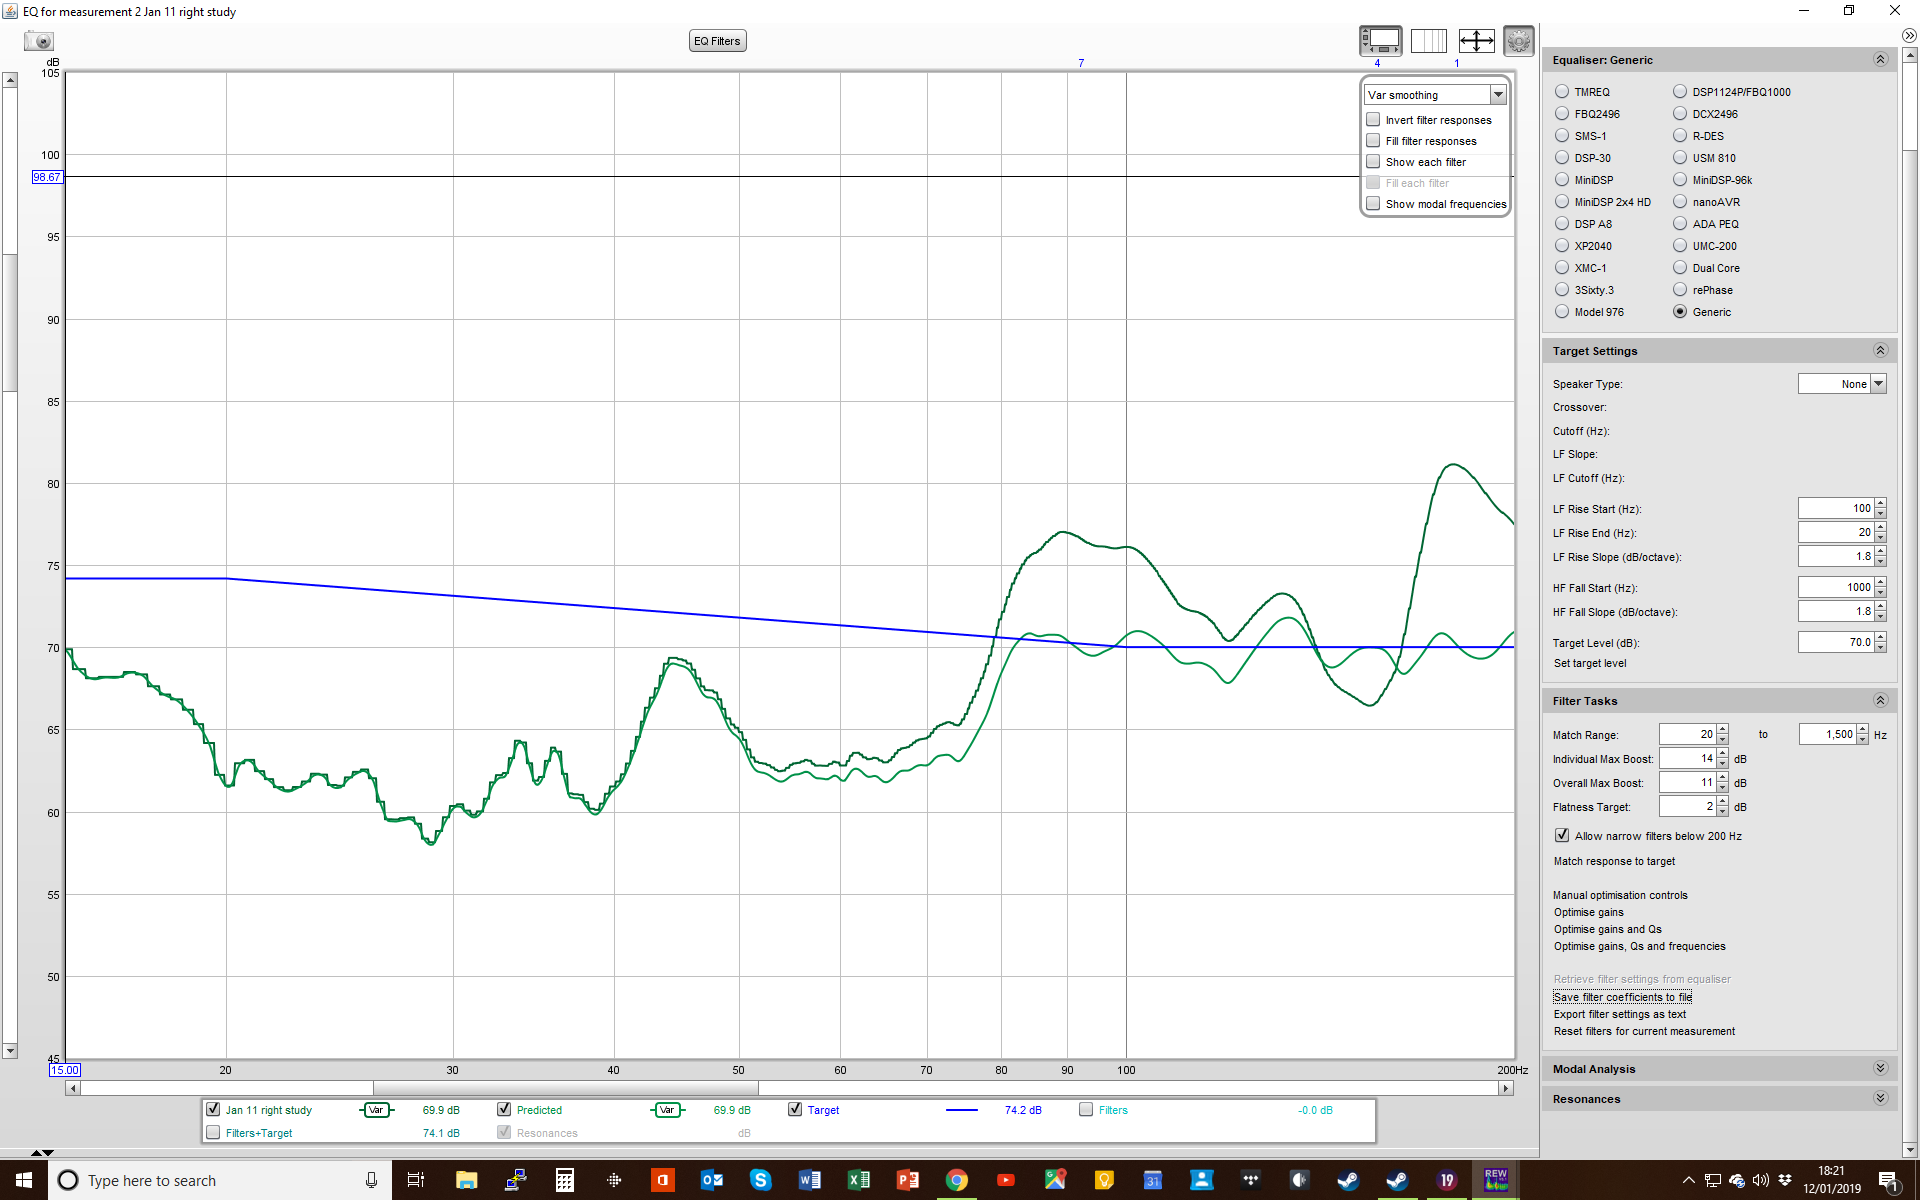
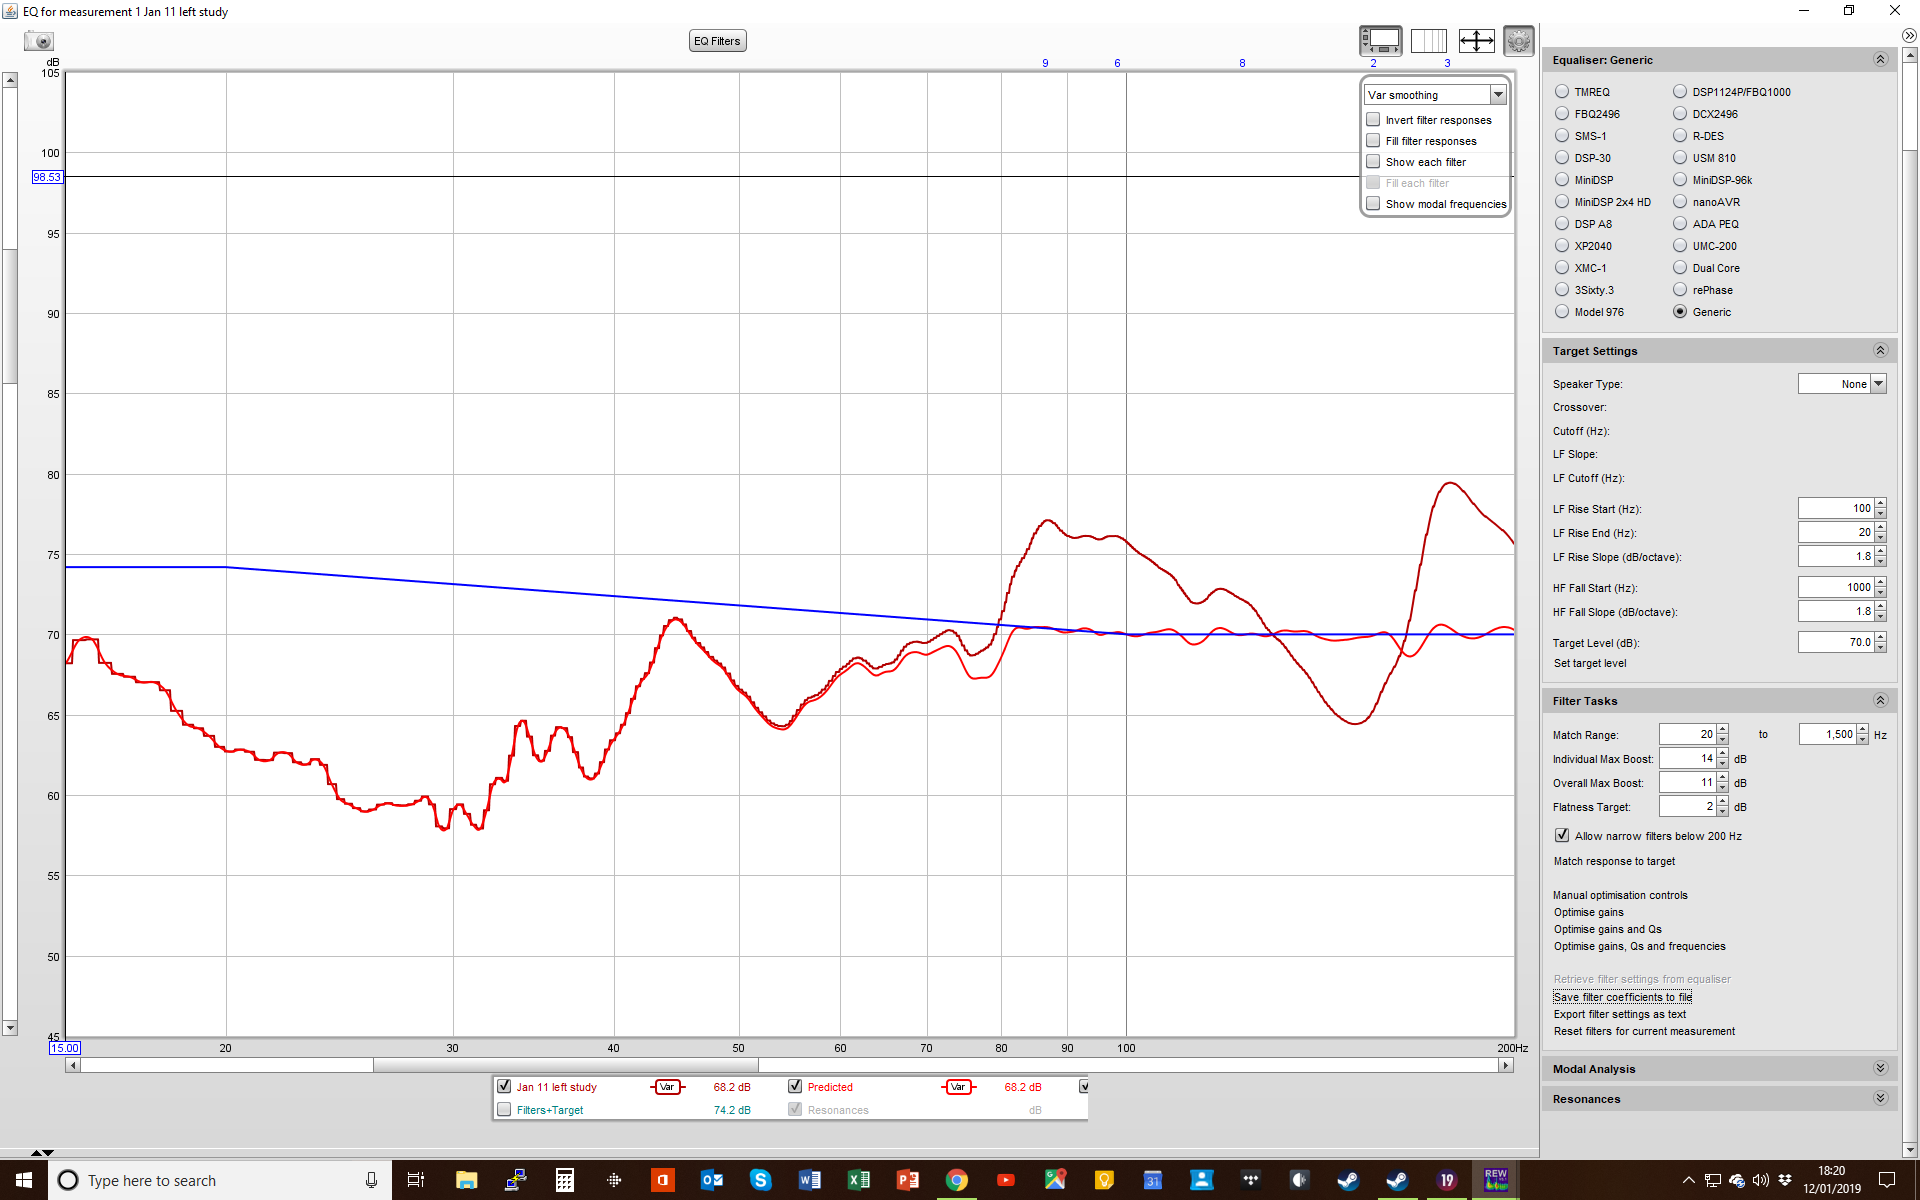
Anyway, I am back to a set of adjustments based on my second measurements yesterday. See below, I cleaned the screen shots up a bit.
I am sat here listening as I type and it sounds great! Thanks Magnus, well done!
A couple of other things, firstly for item number 14, I didnt read or take in your instructions. I basically outputted a wav file for every possibility e.g. 14, 24 and 32 bit and every sample rate for each, just to be sure. I assume this won’t be an issue, they are all zipped together for the upload to Roon.
for number 16, how do you ‘save the “Pink PN”’? As I would like to have a go at this. I take it I get the filters for the Room PEQ from the EQ filters in REW?
And @ged_hickman1, I think just have a run through the instructions above as Magnus suggests, it has improved things for me. As @Cantodea says just post any questions and people will answer.
For 14, I only save in 32 bits, with “Normalise samples” checked. Then I save for the frequencies I up-sample to in Roon, but you can save for more frequencies and zip them and it will work. I assume Roon will select 32 bits data if several bit-depths are available, but I am not 100% sure so I suggest only to save in 32 bit.
Step 16 is an optional and little more advanced step, but if you want to experiment with it you can save Pink PN from the “WAV” button in the Generator, see picture in step 4. But this step won’t give any big improvements, so you can safely skip it (getting the other steps correct is more important). I suggest you don’t do 16b (or do it carefully), and 16c can be helpful if you want to do acoustic treatment in your room.
Whilst I am keen, I had a go at some room correction in my office. Its a weird place as its across in the corner of one room, essentially under, or partially under the stairs. The speakers are Adam F5 fed by a Arcam irDAC-II from a Allo Digione. I mucked around with adding some of my own adjustments in the EQ filters before adding to Roon however I did not take screen shots unfortunately.
I did however take some shots after re-running the process again today - any thoughts on how to improve?
Dear Magnus,
I followed your guide and created different filters using REW and the EQ feature in that software. I noticed the beta 4 version Mac OS version worked wonders for headroom with the new 32 bit float filters in my room. The sound in my room has improved with this approach. I have ROCK running on a NUC. I was running Roonbridge on a Mac Mini to drive my DAC through Dirac Live to correct for room influence on the sound. After producing the filters using your guide and running the Roon DSP convolution filter straight from the NUC to my DAC I now have sound that is more alive and with greater contrast and clarity than before. Many thanks for helping out with this guide.