Recently I bought a Motu M4 USB audio interface because of it’s really excellent technical parameters (Motu M4 review: With measurements and Linux notes, Motu M4 Audio Interface Review | Audio Science Review (ASR) Forum).
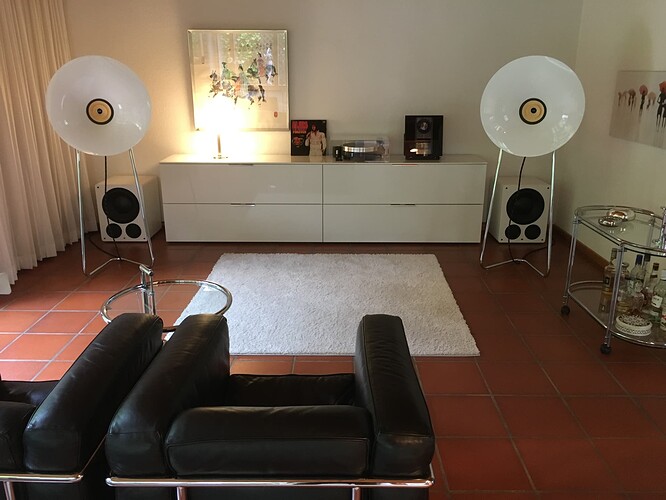
The idea was to run it as a playback device in an active F.A.S.T configuration with two woofers and two full range speakers. The streaming device should be a cheap Raspberry Pi4 running Raspbian and Roonbridge. Motu M4 is USB powered, so I thought the Pi4 and the M4 together with a Pi4 3A power supply would give a handy and high quality system.
During my effort I was faced a lot of issues but finally I succeeded! I like to report what I did, because my findings may also be relevant for all other 4-Channel audio interfaces.
Hardware
Connecting the M4 to a USB port of the Pi4 I found, that right after Raspbian discovers the USB device it got disconnected, reconnected and so on. I thought it was an issue with power but it was not. It is a software issue in the Pi4 USB controller. I could fix that with an external Hub that also has a separate power supply, even better ![]() With the Hub the M4 got connected and discovered by ALSA. You can check this with the “aplay -l” command.
With the Hub the M4 got connected and discovered by ALSA. You can check this with the “aplay -l” command.
Roon issue
Roon isn’t able to deal with 4-channel interfaces! It does with 2.0, 5.1 and 7.1 but not with 4.0. There is an open feature request for that, one from me (Support for 3 and 4 channel layouts, Request: Support Four-Channel DACs).
That might have been the end of the story but wait, I’l continue ![]()
As Roon cannot handle 4-channel devices why not giving Roon an 8-channel virtual device on the Pi side. That’s what I did.
Setup for Raspbian
On the Pi side we need a virtual soundcard that exposes eight channels. This can be done with the snd-aloop ALSA driver. These are the steps to do:
-
Create an new file /etc/modprobe.d/alsa-loopback.conf and put this line in:
options snd-aloop pcm_substreams=8 id=“M4Help” enable=1 index=0
You can give it a different name than “M4Help” and you also can put it in a different audio slot (index=0). -
In the file /etc/modules insert this line at the end:
snd-aloop -
Now reboot and after this enter aplay -l.
You should see something like that:
**** List of PLAYBACK Hardware Devices ****
card 0: M4Helper [Loopback], device 0: Loopback PCM [Loopback PCM]
Subdevices: 8/8
Subdevice #0: subdevice #0
Subdevice #1: subdevice #1
Subdevice #2: subdevice #2
Subdevice #3: subdevice #3
Subdevice #4: subdevice #4
Subdevice #5: subdevice #5
Subdevice #6: subdevice #6
Subdevice #7: subdevice #7
card 0: M4Helper [Loopback], device 1: Loopback PCM [Loopback PCM]
Subdevices: 8/8
Subdevice #0: subdevice #0
Subdevice #1: subdevice #1
Subdevice #2: subdevice #2
Subdevice #3: subdevice #3
Subdevice #4: subdevice #4
Subdevice #5: subdevice #5
Subdevice #6: subdevice #6
Subdevice #7: subdevice #7
card 1: M4 [M4], device 0: USB Audio [USB Audio]
Subdevices: 0/1
Subdevice #0: subdevice #0
- Now enter the following command. It reads audio from the virtual soundcard and writes to the MotuM4.
alsaloop -C hw:0,1 -c 4 -P plughw:1,0 -f S32_LE -c 4 -S 2 -r 192000 -v -v -v
Convolver setup
For roon I built a convolver config file with two input and eight output channels with 192kHz XO filters generated by Acourate. I decided to use 192kHz because this is the maximum M4 can achieve.
Cor1L192.dbl and Cor1R192.dbl are the Low-Pass-Filters for the woofers, Cor2L192.dbl and Cor2R192.dbl are the High-Pass-Filters for the full range speakers. Build a ZIP file including the XO files and the configuration file “M4.cfg” with the contents below:
192000 2 8 0
0 0
0 0 0 0 0 0 0 0
Cor1L192.dbl
0
0.0
0.0
Cor1R192.dbl
0
1.0
1.0
Cor2L192.dbl
0
0.0
2.0
Cor2R192.dbl
0
1.0
3.0
Audio setup in Roon
Now start roon and go to Settings->Audio.
Here you find the M4 Audio interface and two Loopback PCM devices. You get two because the loopback device is bidirectional and this cannot be disabled as far as I know. So you have to figure out which one is the right one.
I took one of them enabled it and gave it the name ”M4help0”.

Now enter “Device Setup” and configure the following parameters and save.
- Volume Control: DSP volume
- Channel Layout: 7.1
- Send Stereo / Mono content as 7.1: Yes
- Swap rear and Surround Channels: Yes
- Multichannel Mixing: Channel Mapping only
Output setup in Roon
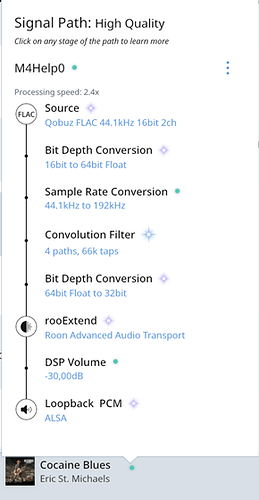
After selecting M4help0 as output device klick on the speaker symbol on the right bottom corner of the roon screen. Next klick on DSP. Add filter “Convolution” and load your ZIP file with the convolver setup.
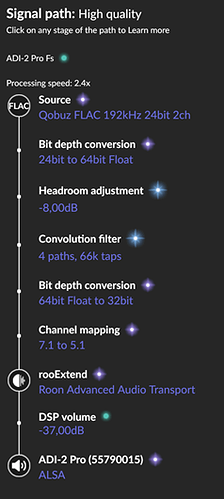
You now can start playing music and watch the Signal Path.
At the convolution filter you should read “4 path, 66k taps”.
On the Motu M4 all four volume bars should display a signal. At the outputs 1/2 you should hear the woofer signal (L/R) and on 3/4 the signal for the full range speakers (L/R).
It is interesting watching the output of alsaloop command at the raspberry terminal. In regular time intervals you see “New pitch for playback…” lines. The reason for this is the signal flow in the Pi4.
Roonbridge–>snd-aloop in–>snd-aloop out–>Motu M4
As the snd-aloop driver has its own clock but we like to get a bit perfect signal clocked by the M4, the clock of snd-aloop has to be adjusted continuously so no samples get lost or have to be inserted. And that is what you see here.
Some more hints:
Please recognize that 192kHz 32-Bit PCM data on four channels is really a lot. So be sure you have a fast ethernet connection between your roon core and the Pi4. Otherwise you get uggly sounding underruns on the Pi4 side. And please: forget about WiFi.
Hope my comments will be helpful to successfully implement a F.A.S.T system with Motu M4 or any other 4-Channel audio interface a Pi4 and Roon.
DrCWO
Please also visit this thread.


 , and I no longer keep the preamp as I do not see the feasibility considering my use case)