Installing a graphical Roon Core / Roon Bridge
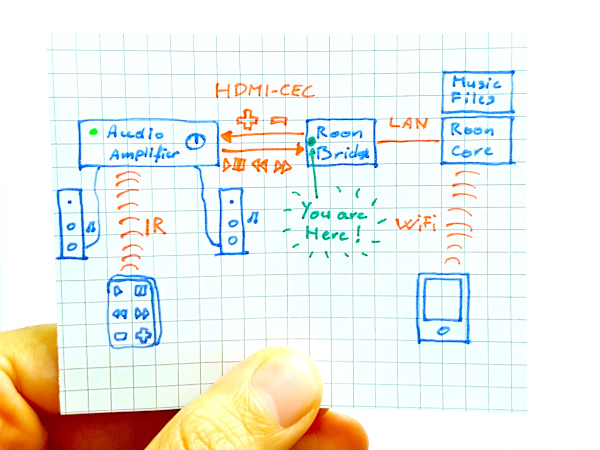
I was looking for the perfect Roon Core / Roon Bridge that would:
- Output multichannel audio.
- Use an HDMI output and understand CEC.
- Be reliable.
- Be cheap (that is very subjective).
- Output DSD files throught HDMI (I could not find a solution for this).
I initially planned on using Roon Optimized Core Kit on an Intel NUC.
I eventually changed my mind and decided to install Roon Core “manually” on top on Linux because:
- ROCK does not provide any ssh access.
- ROCK does not use the video output (you just get Linux text gibberish). I was planning to use it also as a Roon Bridge, connected to my 5.1 audio/video amplifier so I wanted a nice looking video ouput even though I hardly use it.
TLDR;
This post explains what I did:
- Bought a NUC with HDMI-CEC Adapter.
- Installed Ubuntu Server 18.10.
- Installed openbox as window manager (kiosk-like).
- Installed qutebrowser to display Roon graphical informations.
- Installed my custom made Roon CEC Controller Extension.
Get the hardware
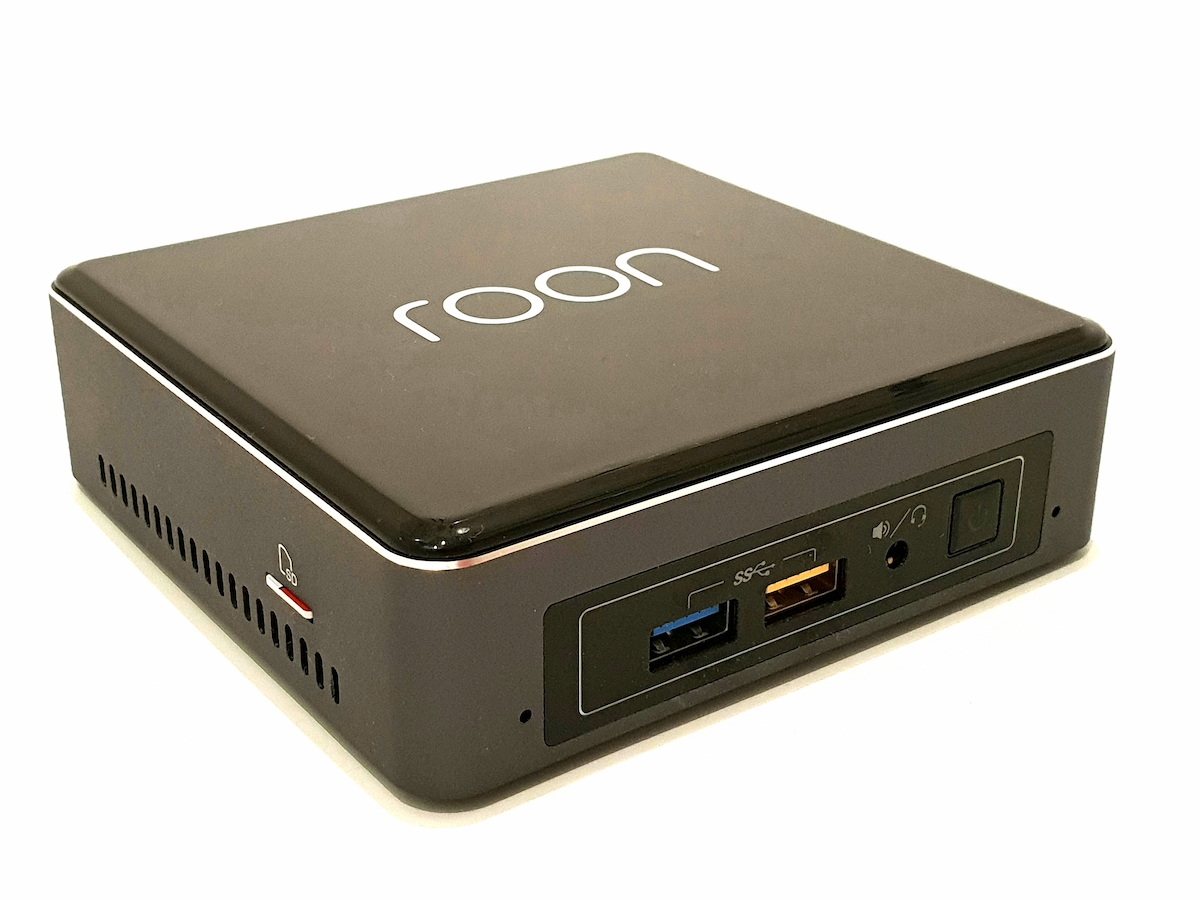
I bought an Intel NUC because you can install Roon Optimized Core Kit on them (even though I gave up on ROCK).
I picked the smallest and cheapest one, the NUC7i3BNK.
I added a 120Gb hard drive (Corsair Force MP300 120 Gb) and 8Gb RAM (G.Skill RipJaws Series SO-DIMM 8 Gb DDR4 2133 MHz CL15).
So far it has never failed me.
Then I added an Intel NUC HDMI-CEC Adapter so that the NUC is able to send and receive HDMI-CEC commands.
Before going to the software installation you probably want to update the NUC firmware.
Also I strongly suggest that you get a micro SD card and use it to store Roon Core automatic backups: in the event of hard drive failure, or if you just want to reinstall the Roon Core server and its OS, you will be able to get all your data back very easily. Moreover, this will allow you to get your backups out of the NUC just by ejecting the SD card.
Install Ubuntu server
I chose Ubuntu because I like it. Server because I wanted a minimal installation. I chose 18.10 over 18.04 LTS because it has more packages that I needed already installed by default. And I will probably upgrade it every 6 months but you may want go with the LTS, that is up to you.
You may get Ubuntu Server here.
Install it the usual way.
I recommend that you select “English” as language even if that is not your native language (it’s not mine), because it will be easier to google error messages when you get some.
When you install Ubuntu, pick a nice server name, such as rooncore, and a nice admin user name, such as your own first name.
There is no snap to install, we won’t need any.
SSH server is already installed.
Then you probably need to update the software:
sudo apt-get update
sudo apt-get upgrade
And install your favorite text editor:
sudo apt-get install vim
Install Roon Core
Everything you need to know is here.
Install some mandatory packages:
sudo apt-get install curl ffmpeg cifs-utils
Then install Roon Core:
cd
wget http://download.roonlabs.com/builds/roonserver-installer-linuxx64.sh
chmod a+x roonserver-installer-linuxx64.sh
sudo ./roonserver-installer-linuxx64.sh
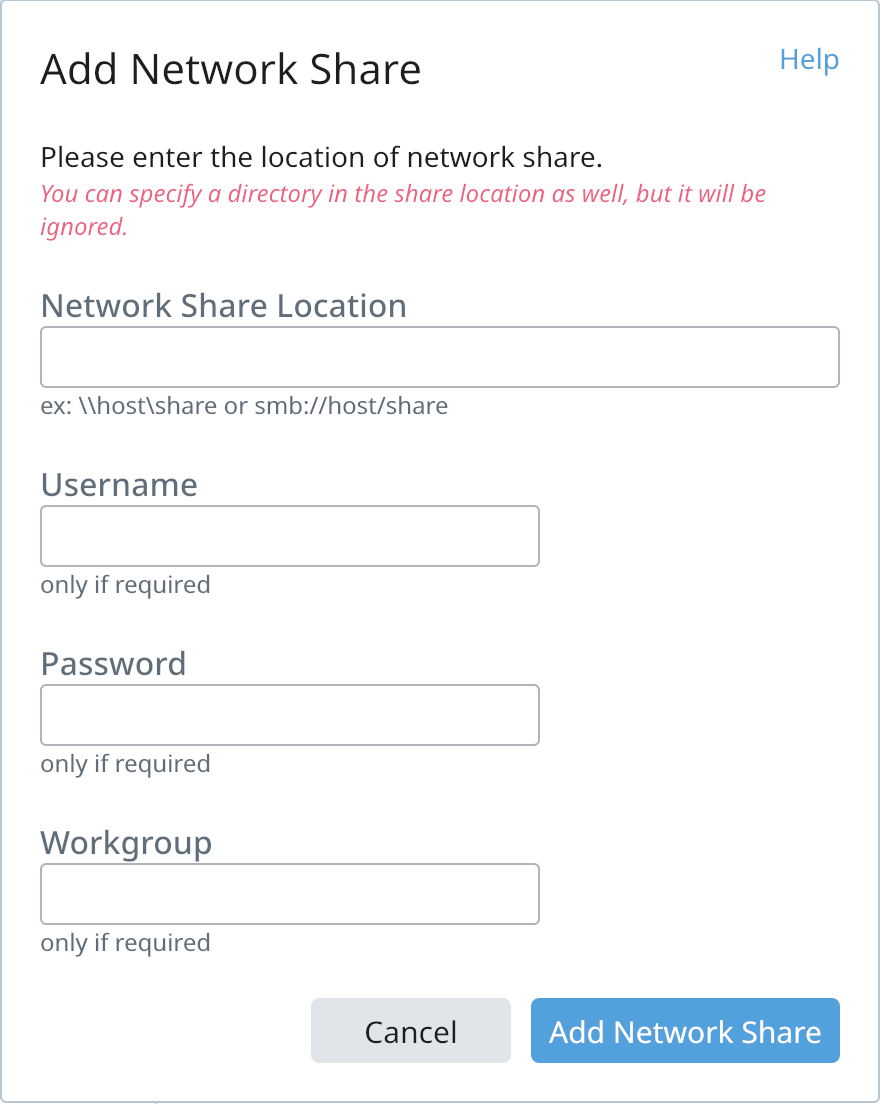
If you have a micro SD inserted in the NUC, now is a good time to configure Roon automatic backup to use it. I recommend FAT formating.
Depending on your configuration it could look like this:
sudo mkdir /media/ROONBACK
Get your SD name with this:
sudo fdisk -l
Then add this to /etc/fstab with something like this:
/dev/mmcblk0p1 /media/ROONBACK vfat user,fmask=0111,dmask=0000 0 0
Create a Roon Kiosk
This part is about automatically launching a web browser showing the Roon display page on boot.
Create a roon user. This user should have no privilege (he should not be a sudoer) as he will automatically log in and launch the web browser with no password asked.
sudo adduser roon
Then install X server, openbox and qutebrowser.
I chose qutebrowser over Chromium or Firefox because you can use it with just a keyboard and no mouse. (And I like VIM.)
sudo apt install --no-install-recommends xorg xserver-xorg-legacy openbox qutebrowser
Then create /opt/roonkiosk.sh:
#!/bin/bash

xset -dpms
xset s off
openbox-session &

qutebrowser
Then
sudo chmod a+x /opt/roonkiosk.sh
Edit /etc/X11/Xwrapper.config:
allowed_users=anybody
needs_root_rights=yes
Create /etc/systemd/system/roonkiosk.service:
[Unit]
Description=RoonKiosk
After=systemd-user-sessions.service
Requires=roonserver.service

[Service]
Type=simple
User=roon
ExecStart=/usr/bin/startx /etc/X11/Xsession /opt/roonkiosk.sh
Restart=always

[Install]
WantedBy=multi-user.target
Then
sudo systemctl daemon-reload
sudo systemctl enable roonkiosk
sudo mkdir -p /home/roon/.config/qutebrowser
Then edit qutebrowser parameters in /home/roon/.config/qutebrowser/config.py with roon user:
# QuteBrowser Config file for Kiosk mode

## Hide the statusbar unless a message is shown.
## Type: Bool
c.statusbar.hide = True

## When to show the tab bar.
## Type: String
## Valid values:
##   - always: Always show the tab bar.
##   - never: Always hide the tab bar.
##   - multiple: Hide the tab bar if only one tab is open.
##   - switching: Show the tab bar when switching tabs.
c.tabs.show = 'multiple'

## Page to open if :open -t/-b/-w is used without URL. Use `about:blank`
## for a blank page.
## Type: FuzzyUrl
c.url.default_page = 'http://127.0.0.1:9100/display'

## Page(s) to open at the start.
## Type: List of FuzzyUrl, or FuzzyUrl
c.url.start_pages = ['http://127.0.0.1:9100/display']

## Always restore open sites when qutebrowser is reopened.
## Type: Bool
c.auto_save.session = False
sudo chown -R roon:roon /home/roon/.config
If you need to close the default tab, press [d]. To switch to fullscreen press [F11].
Enable this display from Roon controller software.
CEC Controller Extension
If you want to control Roon from your amplifier and/or TV set remote control, install Roon CEC Controller Extension.
This should do it:
wget -qO- https://deb.nodesource.com/setup_8.x | sudo -E bash -
sudo apt-get install nodejs cec-utils
sudo usermod -a -G dialout nobody
cd
git clone https://github.com/benjaminbellamy/roon-cec-controller-extension.git
cd roon-cec-controller-extension/
npm install
cd ..
sudo mv roon-cec-controller-extension /var/
sudo chown -R roon:roon /var/roon-cec-controller-extension/
sudo cp /var/roon-cec-controller-extension/roon-cec-controller-extension.service /etc/systemd/system/
sudo systemctl start roon-cec-controller-extension.service
sudo systemctl enable roon-cec-controller-extension.service
Enable the extension from Roon controller.
Et voilà !
PS1: If you notice any mistake, please feel free to tell me.
PS2: Of course all this is a perpetual work in progress. Any piece of advice will be welcome.